|
Advertisement / Annons: |
3D Printing:
|
Contents:
Note: |
15, Temperature P.I.D. optimizing:When I bought new filament last time I got the ABS pro. It should be more resistance to weather so maybe good for astronomy use. That material needs another parameters in the setup, among other the nozzle temperature needs to be higher compared when using the PLA filament. When I increased the temperature I got oscillations in the temperature, at 230 it oscillate +/- 6 degrees Celsius. That blocked the 3D-printer to start printing. Something must be done to it, but what ? 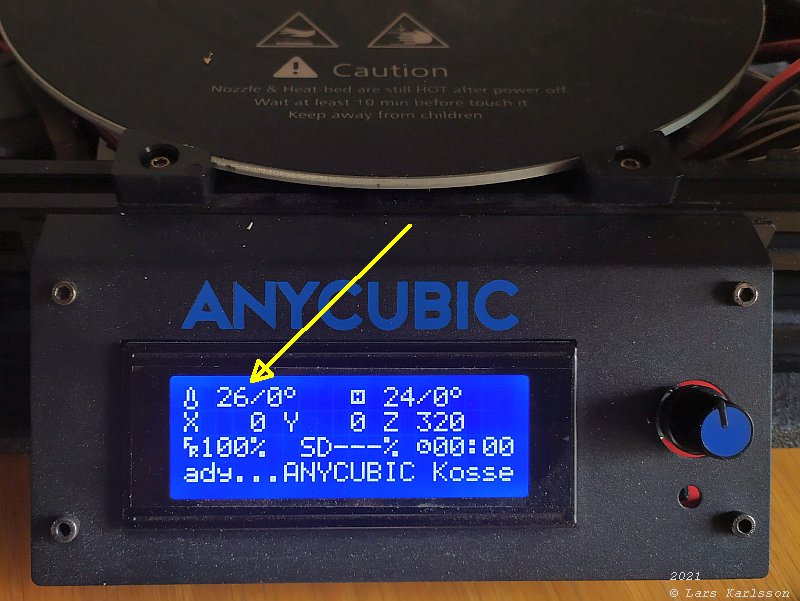
This is the nozzle temperature, when reaching 230 degrees and above it's not stable. After searching on internet about the problem I found this excellent site:
Check his site and follow his instructions, below I have make some notes how I did it and what software I used. Sending G-codes to set the P.I.D. parameters:Nothing is easy, sending G-code, something I can do with the software Cura that I already have installed. But Cura doesn't display what it receive from the 3D-printer, strange. Note: You must have your computer connected to the 3D-Printer through the USB cable and setup correctly. Once again out on internet and search for something easy to install that can do this, I found this one:
Before I do any change I note what the original parameters are:
In Marlin, the software that control the 3D-printer there is a built in function to automatically find the optimize P.I.D. parameters. It will be interesting to see how well it works. The bed heater works fine and I will not do any change to its parameters. 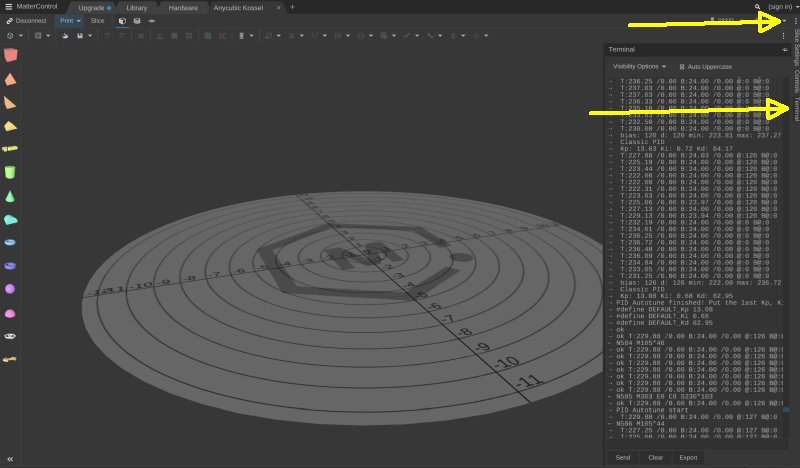
After I have setup Matter Control to my 3D-printer I need to ad the Terminal menu. At upper arrow there is a setup to enable the Terminal menu. I will appear where the lower arrow is, click on it and the terminal window opens. I gave two commands according to the instructions above, but set the temperature to 230 degrees Celsius:
End each command with a Enter or with the "Send" button. Note: When printing with ABS Pro some tell that the fan speed should be reduced, I Normally have it set from 25% to 50%. 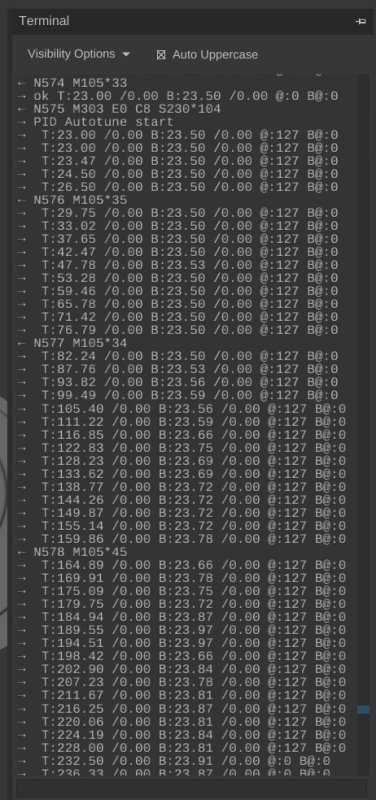
The auto P.I.D. optimizing process starts and it take a couple of minutes. 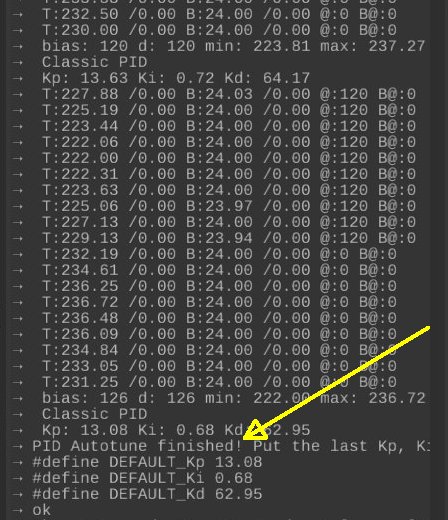
When finished the recommended parameters shows up in the terminal list. 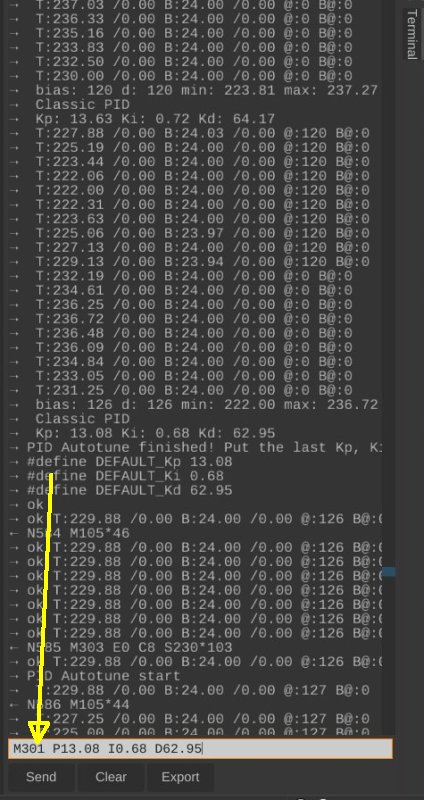
I gave a new command to set these new P.I.D. nozzle heater parameters in the 3D-printer:
Compare these new parameters with the old ones in the table above. Big difference ! 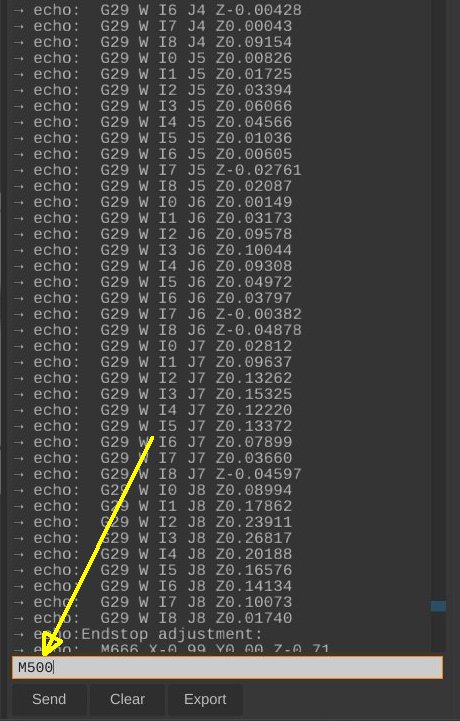
A second command store the parameters:
Note: 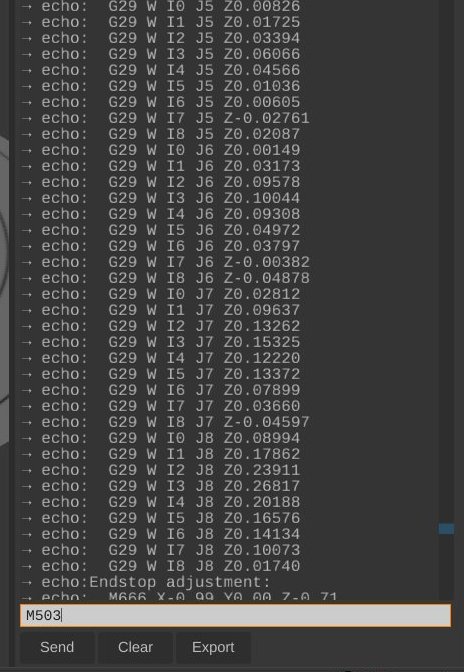
At last I do a check what values are stored:
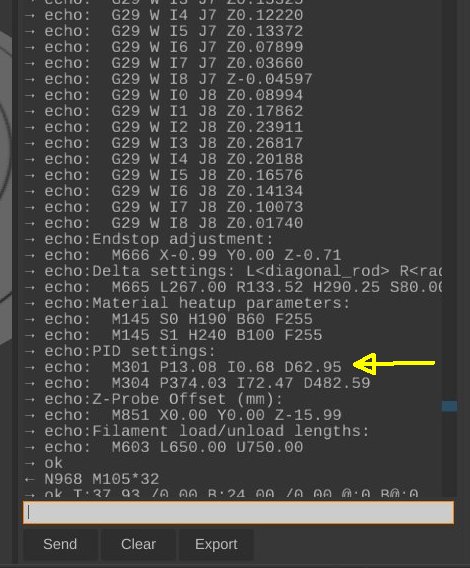
And there they are and correct stored. The M304 parameters is for the heated bed, that temperature stability was okay and I didn't do anything with it. G-Code commands: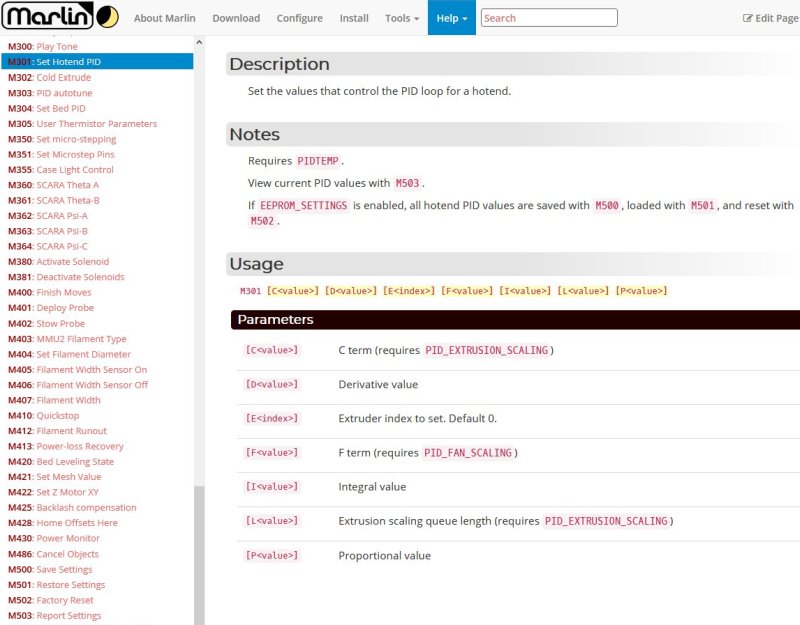
List of G-Code commands and explanations.
I started up the 3D-printer and from Cura I set the nozzle temperature to following temperatures: 220, 230 and 245, all these settings gave stable temperatures within +/- 1 degree Celsius. The problem is solved I hope. Thermal Runaway E1:After I calibrated the PID regulator the 3D-printer worked for about a half year. Then I got new problems, the printer could stop after 30 minutes and give this error message: 'Thermal Runaway: E1'. 
I started to investigate what happens during the printing process. I could see that sometimes the temperature of the nozzle could start to fluctuate, 225 +/- 8 degrees C or more. Normally I had a variation of less than +/- 3 degrees C. 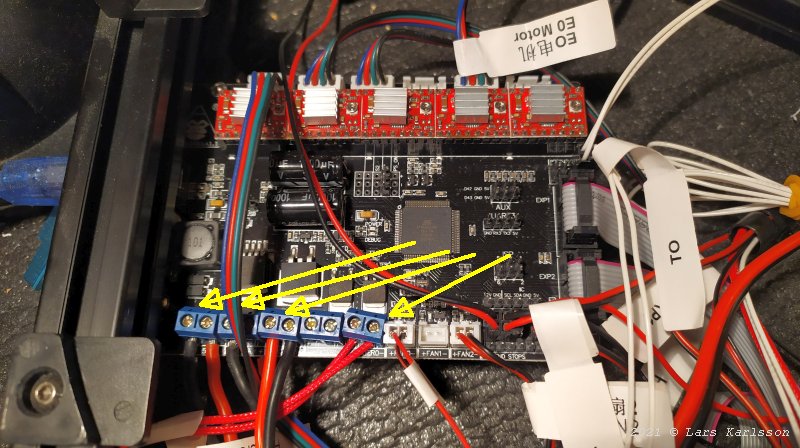
I open the lid to reach the circuit board that controls the 3D-printer. I tighten all the screw on the terminal, the first four to the left is from the power supply and the next four are to the two heating devices. After that the temperature got a bit more stable. I could still see that when printing big flat surfaces the temperature starts to fluctuate more, but now not that bad that it stop the printer. I'm not sure why it do like this, maybe it increase the flow of the filament which cool the nozzle down and then it could not do the PID regulation process as good as it should be. 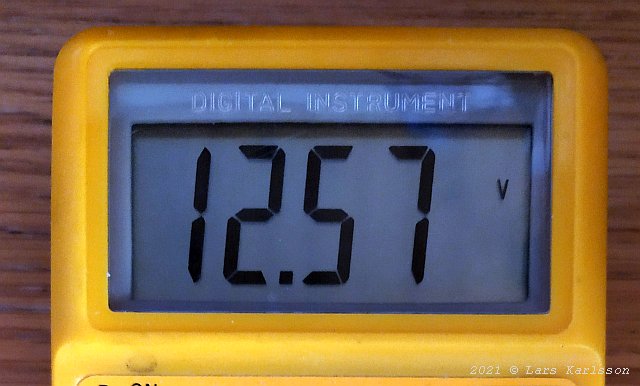
The power supply deliver 12.6 Volts when unloaded. To check what happen during load I start with the Heating bead on, then I have 12.57 Volts, no problem. 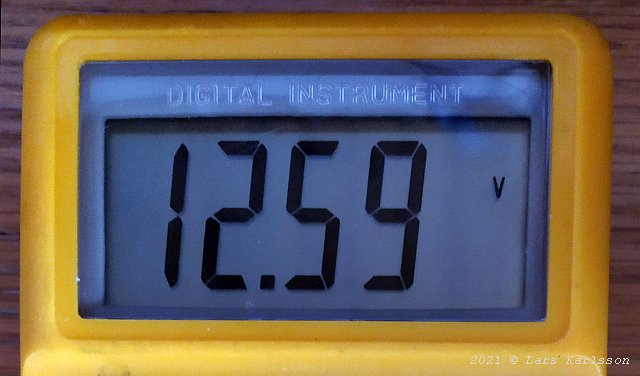
With both heating bed and nozzle heater on I have 12.59 Volts, okey. 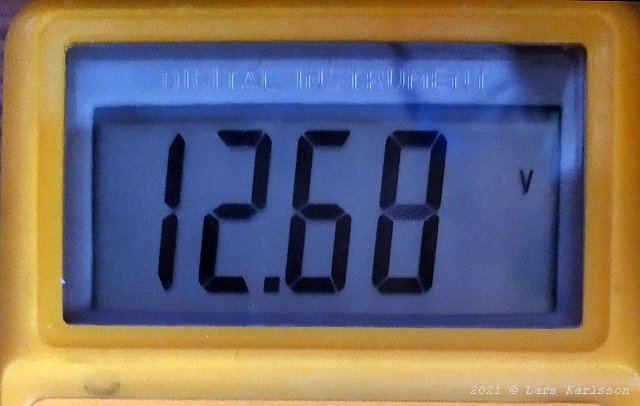
Heaters and all four stepper motors running, 12.68 Volts, okey. 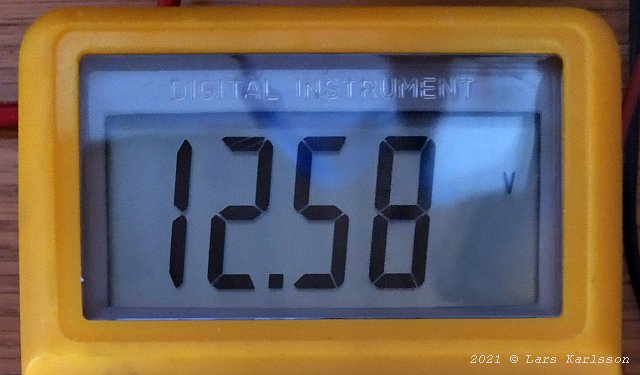
When printing a flat surface which was what it did when getting Thermal Runaway, 12.58 Volts, okey. With the information from these measurements I think there is no problem with the power supply. I also checked the resistance of the temperature sensors, both the nozzle and bed temperature sensors hold 109 kohm at room temperature. After that I read about the setup file about the PID setting. All these settings is in the setup advanced file. Looks complicated, and there is a setting to compensate for the cooling fan of nozzle. That parameter is not calculated when doing the automatic PID setting. Here is a link of what problems can cause this:
Sometimes I get problems to get the filament stuck to the bed, maybe related to this problem. One thing I will try is to put some thermal isolation around the hot nozzle, mine have none. When printing with ABS filament it's needed a bit higher temperature and the cooling effect get worse, maybe it helps. I can also lower the speed of the filament cooling fan a bit, as it's now it always running at 100%. If doing something like this, be very careful to not overheat some parts. 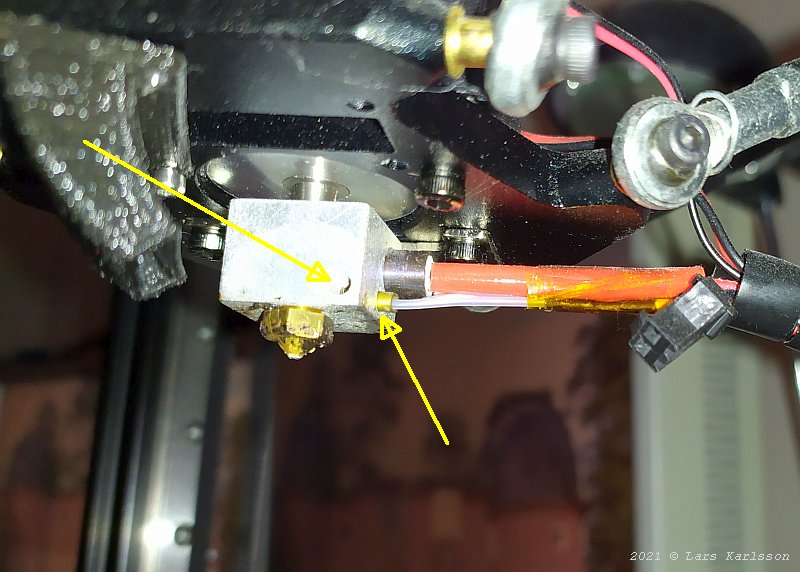
More things to check, the temperature sensor of the nozzle must be in good contact with the aluminum chassi of the nozzle. It's locked with a hex screw, don't tight to hard ! To reach it I have to unscrew the plastic pipe that direct the air flow from the fan, the black one to the left. 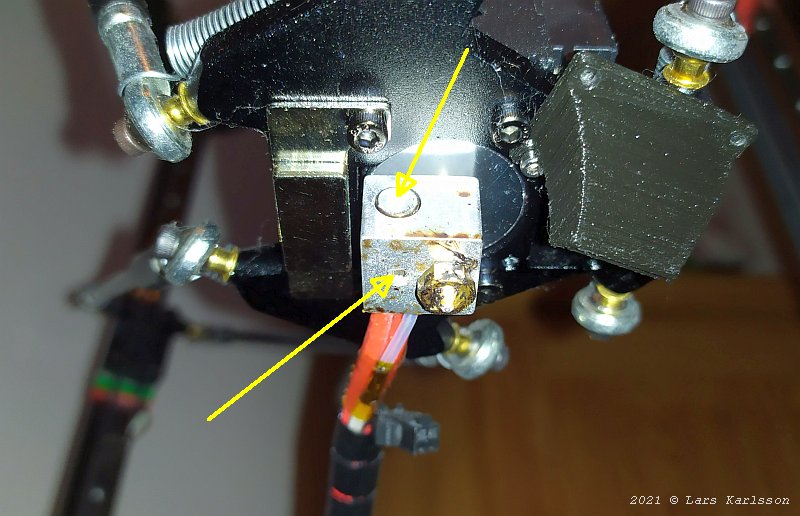
The heater is also installed in this aluminum chassi. I found this hex screw to be a bit loose. 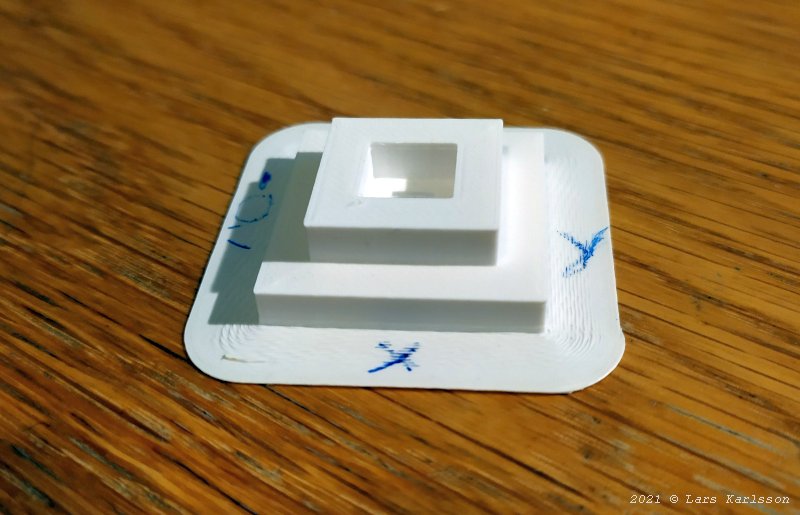
Not fully functional yet but I could 3d-print the test module I use to calibrate the Horizontal Expansion at the next page. Still the fluctuations of the nozzle temperature is too big, on the limit to get a Thermal Runaway.
|
|