|
Advertisement / Annons: |
3D Printing:
|
Contents:
Note: |
12, Setup Marlin 1.1.19:Long delay:It was too much problem with the older drivers and software to control the 3D-printer and I put it to sleep for a while. Now more than a year later I start it up again, first I have to remove all dust the printer has collected. A lot of thing had happen with the development of the software. I have also start to practicing 3D CAD drawing and then I'm eager to have the 3D printer working. On this page I talk about Marlin software version 1.1.9 which is the extent of the old version I have used earlier. I thought it was the best solution. But after a while I still found it difficult. Then I downloaded Marlin 2.0.0 which has a lot of changes and you can't anymore use the same configuration.h file. For both version there are a couple of dimensions you must have. Measure the rod length:There are a lot of versions of the Kossel Anycubic delta 3D printer. I have the Linear Plus version, still there can be difference between them, better to measure the dimension direct on your own printer. 
The rod length, the six arms that hold the printer head are critical to be of exact the same length. I didn't have a caliper long enough to measure this, I used a ruler only to control the standard length of 267 mm, looks to be correct. You need a precision of 0.1 mm which the ruler can't give. The length you should measure is from center to center of the screws that hold the rod. 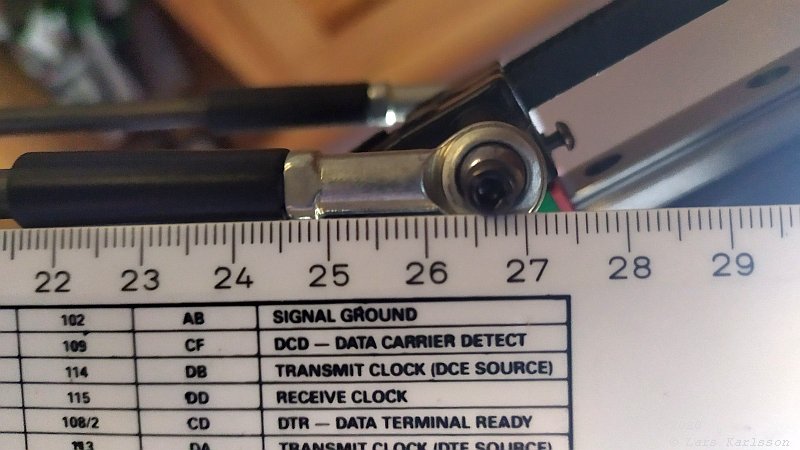
The distance to the other screw's center was 267 mm which it should be for my model. Measure of the printer bed diameter: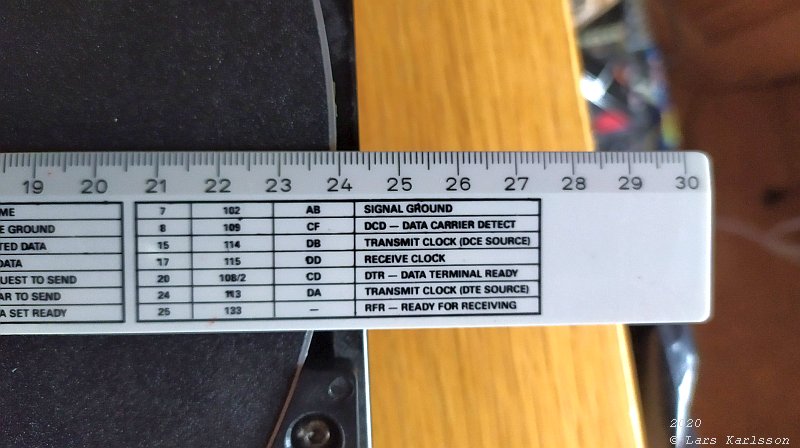
The diameter of the printer bed, it's a heated aluminum plate and it has a diameter of 239 mm. 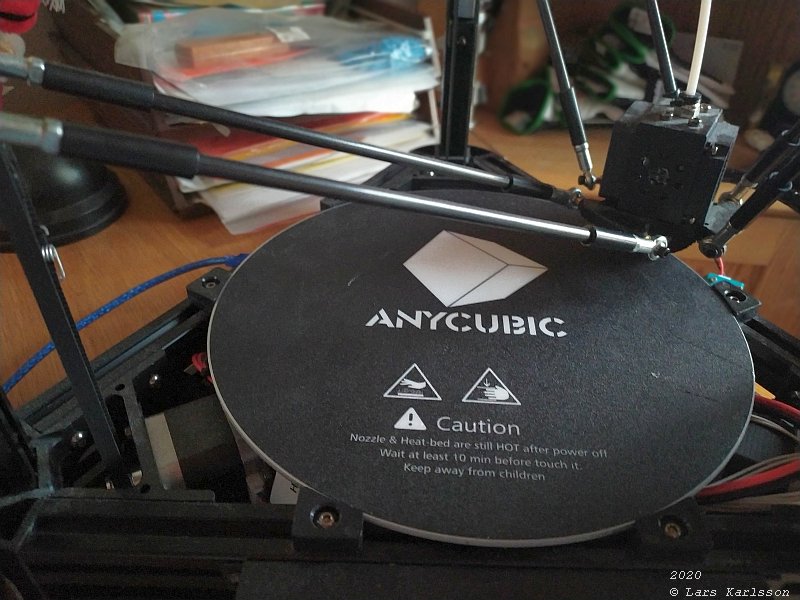
You can't print all the way out to the rim. 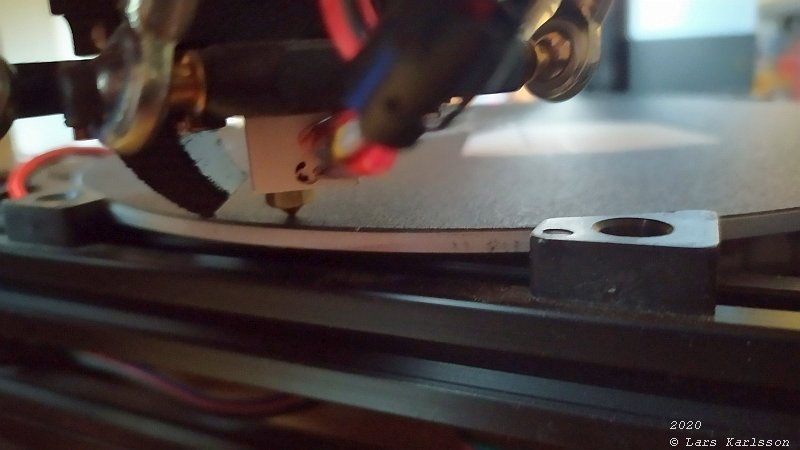
I found the maximal used printer diameter to be 228 mm or a radius of 114 mm. It should be 115 mm according to the manual. 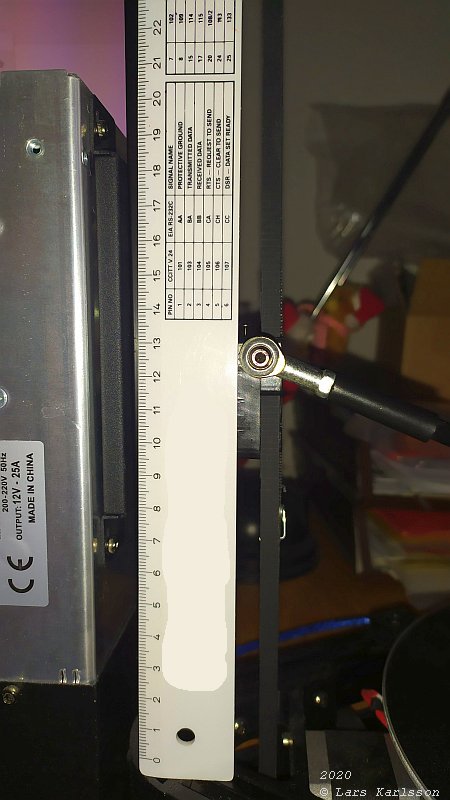
If I want to reach all the way to 115 mm radius I must lower the slider and it's mechanical stop. If I want to maximize the diameter to 238 mm I have too lower the slider rail about 25 mm, but then I get a reduced printer height of 25 mm and only gain 5 mm extra radius. I kept it as it is. Setup the configuration file (Marlin version 1.1.9):
First I found a note that you could get better precision by solder a capacitor in parallel of the limit switch. I haven't done that yet. 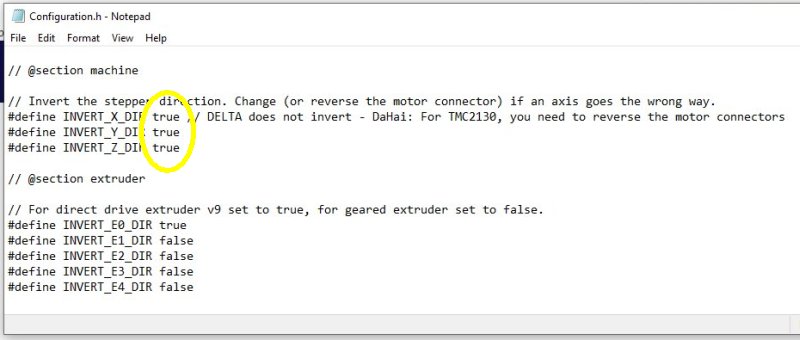
To my surprise the stepper motor were running backwards after the update of Marlin software. I have to change from "false" to "true". I didn't have to reverse the connectors on the stepper motors, maybe depends of which hardware driver you have. Be aware of this reverse problem, you don't want the printer head crash into the printer bed. 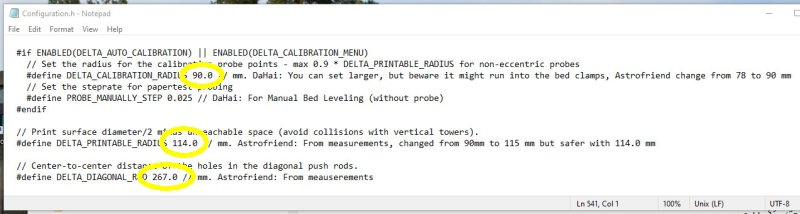
Other parameters that I had to change. Check of calibration, obsolete follow no 13 Setup / Calibrate Marlin 2.0.0 !:
When finished and compiled the Marlin code I uploaded it to the printer and start it up. I also from the slicer software Cura gave the command M502 to delete all old data in the printer and then M500 to save the new. After this I did an automatic calibration. Here I do the paper test to check the calibration, this is done at the origo, X = 0, Y = 0. I lower the printer head with 0.1 mm increments close to the printer bed and stop when I get some friction to the paper when I move it back and fort. 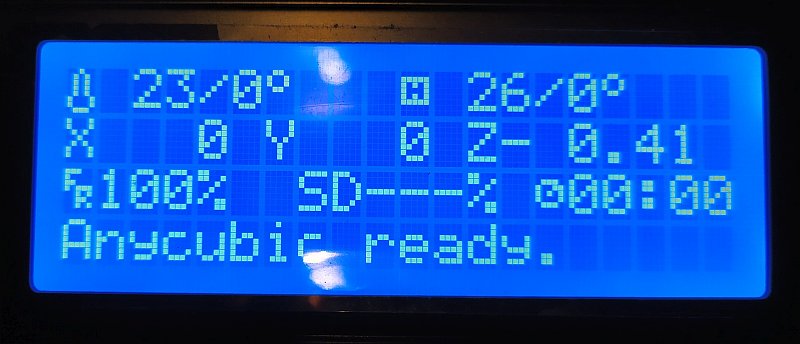
This was the result from the first test at origo, a difference of -0.41 mm. It means that the printer head don't go all the way down to the printer bed, too big error, try to have it less than +/- 0.1 mm. 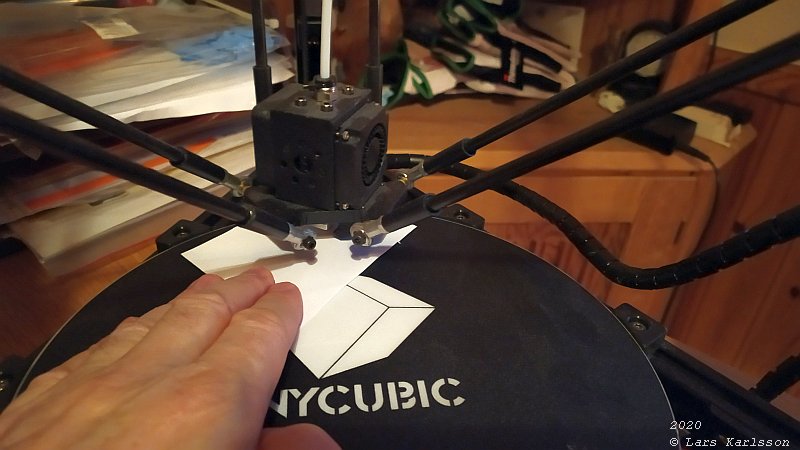
I also did a paper test at the coordinate X = 0, Y = 99 mm, the upper edge. 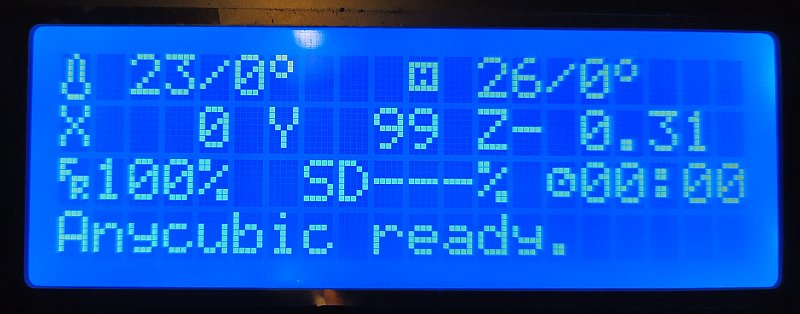
I got the error of -0.31 along the Z-axis. I could get this calibration better, but in next step when I do Auto Bed Leveling the printer wasn't move the head as it should. Then I took the decision to move over the new Marlin version 2.0.0 even if there will be a lot of more work. Useful links:
|
|