|
Advertisement / Annons: |
Tutorial:
|
Content:
Note: |
1.3, Background subtraction, comet & bright stars:When I background subtract and there is a bright big comet it often happens to leave a black pit behind the comet, also strong star gives this fenomena. With more experience I found a more developed method to do this background subtration. Black pit behind strong extended object: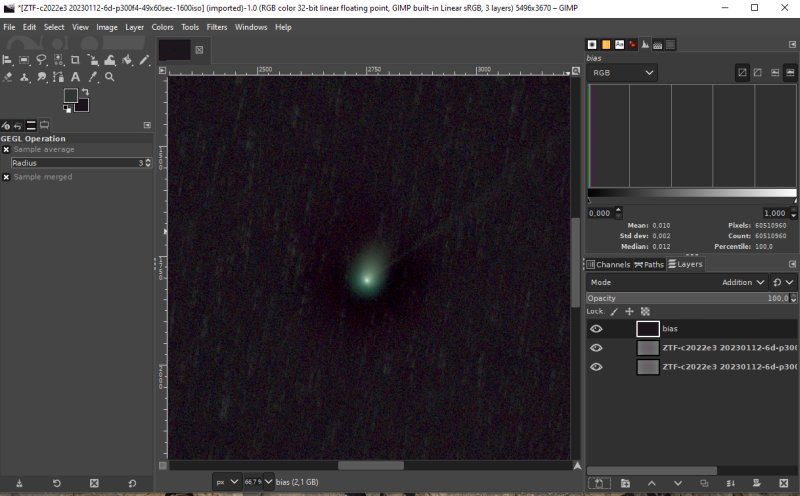
This is a typical look when the Gaussian Blur filter has been used when subtracting the image background. It's the black background behind the comet that's the problem. It's the layer two that's the subtraction layer. Bias layer used to lift the levels over the zero level, it's only a constant. 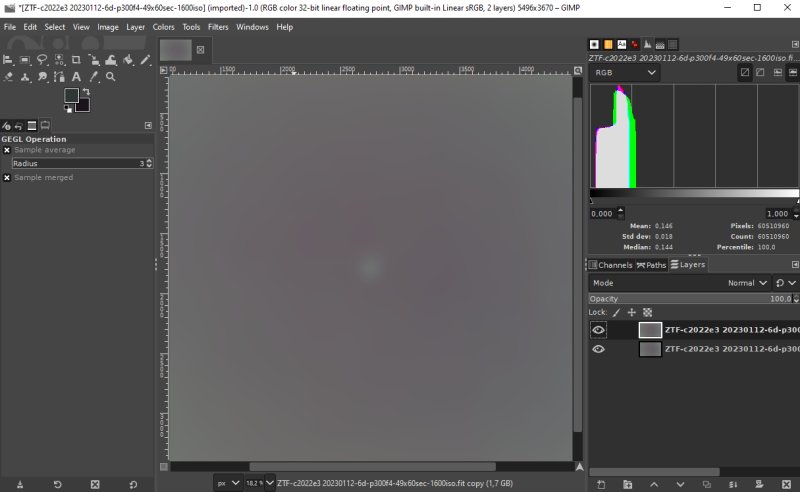
One step back, when creating the subtraction layer I try to paint over the remaining of the comet after Blur filter has been applied. I use the Clone or Heal tool for this. It's the difficulties to do this that cause the black pit behind the object in the final image. A more developed method: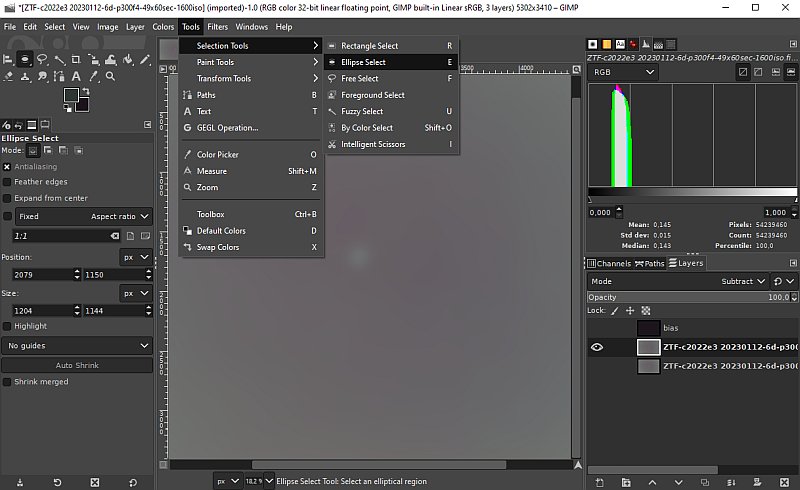
Now I divide the Blur filter in two steps. Here I have already let the Gaussian Blur filter with a setting from 20 to 80 operate over the hole image. Next step here is to select an area around the comet, if it's a round object the Ellipse/Circle tool could work well. 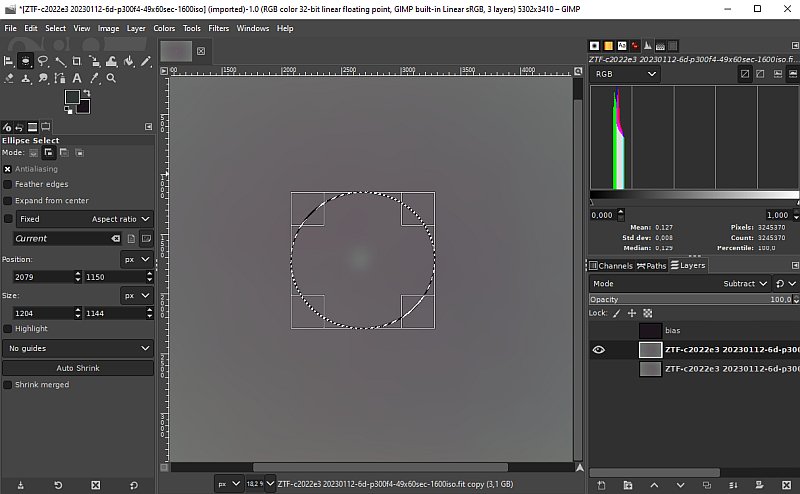
This is a little bit trail and error how big area to select around the comet that give the best result. Free select tool: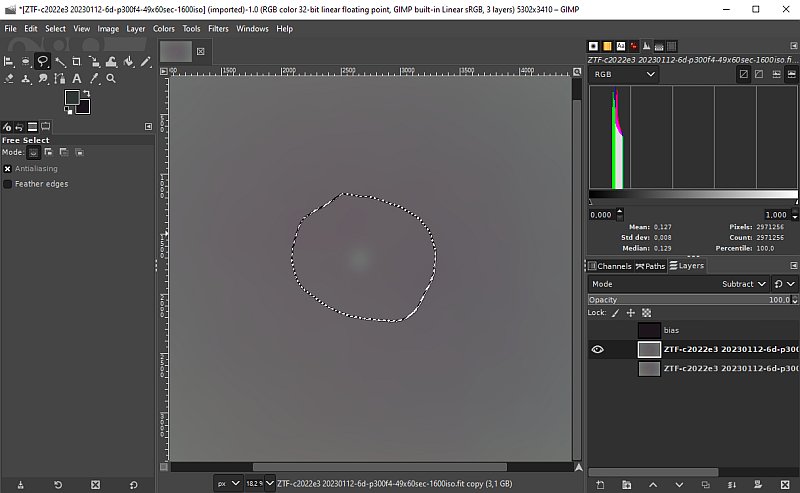
If the object isn't round maybe the Free Select tool is better. Feather: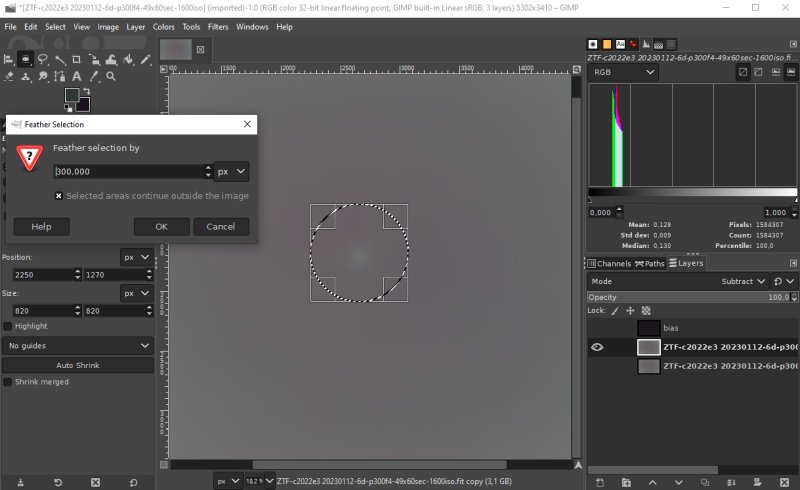
Whatever tool used to select the object it should have soft edges, the Feather tool do this. If the with of the selection is 600 pixel, try to set Feather to half that, 300 px. Second Gaussian Blur filter: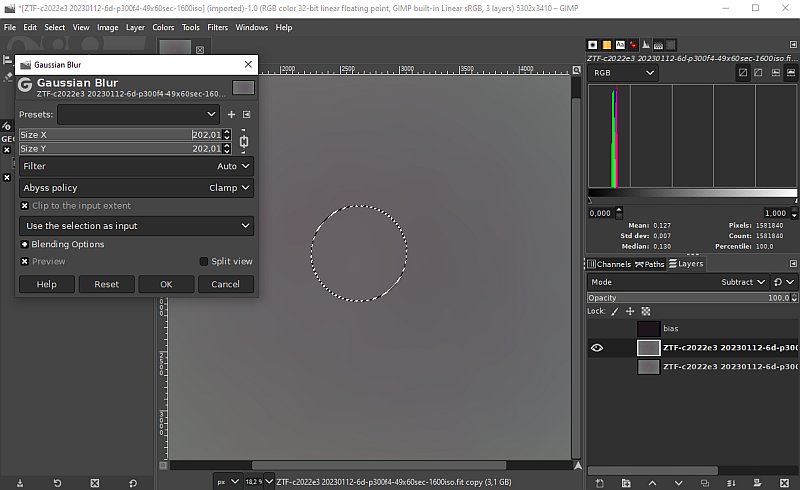
Now I apply a second Gaussian Blur filter with other parameters. This filter only act around the comet which make the difference. I crank up the size x/y to 200, much higher than what was applied when working over the whole area. That get rid of the remains of the comet. The new comet image: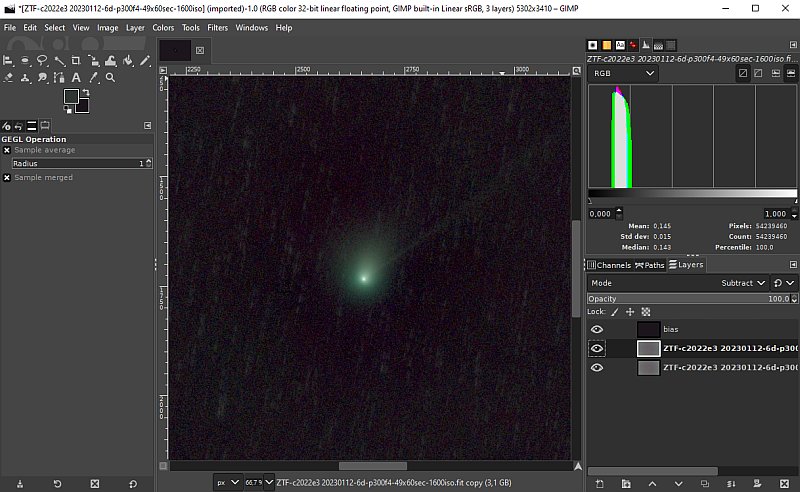
Compare this image with that one at the beginning, the black pit/hole below the comet is much less. Going back and tweaking the parameters and selection could get it even better. Big Stars: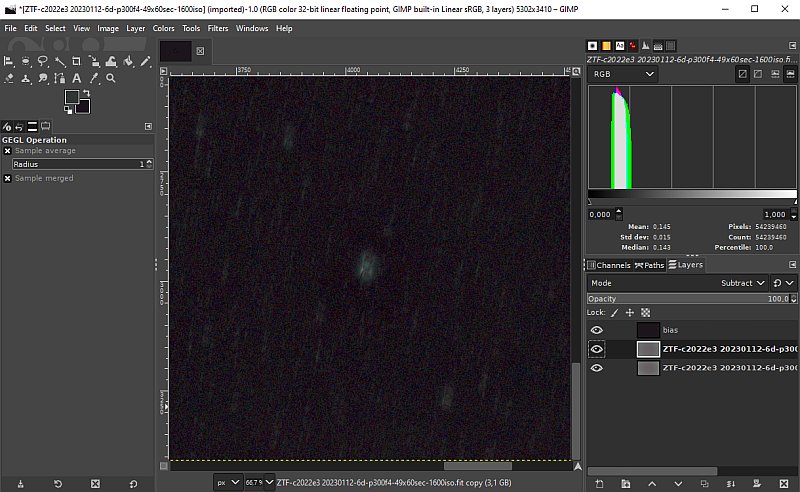
In the same image it can be seen that the remaining of bright stars have the same problem with a black pit behind. If it's only a few stars that have this problem I use the same technique as above. But if there are a lot of stars some more automatic method must be used. By Color Select works sometimes.
|
|