|
Advertisement / Annons: |
Tutorial:
|
Meteor Shower equipmentIntroduction:It's April, 2024 now and we have the Lyrid meteor shower coming up. I have to look through my equipment. Not long time ago I sold my 16 mm Zenitar fisheye lens. That's the lens I normally use when taking photos of Meteor Showers and doing time lapse of the night sky. Now I setup an alternative. I have a super wide angle zoom lens. It's a Tamron 20 to 35 mm, f/3.5 to f/4.5. The fisheye lens had an aperture of f/2.8 so this lens is a bit slower. 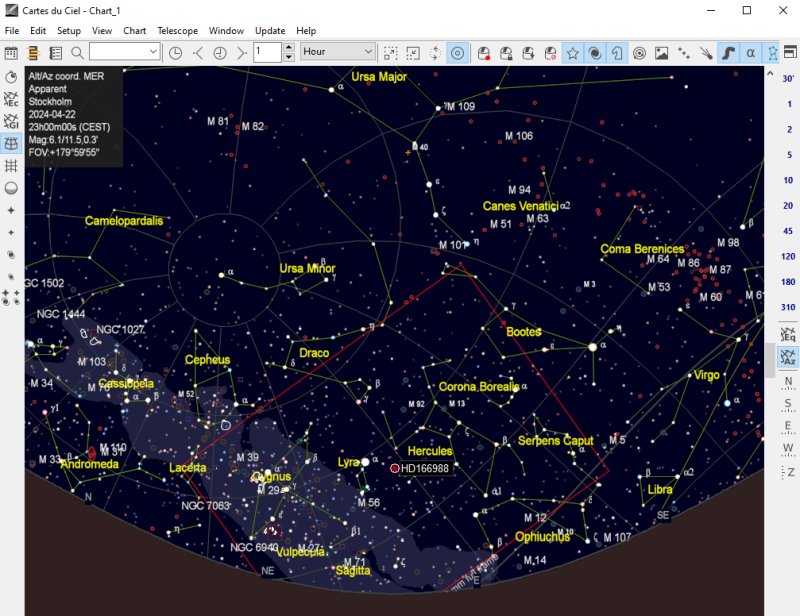 Credit: CdC
The red rectangle is the field covered by a 20 mm lens and a full frame camera. It's a 84 by 62 degree field. The center of the rectangle is the origin center of the Lyrids meteor shower. The best chance to catch the shower is if the camera is directed 90 degree East or West of the origin. This is how it looks like from Stockholm, Sweden. Other common meteor showers:Common meteors showers at different time of the year that can be seen from the Northern part of the globe:
The origins for these meteor showers comes from comets that has passed by the Earth. They leave a dust string that Earth pass through every year. It's this dust string that gives the meteor shower, small tiny cm size rocks that burn up in the atmosphere. More to read about meter showers: My preferable equipment for meteor showers: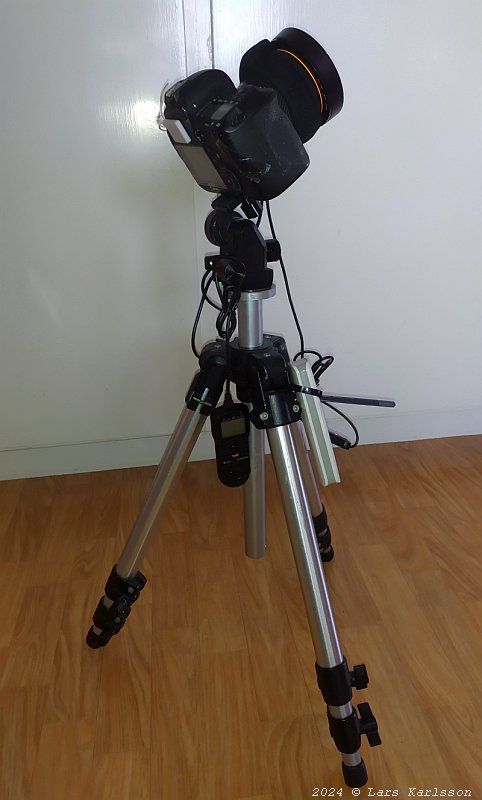
When taking photos of meteor showers there is no need of a complicated motor driven mount. A normal sturdy tripod will do it. I have mounted a geared mount on top of it, but not necessary. 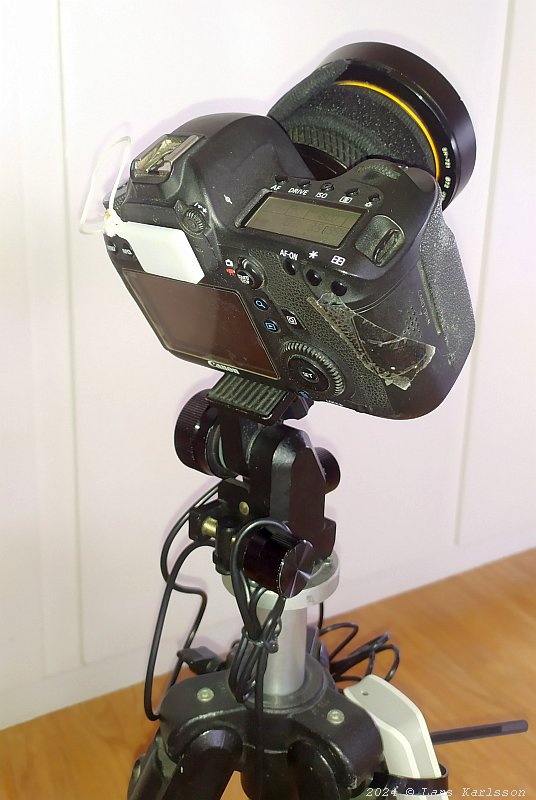
The camera is my old Canon EOS 6D, it's a full frame camera. The white cover on the backside is to block light coming into the camera through the viewer. It's important, most cameras comes with a devices like this that you can use to cover the viewer. When I focus I can use the camera's live view, very practical. But shut it off when finished the focusing, because the live view take a lot of power and heat the camera's sensor and drain the battery. In my country it's always cold when there is something astronomy related going on. The batteries doesn't last very long in cold. Have extra batteries and fully charged. Note, when taking many photos as we do when photographing meteor showers or taking time lapse sequences the camera's shutter wear out. Better with a camera with an electronic shutter. 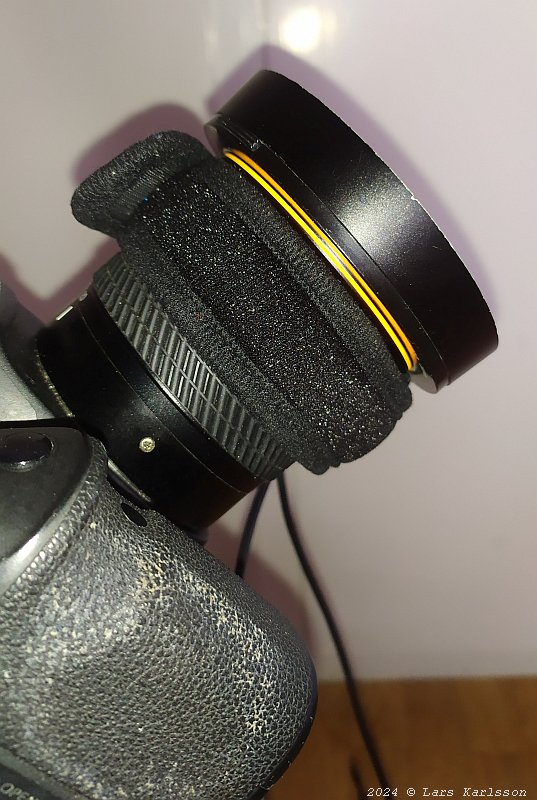
The lens I plan to use. Compare to the Zenitar 16 mm fisheye lens this is 20 mm at the widest setting. A fisheye lens is heavily distorted, this one is linear, rectilinear. It's a bit slower with its f/3.5 compare to the fisheye lens with f/2.8. When taking photos like this it can be many hundreds of photos, it wear the shutter on the camera and the lens' aperture. I set the aperture to fully open to not wear it out. Another problem with the aperture, if stop it down, say f/4, it will not come exactly to this position every time it opens and close. If you plan to do a time lapse sequence it will flicker because of this. On Canon cameras the lens can be fouled to stop it down all time. When stopped down to the opening you want, say f/4, loosen the lens and turn it a little bit off until the lens' electric contacts are not engaged anymore. Note, the lens may easily fall to the ground and get damaged. The fisheye lens didn't had this problem because it was totally manual. Note, at the front of the lens is a heater band wrapped around. Without it the lens will fog up, a dew heater is normally a must. This one is powered through an USB cable. 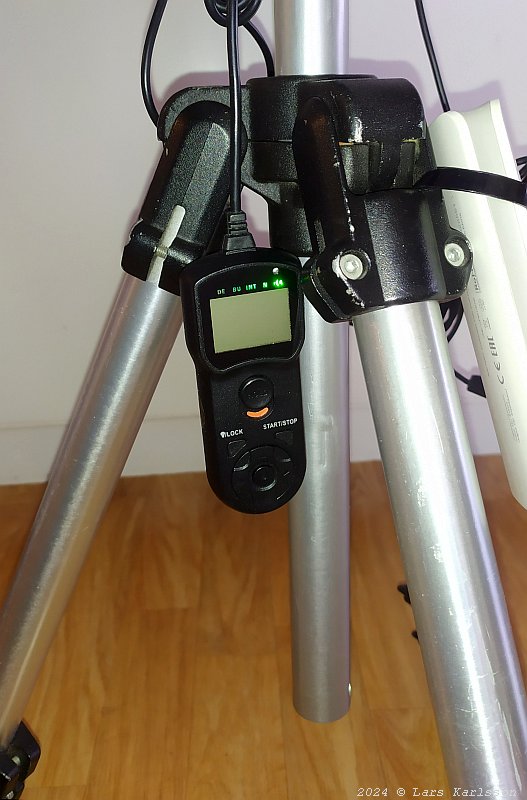
You don't want to manually exposure 500 photos during the night. An intervallo meter is needed. I set the camera to continuous taking photos. No setup of the intervallo meter, only lock the pushbutton to be on all time. With this the time loss between the photos will be minimal. Normal exposure times I use is: 10, 15, 20 or 30 seconds, mostly 20 seconds. Longer exposure time give elongated stars. 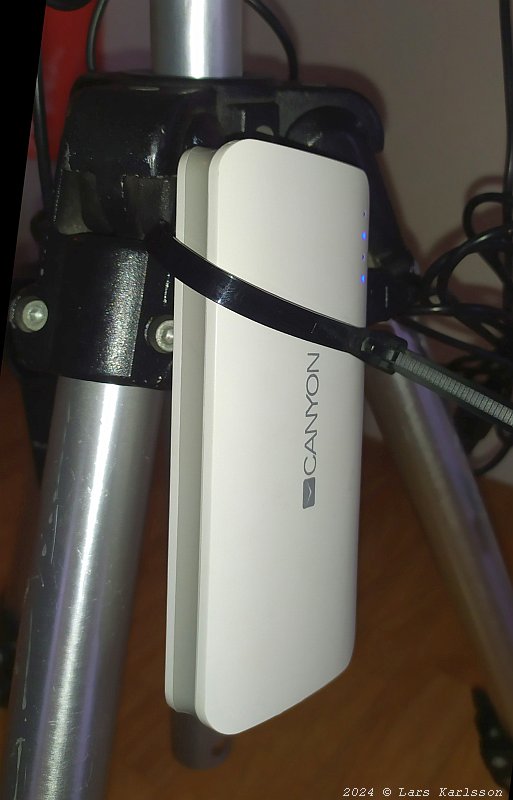
The power source for the dew heater. A normal USB backup battery. This one have the capacity of 10'000 mAmp/h, or 10 amp/h. 
If the dew heater is direct connected to the battery its power will be too high. With result that the battery will not last all the night. I have this little power reducer connected between, it can reduce the power by: 1/1, 1/2 or 1/4, I have it set to 1/4, it's about 2 Watt. |
|
| Go Back |