|
Advertisement / Annons: |
Tutorial:
|
Content:
Note: |
1, My personal parameters when using SirilIntroduction:I have done the pre processing of astrophotos in many different software through the years. Pre processing is when you calibrate, align and stacking your astrophotos. In earlier software there was a big problem, they couldn't handle 32-bits floating points figures which is needed if doing the processing of the images with no rounding errors. The first software I used was Iris, it could only handle 15 bit images. Interesting is that Siril is based on this old software but now added 32-bit support and a lot of new powerful functions. Other software I have used with 32-bit support were: AstroImageJ, Fitswork, DSS and I also used Matlab with 64-bit precision with my own functions. There is already a good tutorial about how to use Siril, I more explain things where I divert from the normal workflow. Siril homepage: It's free to download too ! The Post processing I nowadays do in Gimp which also is a free software to download. Here is a tutorial I have written: Gimp tutorial. Post processing, when you make your astroimage good looking. |
Siril pre processing:First of all, read this tutorial from Siril with its workflow when calibrate, align and stacking astro images: Siril is very easy to understand and use. When I wrote this I had the Siril version 1.2.0 Beta 2 installed and later 1.2.1. Convert raw files to fits: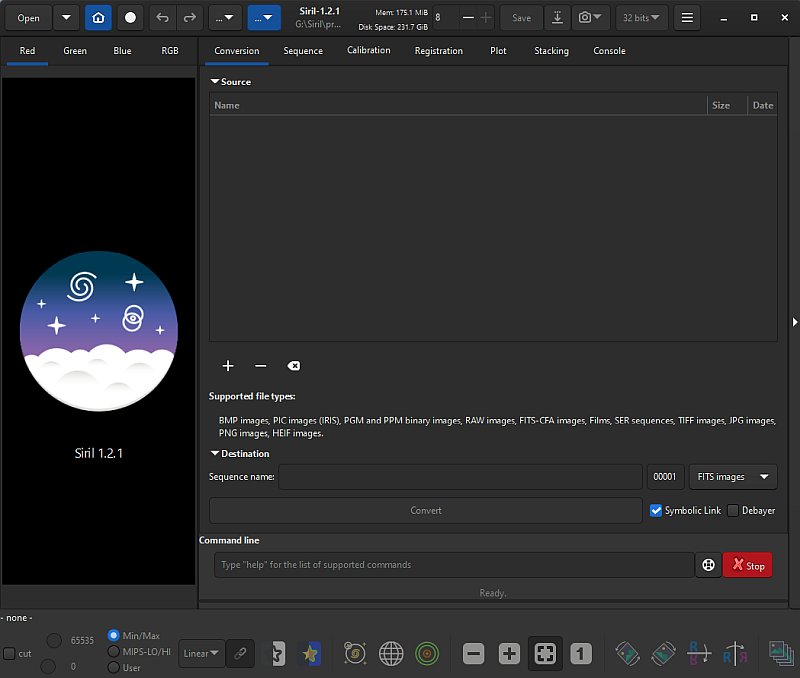
First of all the cameras raw files must be converted to a file format that Siril can work with, fits file format. In my case a Canon DSLR camera with cr2 raw files. Conversion is done under the "Conversion" tab. Click on the "+" button and a file system window opens. 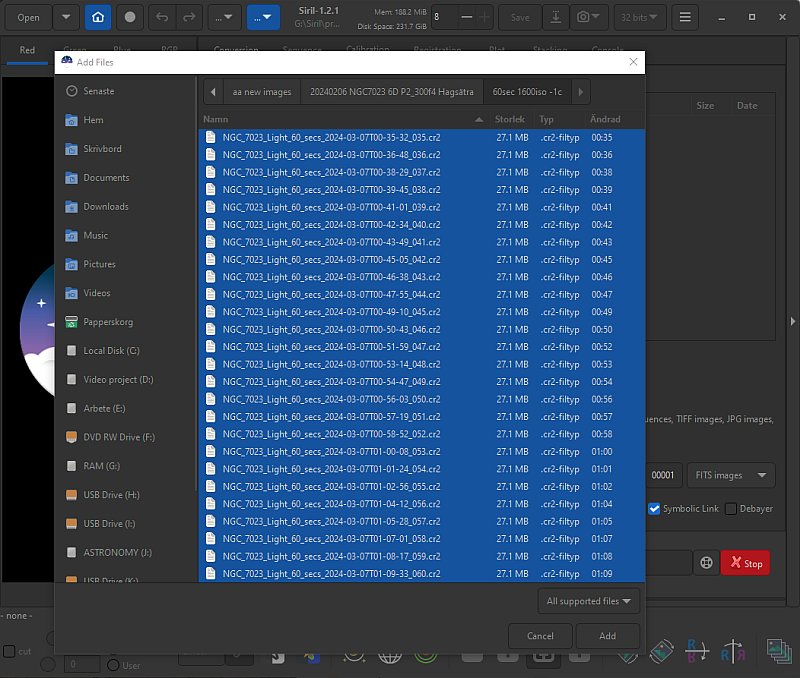
Look for your astro image files you want to process. Mark all of them that shall be processed and click "Add" button. 
In the Sequence window, give your processed files a name, this is how I normally name them. But feel free to use something better for your case. When finished, click the "Convert" button and Siril starts to convert your files. Replace MasterDark with a bias, a constant: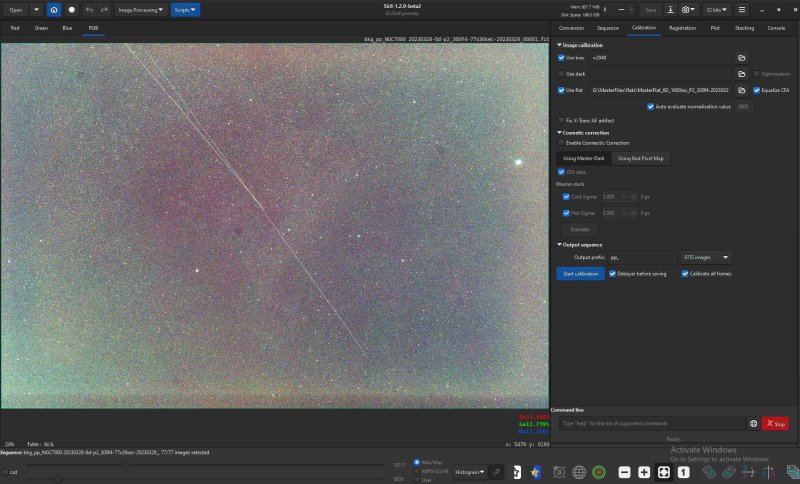
In next step, when calibrating the images I do a little bit different. With a DSLR camera which doesn't have a stabilized cooler your sensor will always have different temperatures which make it complicated to calibrate. The image files and the dark files should have the same temperature. You must built a library with lot of dark images to match the temperature, at least no more difference than 3 degrees Celsius. Even worse, you need 30 to 50 of each temperature and iso setting. And more, every extra calibration you do increase the random noise, dark calibration can only reduce the static pattern. I skip this calibration ! I can do this because my camera, a Canon 6D has relative low noise and no amp glow. This work best if the photos is taken with dithering technique, about 10 to 20 pixels random move between the photos. 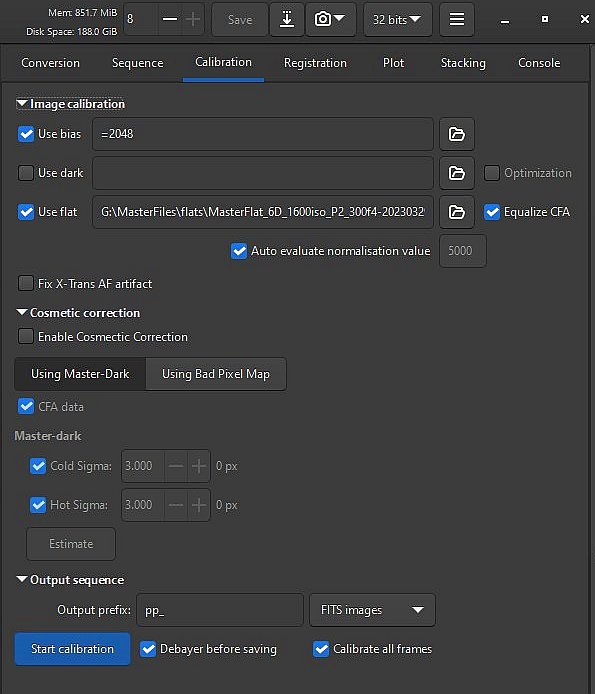
Here is how I do it. Instead of a MasterDark calibration file I use the bias and in this case it's only a constant. My Canon camera has a bias of 2048 ADU, whatever ISO and exposure time I use. There is a more deeper tutorial on Siril's homepage here: Siril Synthetic biases. Background extraction: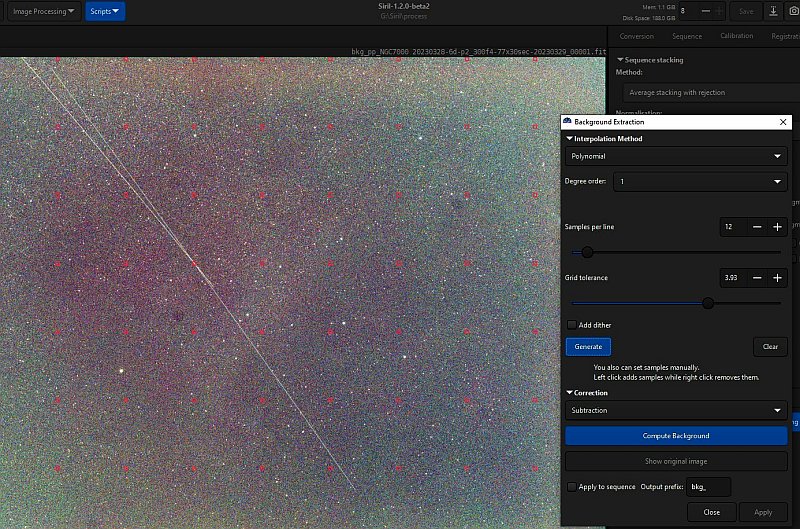
Background extraction is when removing an uneven light polluted background. It can be done in the post processing too, I do a polynomial of 1 degree subtraction in Siril on each sub image. It's a tilted plan that I subtract the image with because of the light pollution gradient on the sky and that change for every image when the camera moves up or down. Sometimes I can try other settings, but mostly I only do this and handle the rest in the post processing later. In the image above can be seen that it has placed its test points, the red small squares, along the edge, that's not good. I have to remove them manually and place new once a bit inside the edge. This error was introduced in the new Beta version and will be fixed later I hope. 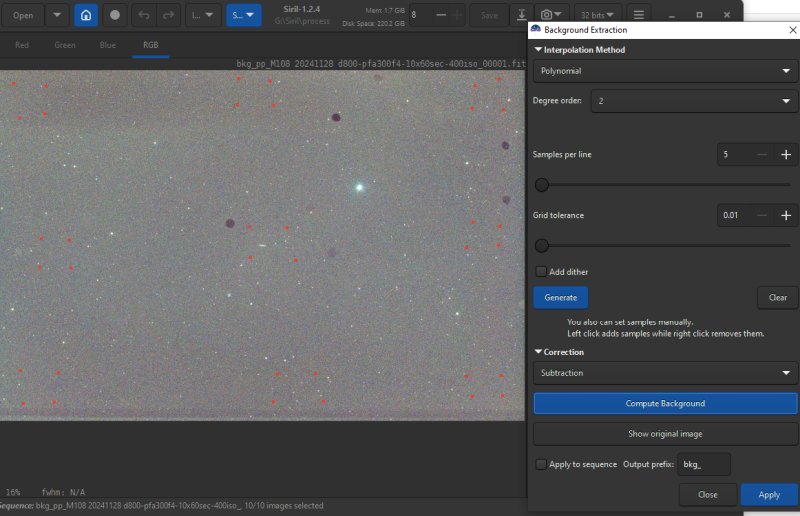
This is an alternative when the flats are not perfect. Flat calibrated images can some times give a pit or a peak in center. Then I use a second degree Polynomial. Added 9 groups of points like the above. Give sometimes much better result, but even better if the flat is correct from the beginning. It depends a lot of the optical design if it gets better or worse. With complex optics it can be riples in the corrected image which will be visible at high contrast. Registration: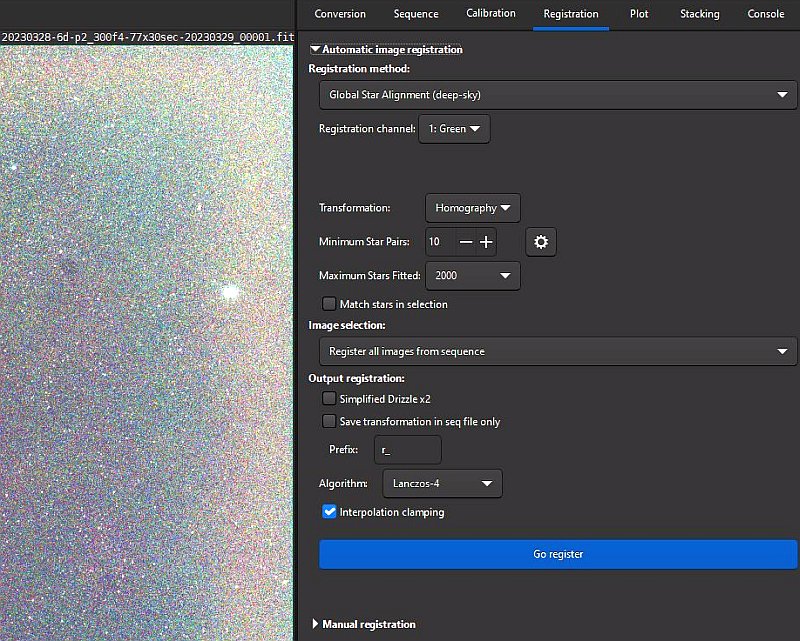
I have found that Siril register the images very good, that's when aligning the images against each other. It shift, rotate, stretch and distort them to fit each other. I use the Global Star Alignment setting when there are no moving objects like comets. 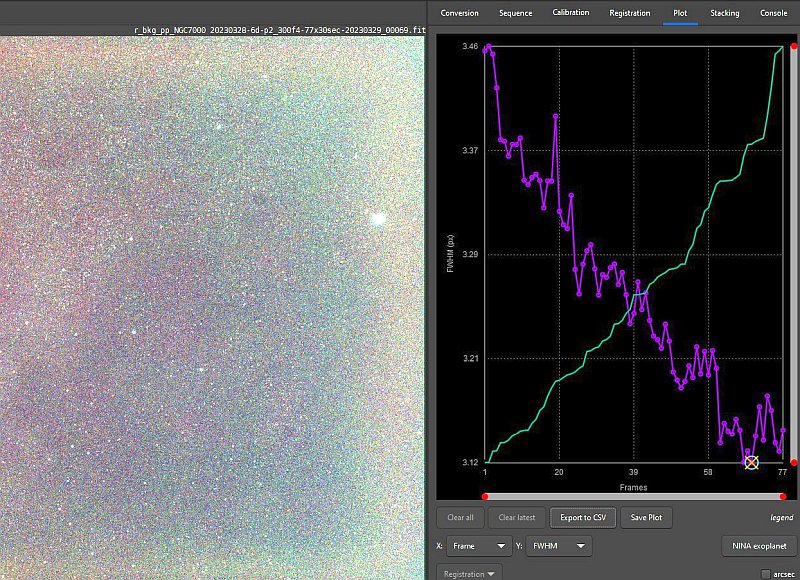
After the images are registered a graph can be plotted to show different data on your choose. In this image I have plotted the stars FWHM value, the stars sharpness. This object was only 18 degrees above the horizon when I started. When time goes on it comes higher above the horizon and the stars sharpness will be better. Bad images can be excluded. Stacking: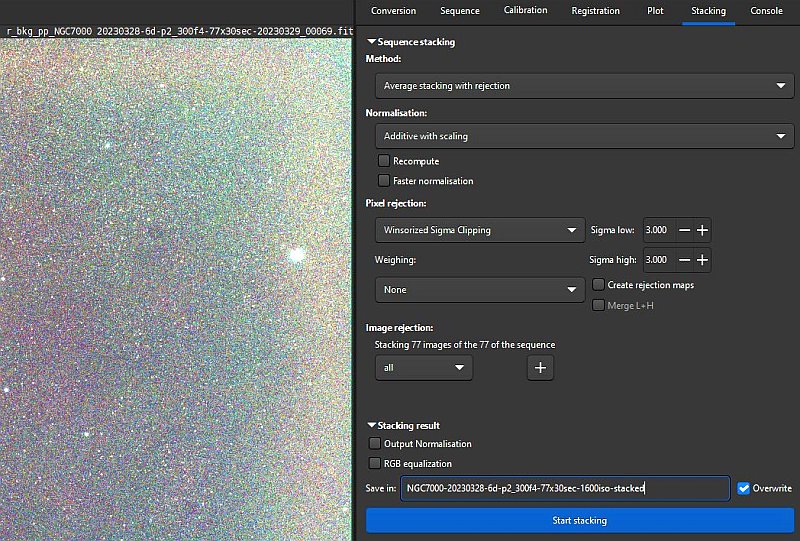
Nothing complicated with the stacking process, I use the Average staking with rejection which is recommended. But when building Master calibration files other settings are used. With stacking of many images you reduce the noise, the same effect as taking one photo with longer exposure time. Smooth the background: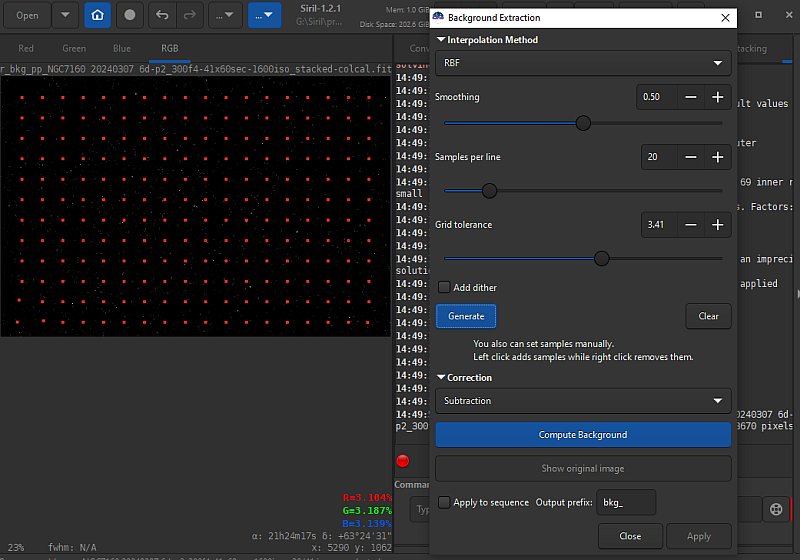
Normally the background is uneven. I can correct this in Siril or the the later post processing in Gimp. If I do it in Siril I do it like this. Mostly when I have a comet photo I have found it to work very well. I place a lot of test points, the red small squares. Siril plays them automaticly, but some times it come above a star and it must be moved. 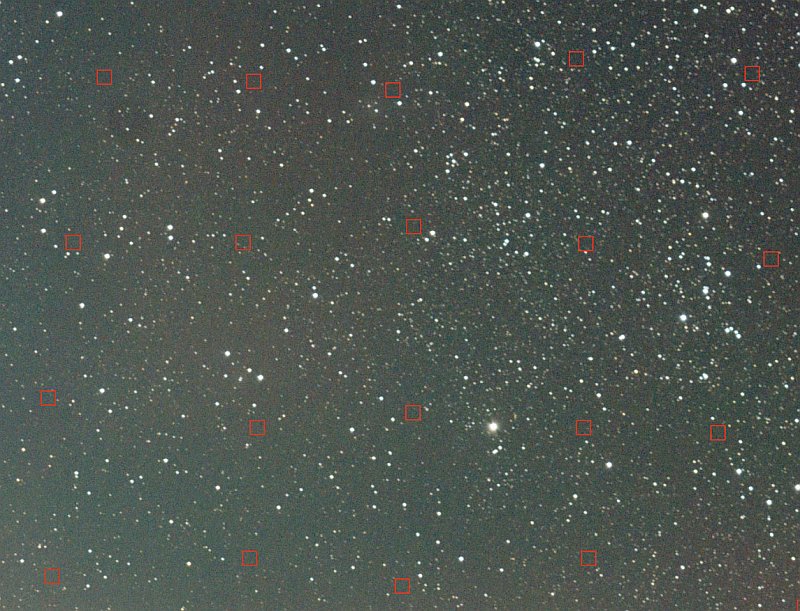
Zoom in and check that there are no stars behind the rectangles. Right click to remove them and left click to add a new one. If there are areas with dark or light that shouldn't be there I add more test points. Note this is done on the stacked files.
|
|