|
Advertisement / Annons: |
Tutorial:
|
Content:
Note: |
3, Star Color calibrationI have doing the color calibration in the post processing earlier. More manually and not so precise. In Siril and many other software it's possible to match the stars in the image with color spectra that is stored in science data bases. It's done almost automatic in Siril. Color spectra from data base: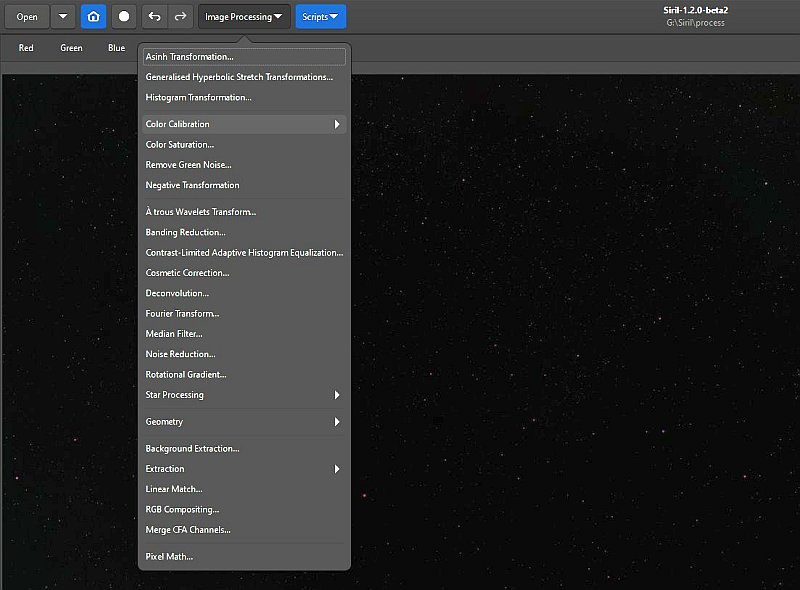
Open the Color Calibration menu in Siril from Image Processing. 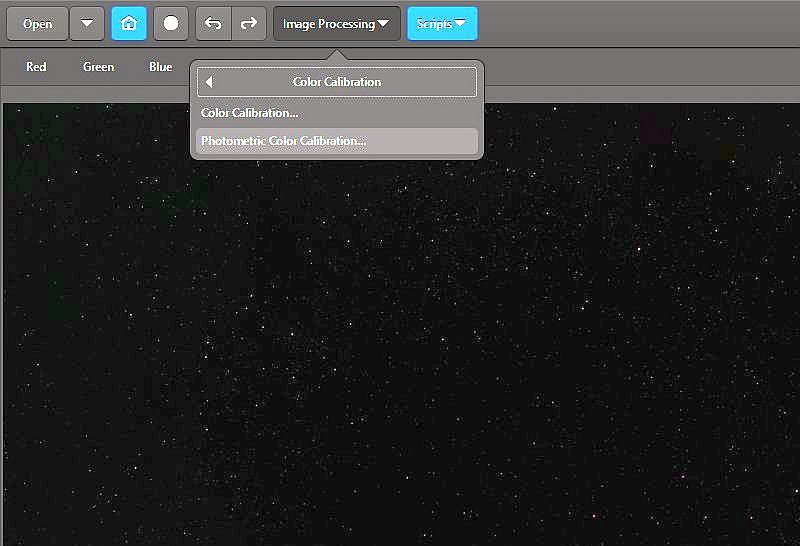
Choose the Photometric Color Calibration from the sub menu. Plate solve the image: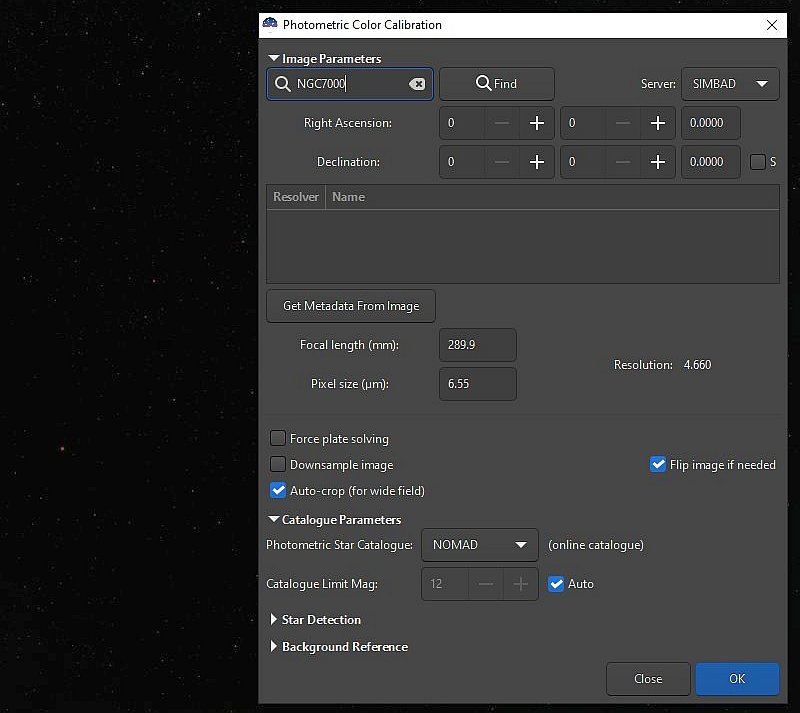
To match the stars in your image it must be matched with the stars in the data base. With plate solving this is done. Siril needs a little help, if you know some object in the image, type it in. In this case it's the nebula NGC 7000. An alternative is to type in the RA and DEC coordinates if you have them. Before the pixel size and focal length must be typed in. Note: It's a 300 mm lens, but here it calculate it to be only 290 mm. Calibrating the stars' color: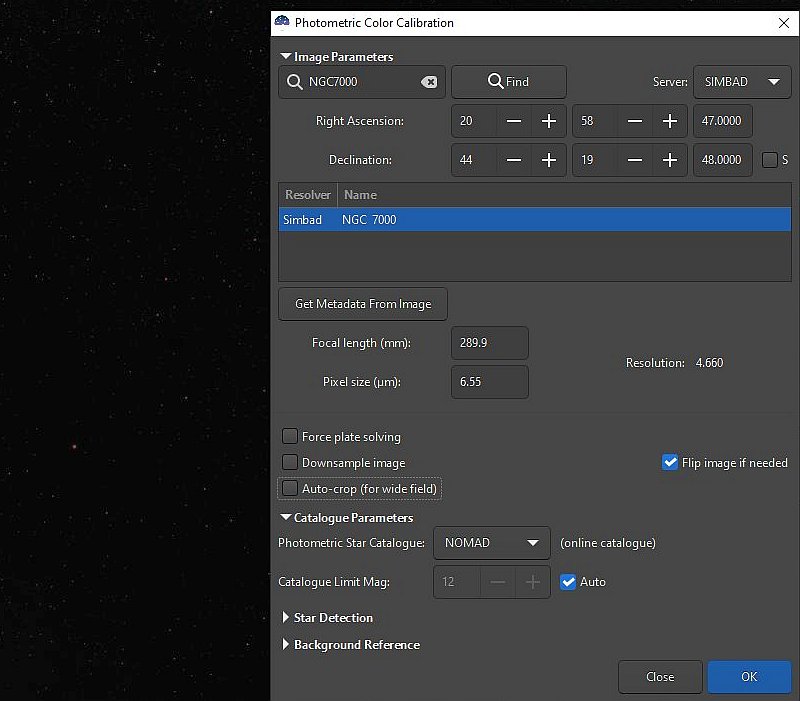
Click on the Find button and it searches after a data base that hold this object. Here it find it in Simbad, and calculate the coordinate from this. Now it's only needed to click the OK button and it calibrate the image's stars for you. If there are a nebula as in this case it will get the correct color from this. Details: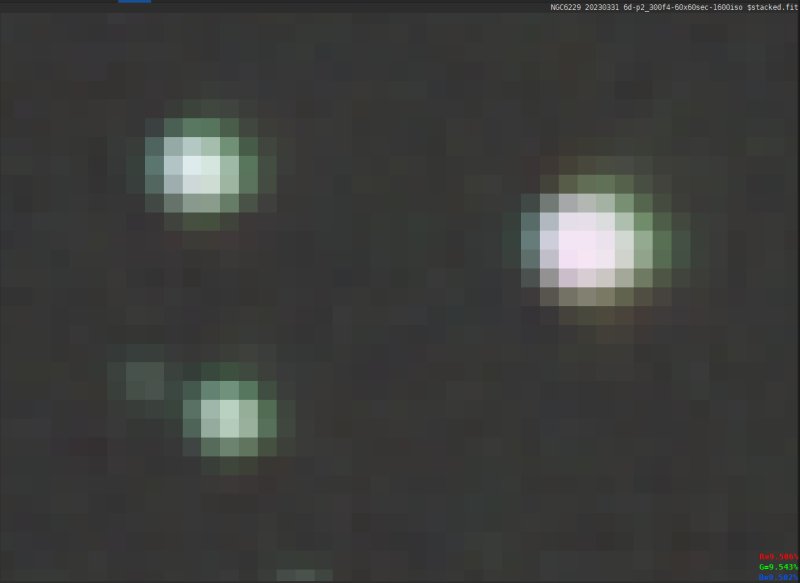
From another image, a stacked image, I test how to use this color calibration. One question, should I first desaturate the stars and then do a color calibration ? The star to the right is saturated, traces of purple color in the center is typical, normally much worse. 
Here I have first color calibrate the image and then desaturated. Here it can be seen the center isn't as flat as in the image above. The colors are not convincing yet. The stars shape has to some amount been restored. On other images I have seen more indication of that this work. Just need a lot of practice to find out how to do it optimal.
|
|