|
Advertisement / Annons: |
Tutorial:
|
Content:
Note: |
5, Dark calibration analyzeDo I a mistake when I skipping the dark calibration and replace it with a subtraction of a constant ? I don't think so, where I live the light pollution is high. The best place I have is about one hour by car to reach, it has Bortle Class 4. I think that light pollution mask the small contribution from static pattern that the camera give, and I can cancel most of that with the dithering technique. Here I do some simple analyze of the same image but with different calibration technique. One with a constant subtraction and one with dark subtraction when calibrating. In both cases they are flat calibrated. All image processing done in Siril. Test object, M81 and its surrounding area: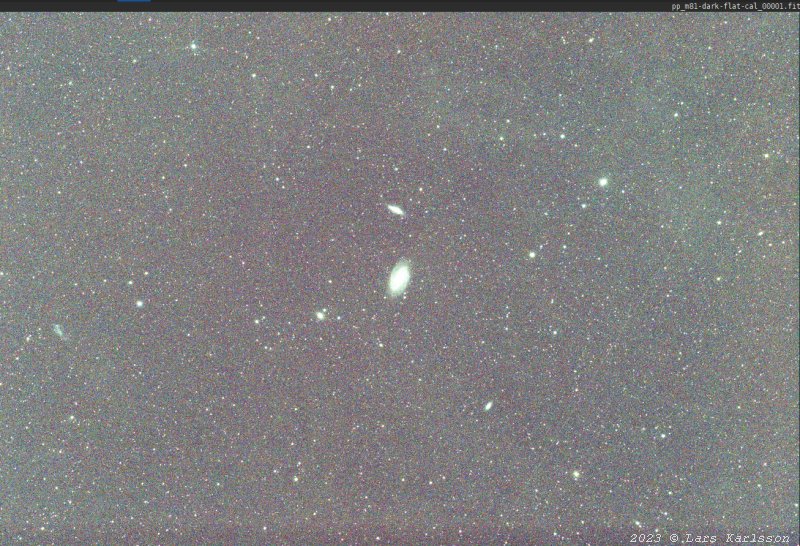
It's not often I'm out at dark places, but this photo of the galaxy pair M81 and M82 is taken from a Bortle Class 4 area. They are also at relative high altitude in the sky. 30x120 seconds and this is one of the sub images. Raw data from this sequence: M81 and M82. Dark subtraction calibrated: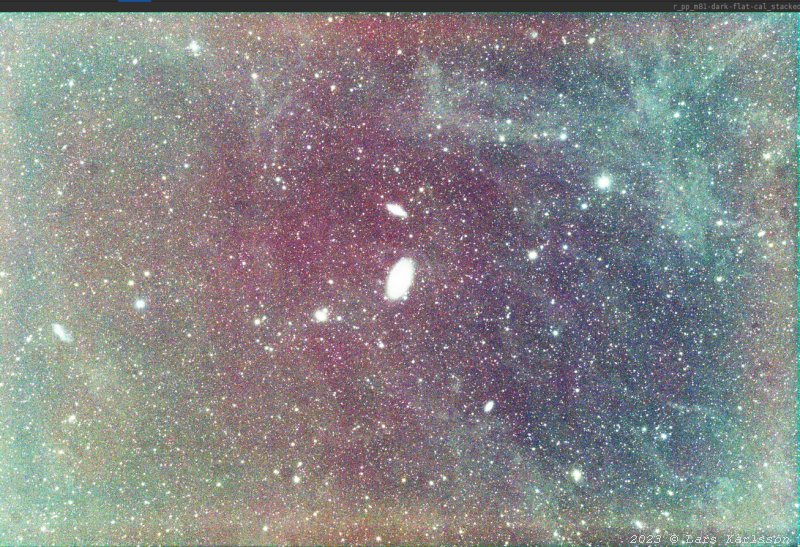
This is the result from the calibrated and stacked images. It is the normal calibration with a MasterDark with matching temperature. When doing this sequence taking I dithered it every 3rd time, that's important to reduce hot pixel and static pattern. Work relatively well with a low noise camera with no amp glow. Constant subtraction calibrated:
This is an alternative calibration where the MasterDark is replaced with a constant, 2048 ADU which is the Canon EOS standard bias. Both this and the above image is histogram stretched. Can anyone see any difference between the two images, noise or static pattern ? No, it's impossible, must go much deeper in the details to see if there are any visible difference. To do that I use the old software Fitswork which I normally use when doing analyzes. Analyze in Fitswork: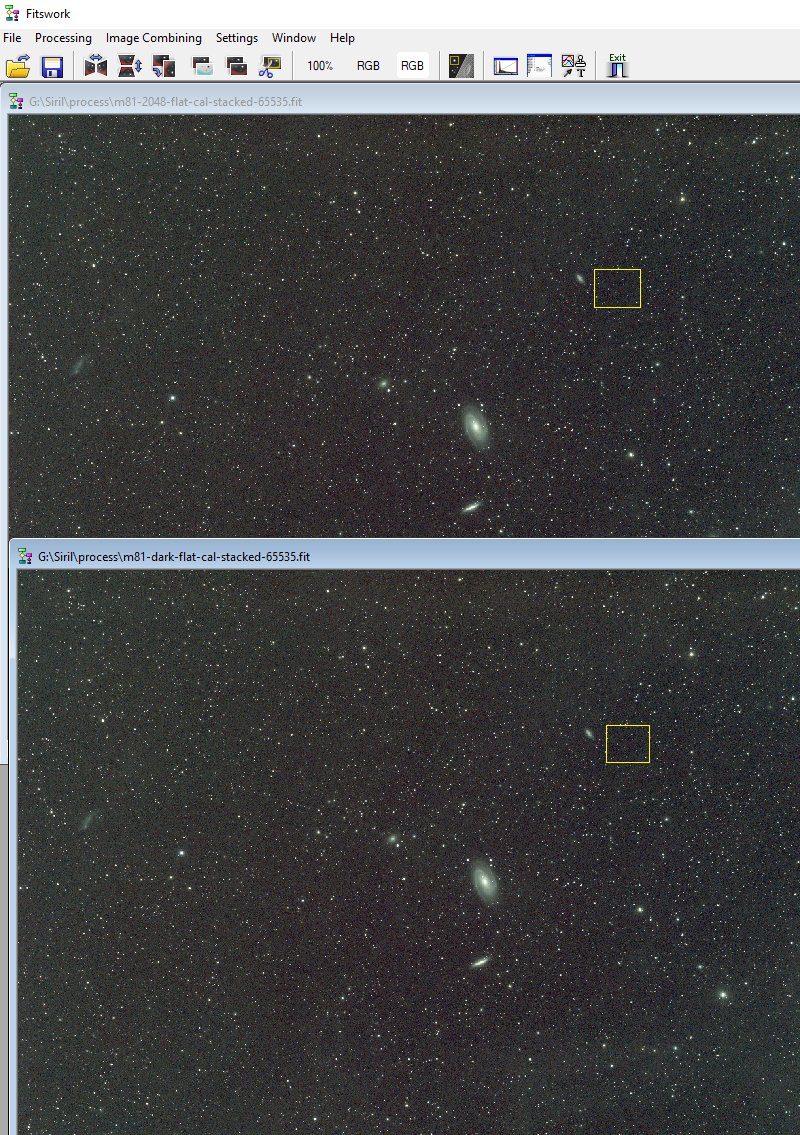
Both calibrated images is opened in Fitswork, they are 32-bits floating point and gamma is set to 5 for the screen. First I must find an empty area where I do this analyze. Searching in the yellow rectangle for it. Variance in Dark calibrated image: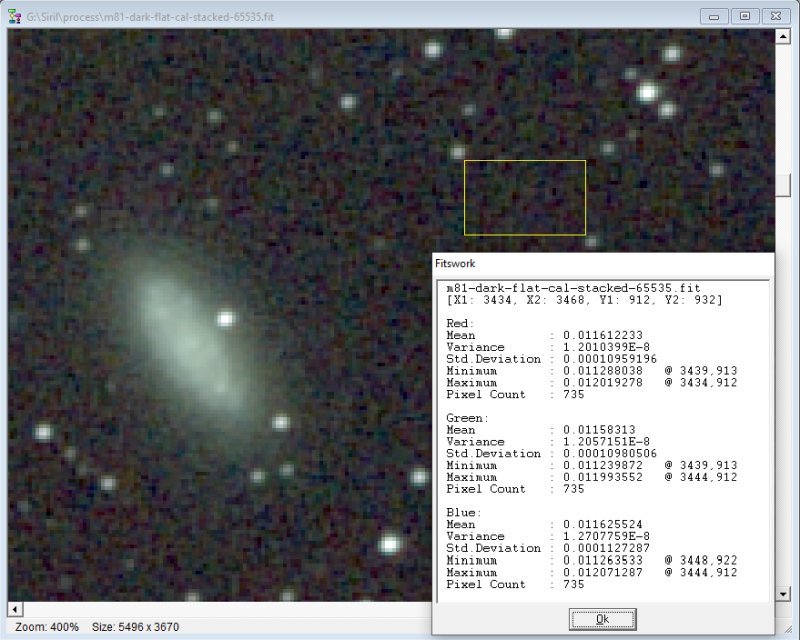
Nearby a small galaxy I use the area between two stars. Mark it and let Fitswork find some data about this area. Variance in Constant calibrated image: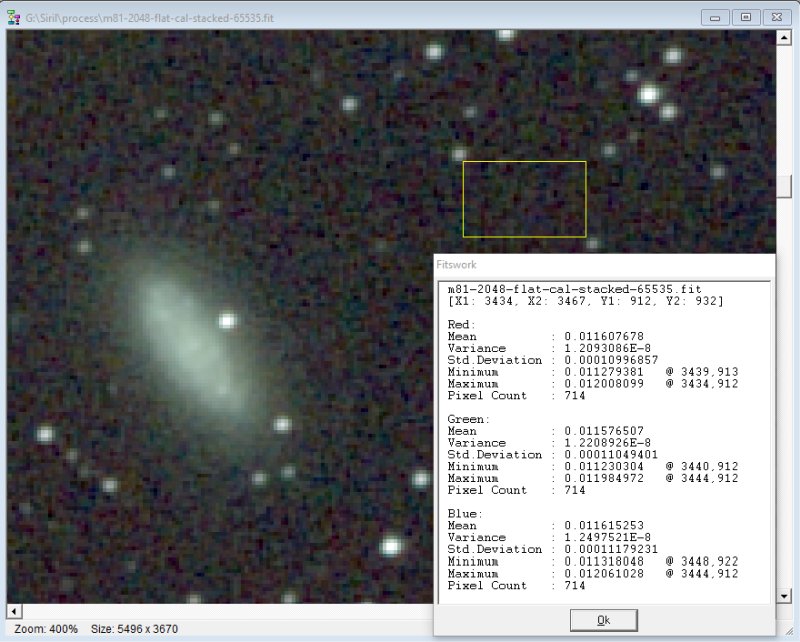
Now I have to find the same area in the other image. I can't get exact the same position but as close as possible. The area inside the rectangle maybe looks only to be noise, but for sure there are a lot of weak stars there. When subtracting or adding images the noise (random noise) will always increase, with one image subtracted by another image the noise increase by rot(2), about 1.4 times. So in that view the images should not be calibrated. But the calibrating reduce the static pattern: Amp glow, Column lines etc. That's why we dark calibrate the images. Data from Fitswork:
In the perfect world each pixel in each sub image after aligned should have the same value. Variance and Std Deviation are measurement of this. A lot of things can make this to not happen, noise, not perfect aligned etc. A low value means it's more concentrated of the value it should have (average value) in the perfect world. Std Deviation is how much it deviate from the mean value. Should also be low. All these are random deviations. Because a constant doesn't have any noise it could be expected that this calibration gives a cleaner image (low random noise). Nothing that could be seen here. More exactly placed rectangle had been better to get more reliable data. I have examined the image with the constant calibration (cheat calibration) if I could see any traces of hot pixels, column pattern, amp glow etc. Nothing what I could see. The dithering seems to have canceled all these artifacts. But with a real dark place and a better camera this is maybe not the case. It's always possible to do a new calibration with real MasterDarks if needed. Here can be read about Variance and Std Deviation in more details:
|
|