|
Advertisement / Annons: |
Tutorial:
|
Content:
Note: |
3.3, Separation of stars and DSO:Invert: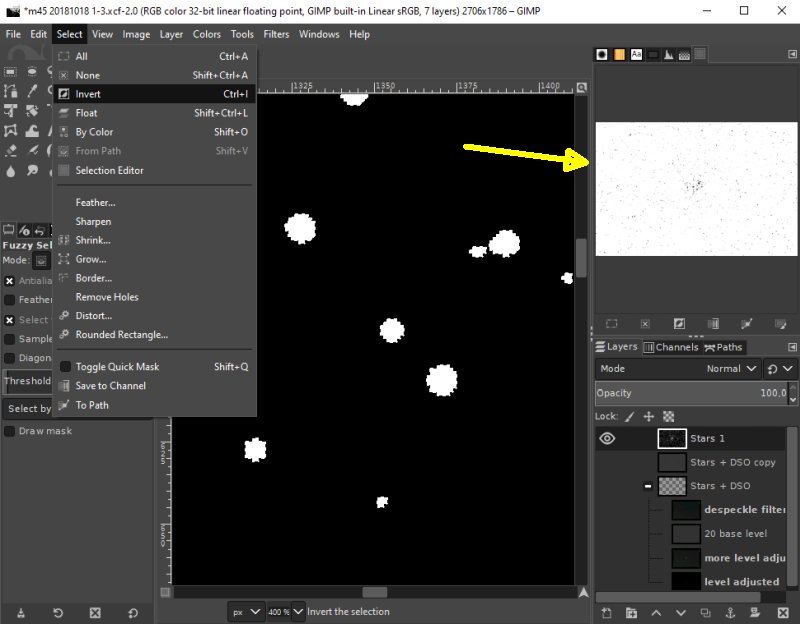
Invert the selected area. The stars will be selected instead of the background. The white preview window change to black. It's now the srats that are selected. Expand the selected area: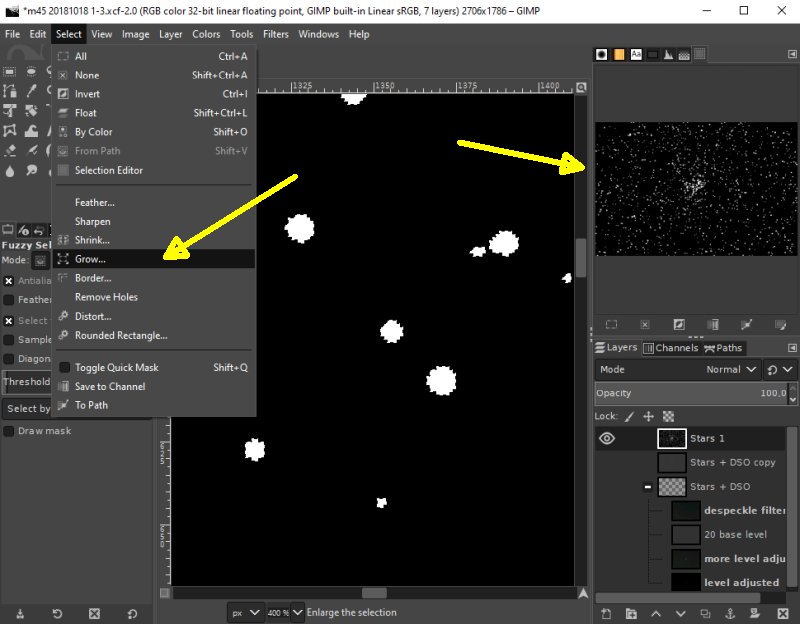
With the Tool 'Grow' we can expand the selected area. Setup Grow: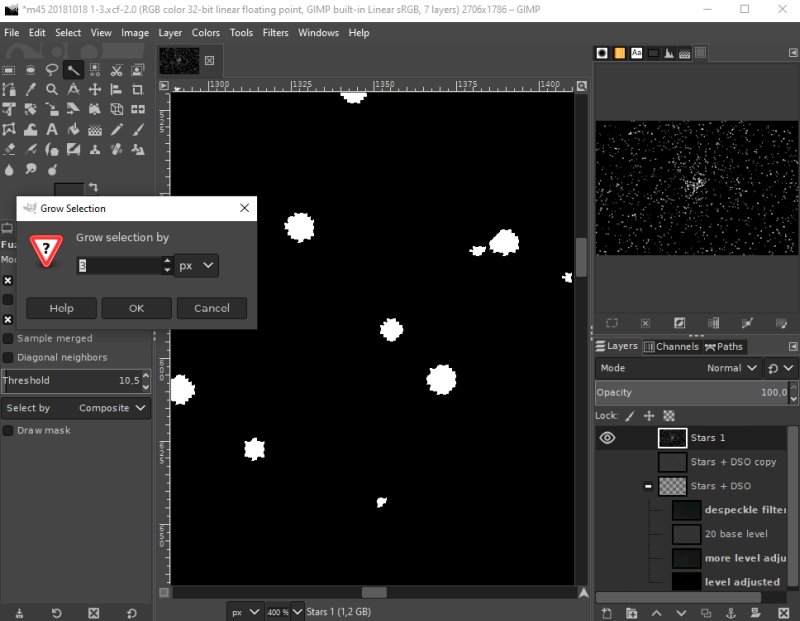
Select how much the selected are shall expand. Something around 3 pixels. New selected area: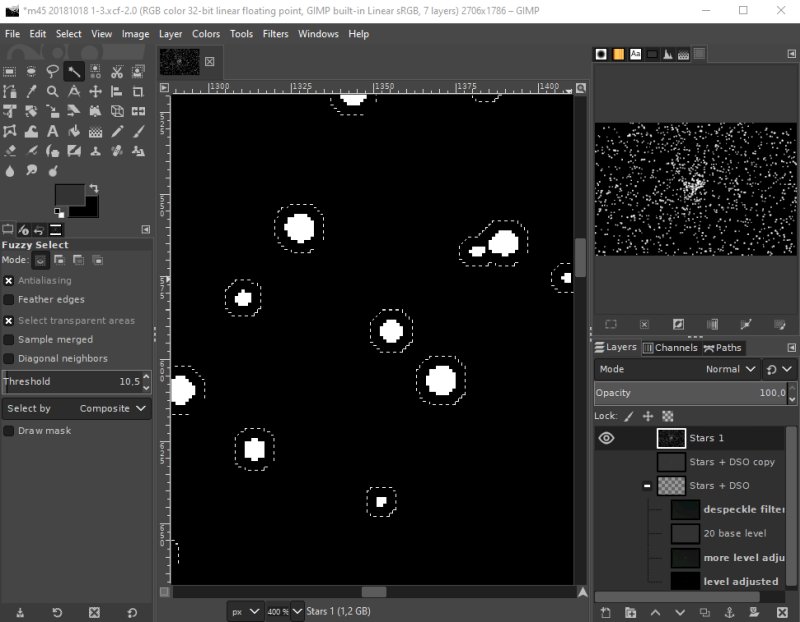
The border of the selected area is now outside the stars. Feather: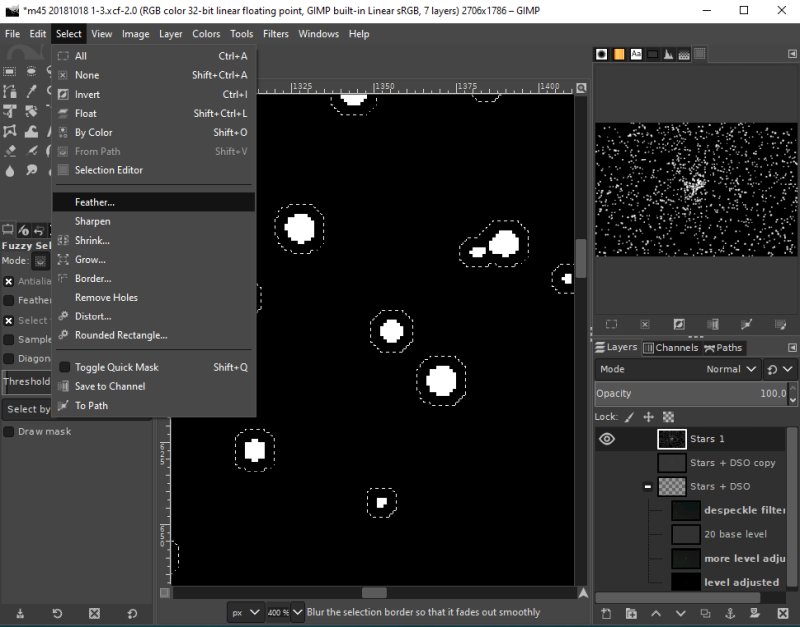
We don't want to have the mask to be just on or off, with the Feather tool we can make a soft transit. Set it something like 2 to 4 pixels, you will not see any difference in this image. Copy to new layers: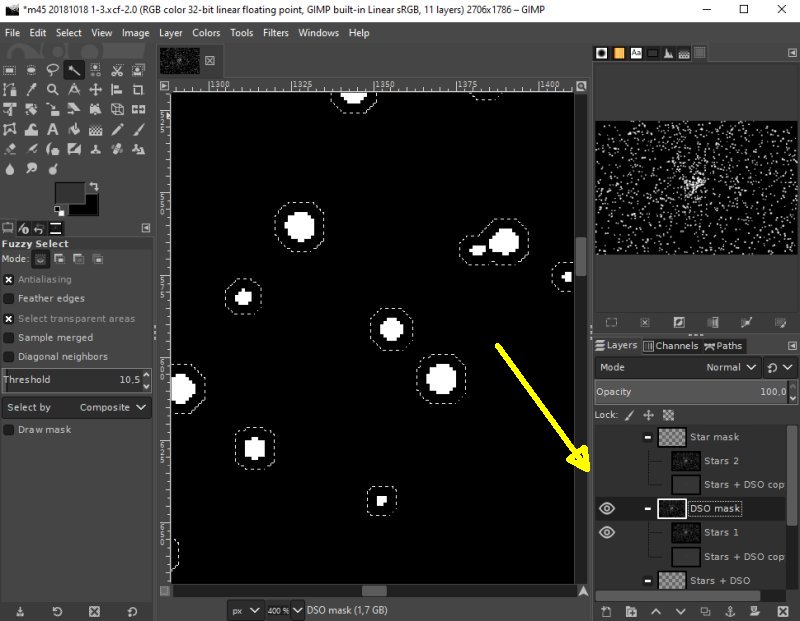
Make a new group of layer, name it 'DSO mask'. Move the 'Stars + DSO copy' and 'Stars 1' layers into it. Make a new copy of the group. Rename it to 'Star mask'. The layer 'Star 1' and 'Star 2' are identical, but can't have the same name. Add a Layer Mask:
Right click on the 'DSO mask', add a layer mask to it. Selection: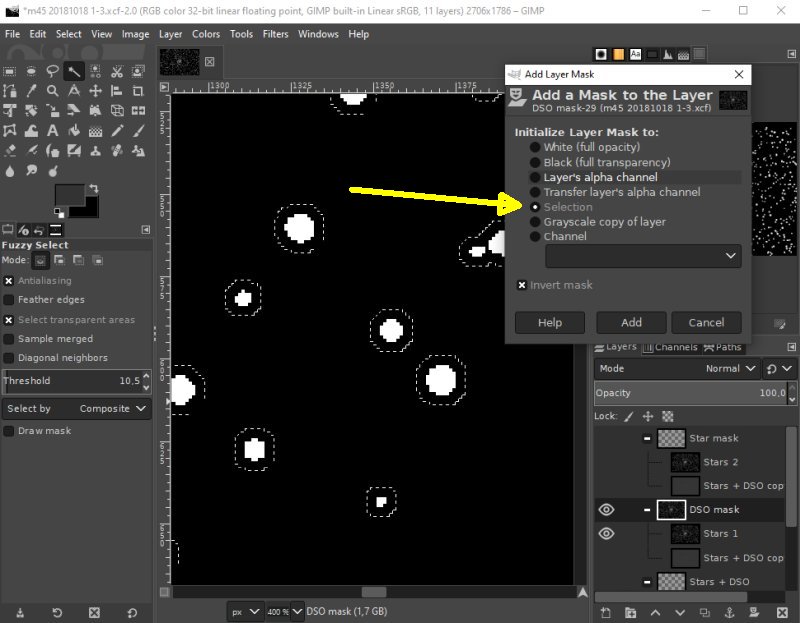
Choose the 'Selection' and click add.
|
|