|
Advertisement / Annons: |
My astronomy project:
|
Content:
Note: |
6: Triple DC/DC converterThe main power to the telescope and its peripheries is 12 volt, or more exactly 13.7 volt. Some devices can take this voltage direct and other needs 5 volt, 8 volt or some other odd voltage. To make it more practical I built a device that can deliver 3 different DC voltages: 5 volt 5 ampere, 8 volt 1.8 ampere and one spare 2 to 12 volt 1.8 ampere. They are all adjustable so it's easy to change for other purpose in the future. Enclosure: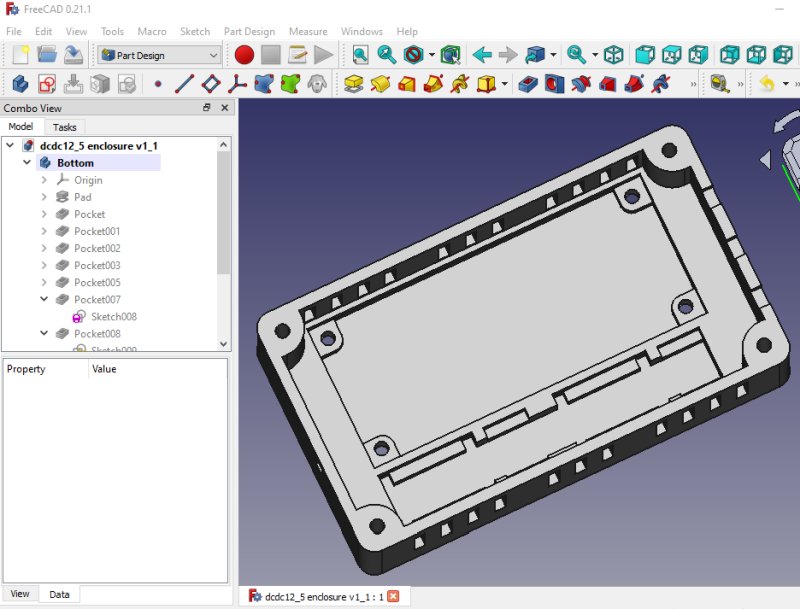
I have some of the electric circuits I need so I have the dimensions of them and can start to design the enclosure. Electronic items: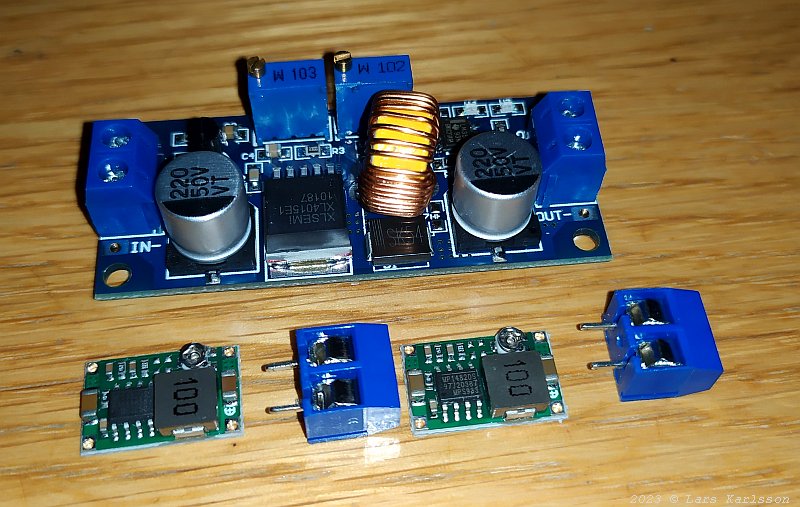
These are the DC/DC converters I will use. They all have adjustable output voltage. The big one also have the opportunity to limit the current. I added two screw terminal to the small ones which make it more practical if I have to change something, and I always do that. Enclosure:
Maybe I made it a bit too tight. It wasn't easy to get the cables in place. The dimensions are: 80 x 45 x 25 mm including a later lid. It had been much better to solder the two small DC/DC converters to another bigger circuit board. 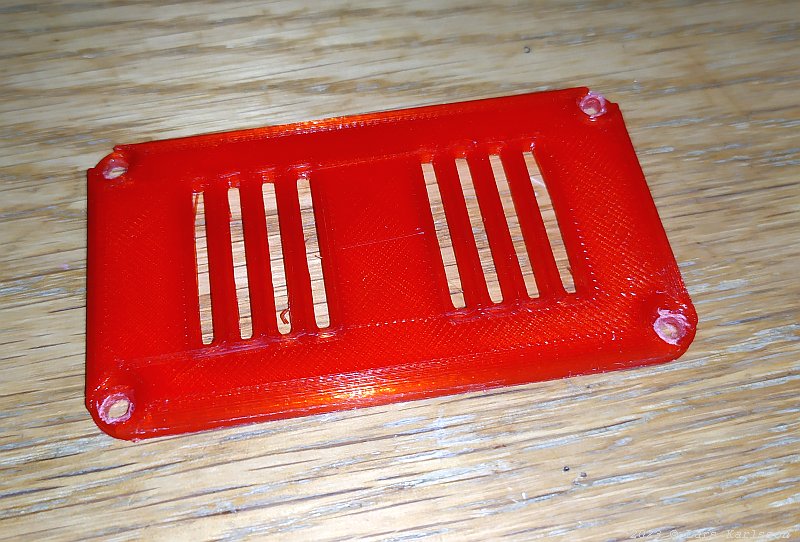
The lid which also has ventilation openings. The top power this DC/DC converter can deliver is 45 Watt. Normal drift is much less. The DC/DC converters efficiency is about 97%, much higher than an old serial regulator. 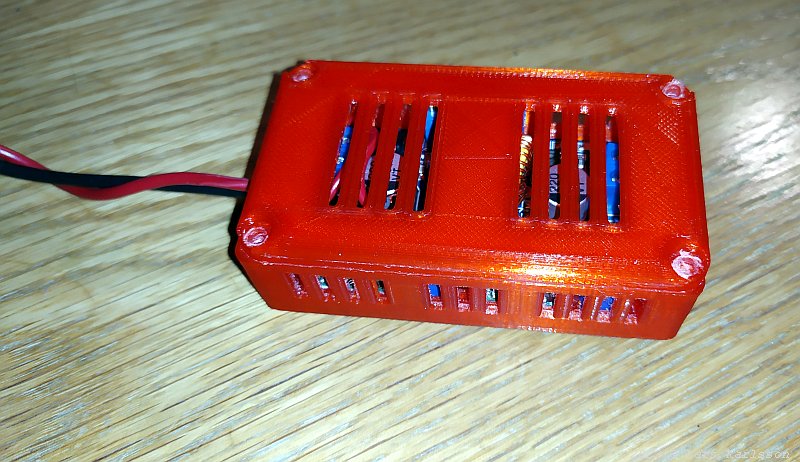
Very compact 80x45x24 mm. It make it easier to place it somewhere where it doesn't take any space that could be used for other devices. 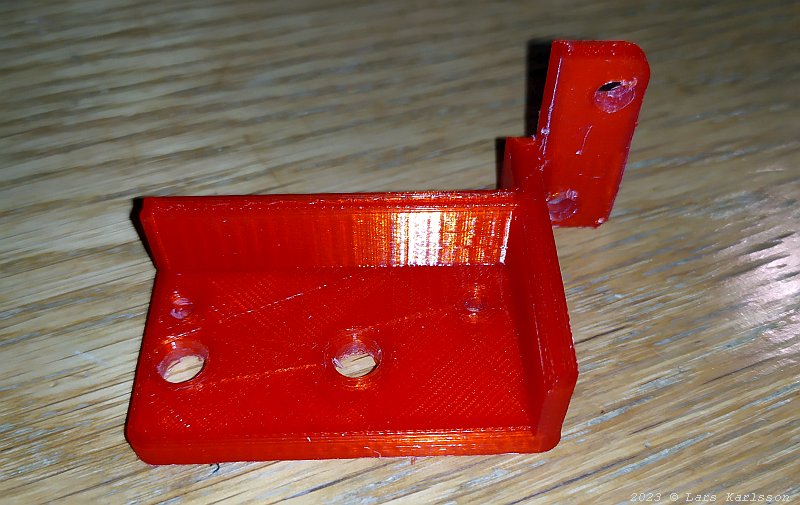
The bracket that will hold the DC/DC converter in place on the telescope. Battery dummy: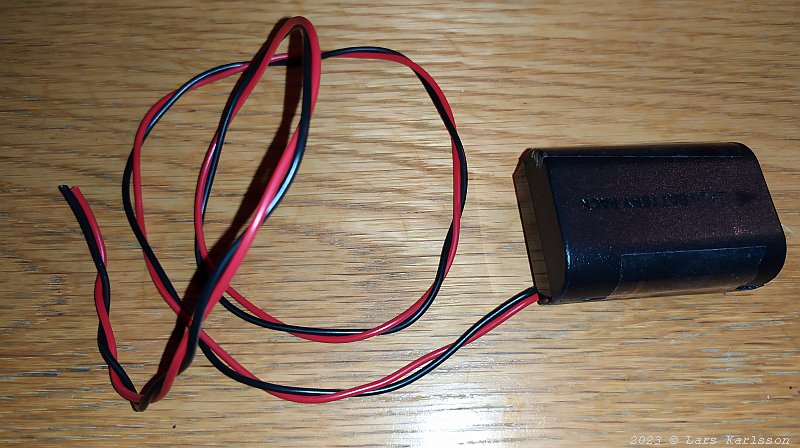
I made one more battery dummy to my camera, a Canon 6D. With that it's only the camera that I need to move between the two telescopes. It need 8 volt input with peaks of 2 ampere when the shutter opens. I placed a 470 uF capacitor inside with a small ceramic capacitor in parallel to deliver power for a short moment and filter out high frequency noise. 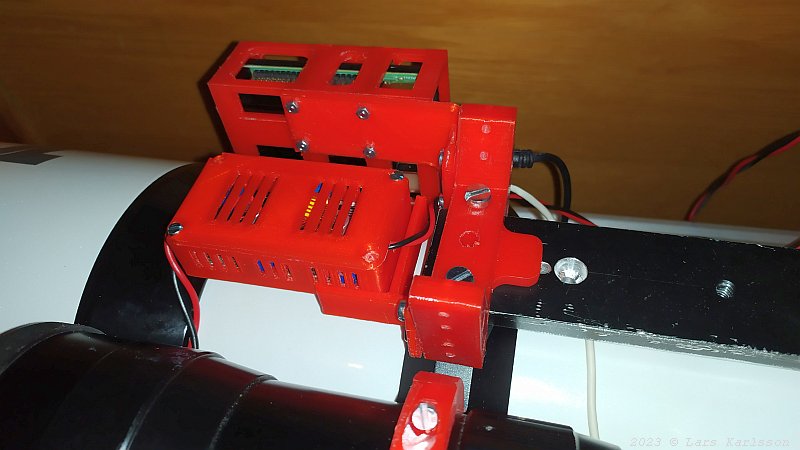
The DC/DC converter is placed on the front stand on the telescope, it's like a little machine room under the telescope. Now the DC/DC converter/ focus motor driver, USB hub and the computer is in place. An option is to add a dew heater regulator, but that can be done later. It can take power from the DC/DC converter which already has one spare output. I have the 5 and 8 volt online but the spare output I broked, it's a nightmare when building it compact like this, don't do it, use more space ! Update: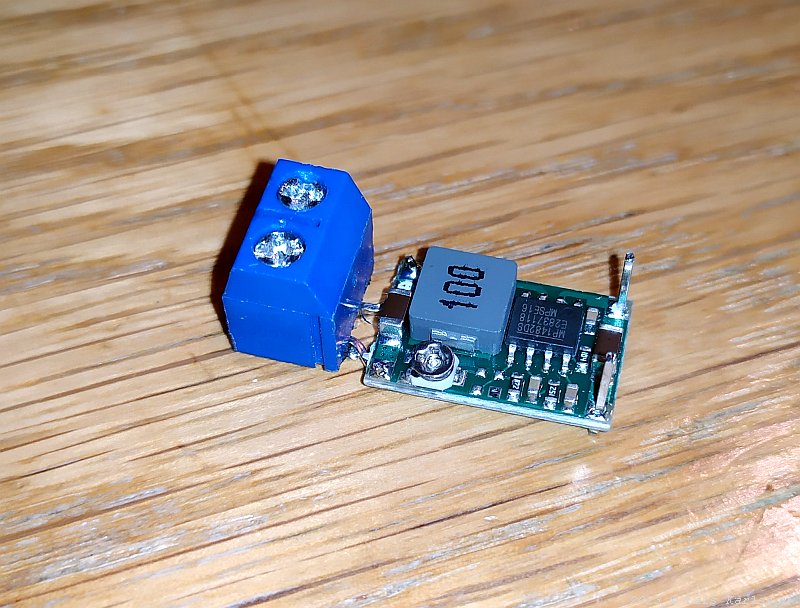
I had to redesign the triple power supply a bit. The thick and stiff cable put too heavy mechanical stress on the circuit boards. First I soldered these solder towers in the holes for the wire connections. 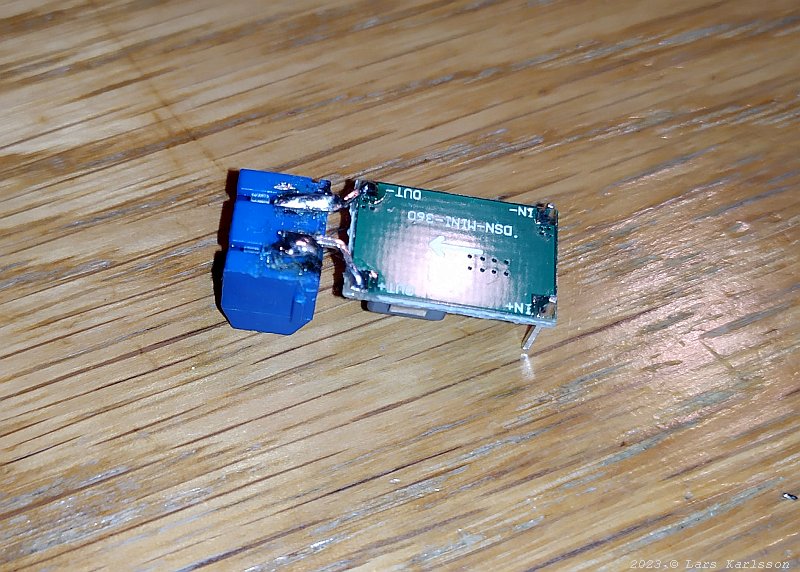
I bent the solder towers to fit to the screw terminal. The distances between the two devices must be exactly 2 mm to fit in the enclosure. Adding cooler: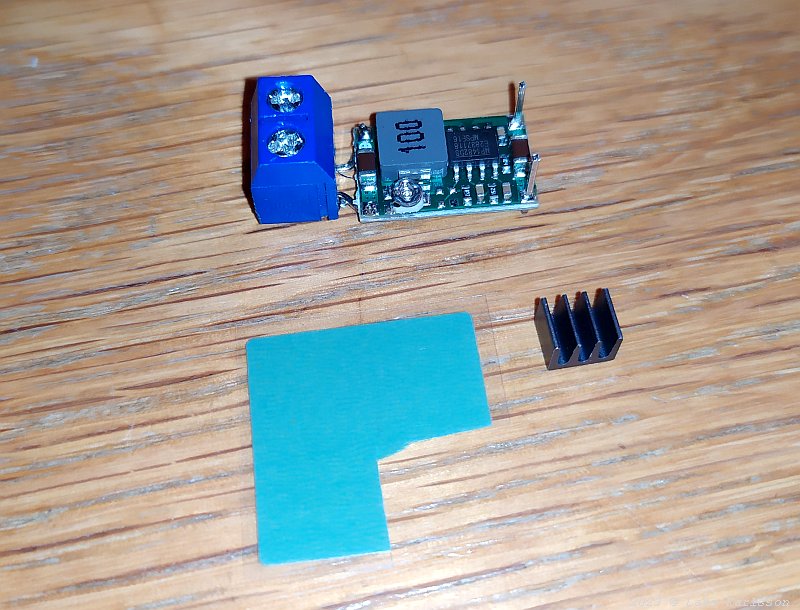
These tiny DC/DC converters can deliver 10 Watt of power, they have high a high efficiency but still they get hot. I attach a passive cooler to the power circuit. It must be smallest cooler ever I had installed, 5x6 mm. The green plastic film is thermally conductive and self-adhesive. With it, the cooler is glued to the circuit. 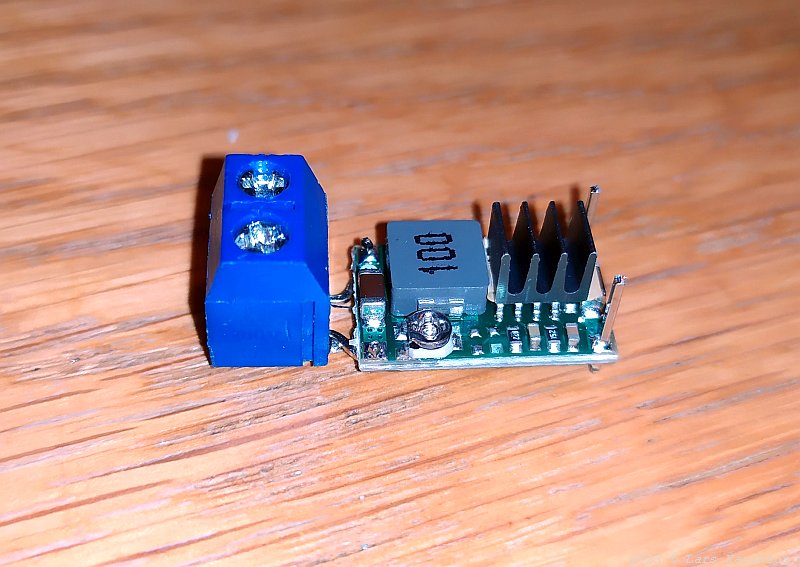
The grey small box is an inductor, an important part of all switched DC/DC converters. 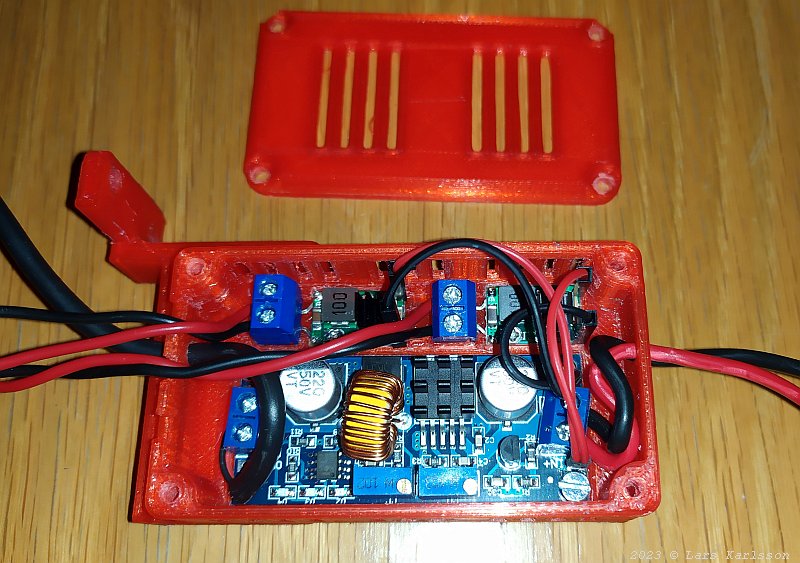
Everything installed in the enclosure and now with coolers. Outdoor test:I have noticed that my 24 to 13.6 Volt DC/DC converter drop from 13.6 to 12.8 Volt outdoors when temperatures are about 0 C deg. That I have read from the built in panel Volt meter. If it's the DC/DC converter or the panel Voltage instrument that cause this I'm not sure about yet. Today I do a test of the panel Volt meter and the new triple DC/DC converter at indoor and outdoor temperatures. Not the 24 to 13.6 DC/DC converter. I have adjusted the output voltage as precise as I could. I use a multi meter as reference which is held in indoors temperature. There is no load on the outputs.
There is no indication of temperature instability from these measurements. The 24 to 13.6 DC/DC converter use the same circuit as the 5 Volt above.
|
|