Astrofriend's homepage

www.astrofriend.eu
Share: Twitter Reddit Facebook Gmail Gmail Email
Search Astrofriend's homepage:

Valid CSS!

All pages shall now have been validated

Info Cookies (Kakor) / GDPR

Navigation

Advertisement /
Annons:

Twitter @AstrofriendLars

Follow Astrofriend

Tutorial News

Advertisement /
Annons:

Advertisement / Annons:

3D CAD:
GT2 pulleys for focusing a camera lens


Contents:

  1. Calculating number of teeth
  2. CAD of 15 teeth pulley, part 1
  3. CAD of 15 teeth pulley, part 2
  4. CAD of 15 teeth pulley, part 3
  5. CAD of 15 save and prepare to print, part 4
  6. CAD of 174 teeth pulley, part 1
  7. CAD of 174 teeth pulley, part 2
  8. CAD of 174 teeth pulley, part 3
  9. CAD of 174 save and prepare to print, part 4
  10. CAD of 174 clean from support material, part 5
  11. CAD of 174 new version, part 6
  12. CAD of 174 slicing and printing, part 7
  13. CAD of 12 and 15 teeth, new design, part 1
  14. CAD of 12 and 15 teeth, printing, part 2
  15. CAD of 180 teeth pulley, part 1
  16. CAD of 180 teeth pulley, part 2
  17. CAD of 180 teeth pulley, part 3
  18. To be continued

Note:
I take no responsibility or liability for what are written here, you use the information at your own risk!


13, CAD of 12 and 15 teeth, new design, part 1:

Now after I have collected some skills in making drawings I try to develop the technique how to do it more effective. It will be many drawings I do in the future and good if it don't take so long time.


12 teeth pulley, new design:

3D CAD: Making a drawing for GT2 pulleys to the focuser of lens

I started as earlier with the macro and make the pulley, but now a 12 teeth variant.


3D CAD: Making a drawing for GT2 pulleys to the focuser of lens

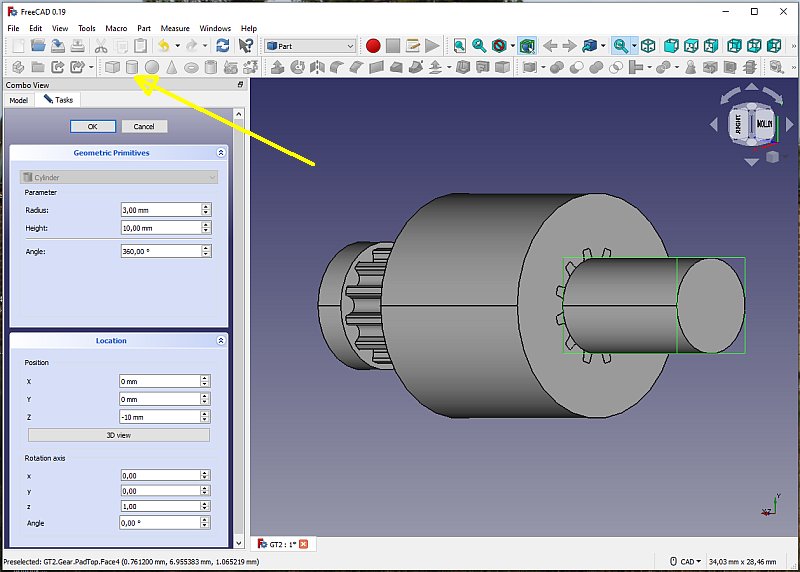
Instead of the hole tool I do the hole with the subtraction method. I will save a couple of steps.


3D CAD: Making a drawing for GT2 pulleys to the focuser of lens

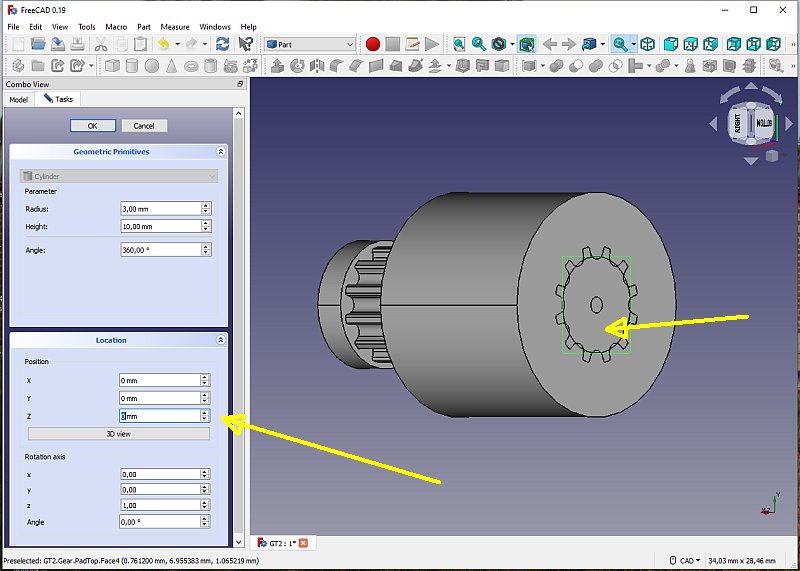
Push the cylinder inside the pulley.


3D CAD: Making a drawing for GT2 pulleys to the focuser of lens

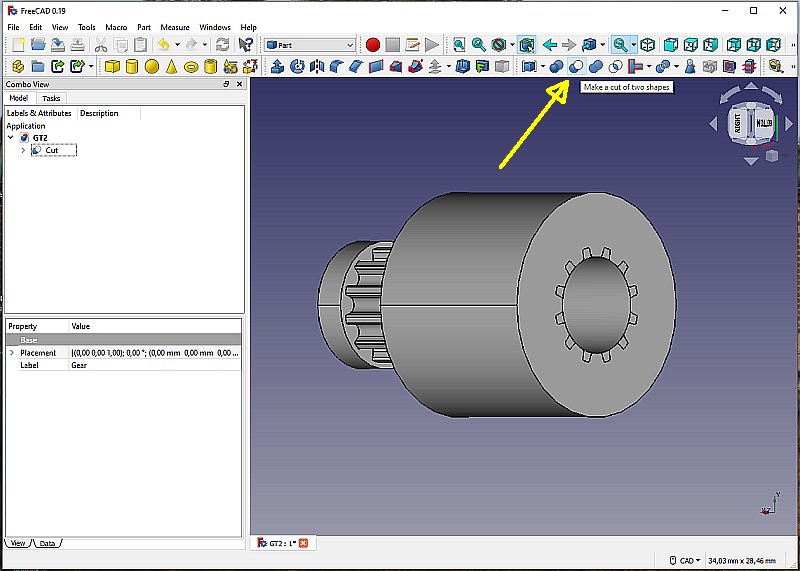
And subtract the cylinder and then the hole is there.


Starting an eleven hours printing:

3D CAD: Making a drawing for GT2 pulleys to the focuser of lens

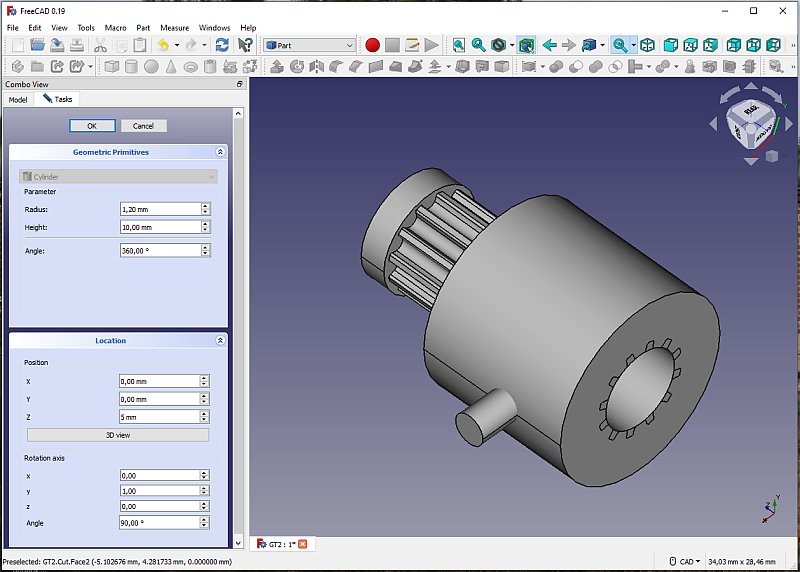
I also make the stop screw hole with the same method.


3D CAD: Making a drawing for GT2 pulleys to the focuser of lens

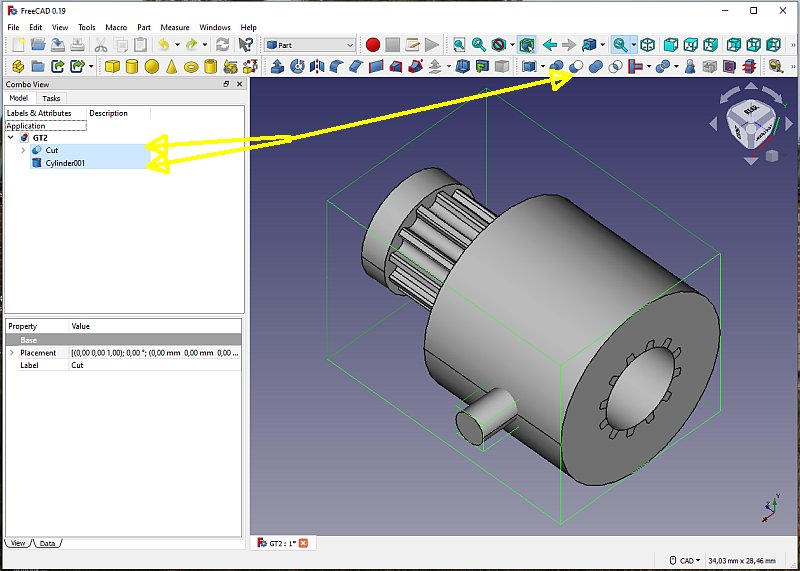
Mark the two drawings and subtract.


3D CAD: Making a drawing for GT2 pulleys to the focuser of lens

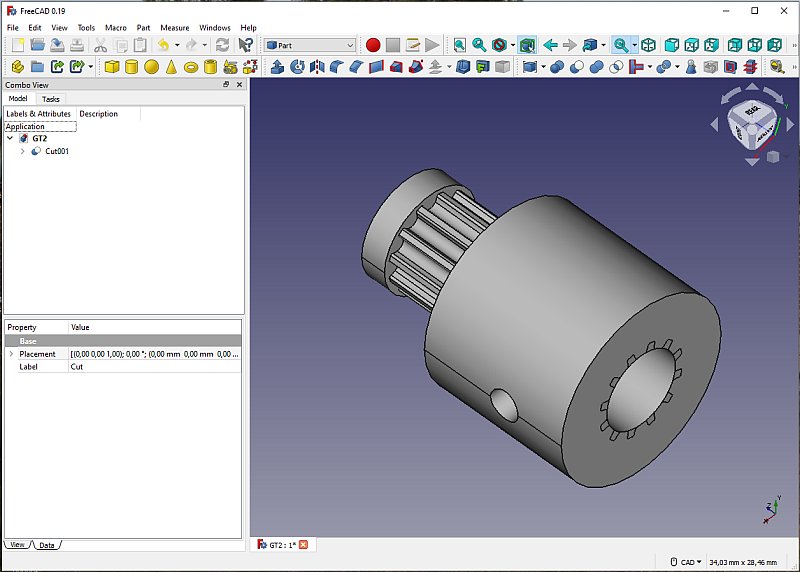
The new pulley almost finished.


3D CAD: Making a drawing for GT2 pulleys to the focuser of lens

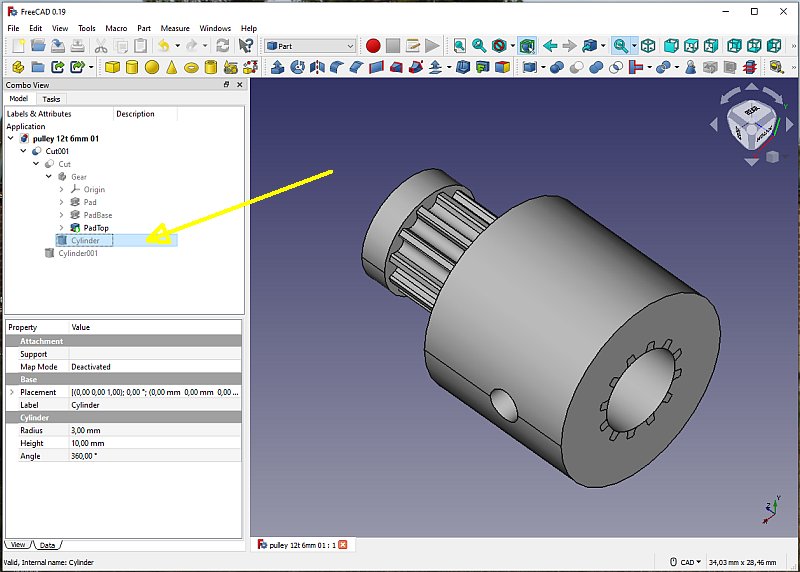
But what if I want to change something ? Example, the axle hole of 6 mm, if I want to increase it slightly, say to 6.1 mm. Can I do it simple and reuse my drawing ? Double click on the cylinder.


3D CAD: Making a drawing for GT2 pulleys to the focuser of lens

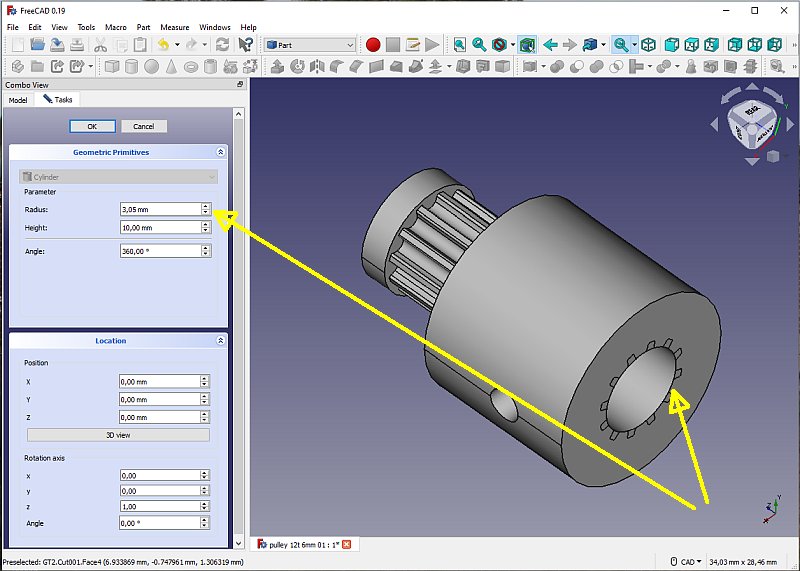
We are back in the menu where we created the cylinder. Increase the radius to 3.05 mm. Click OK button. That was all, the drawings is updated with the new information. I have not find a similar way if I want to change the number of teeth on the pulley.


3D CAD: Making a drawing for GT2 pulleys to the focuser of lens

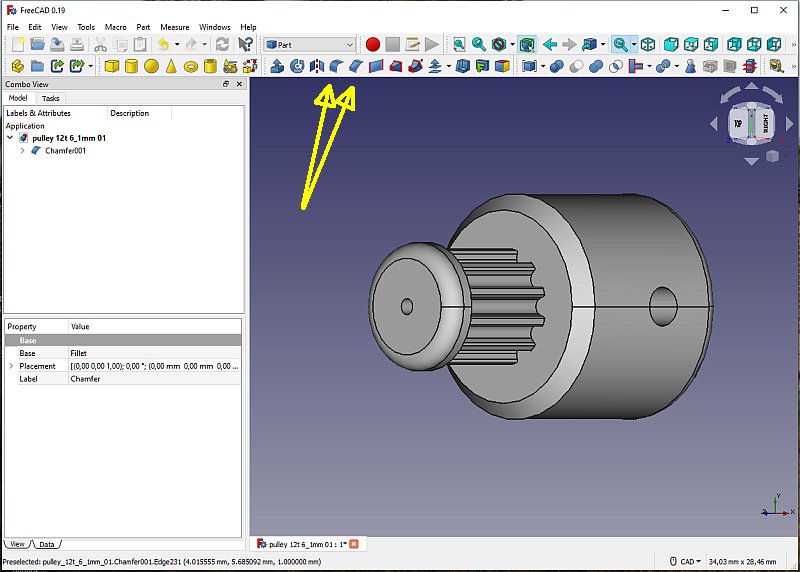
Rounded of the edges.


15 teeth pulley, new design:

3D CAD: Making a drawing for GT2 pulleys to the focuser of lens

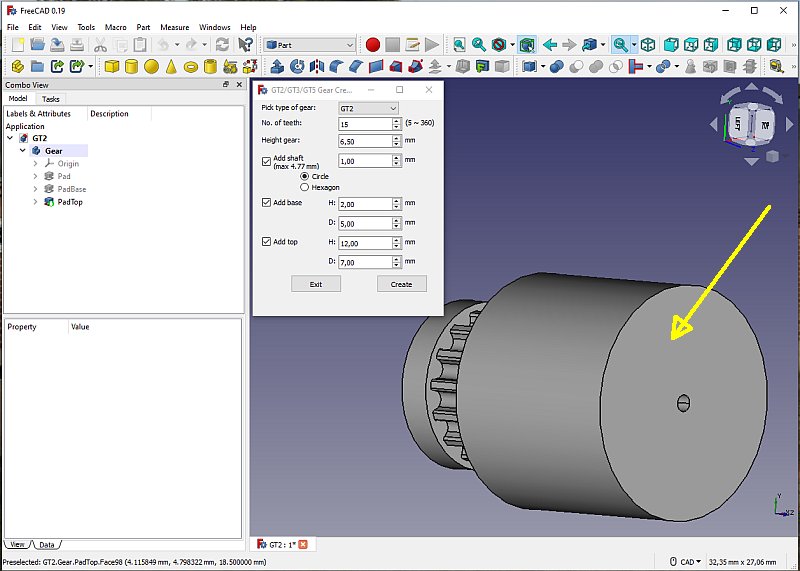
Are there more alternatives how to make the pulley, for sure, every person has its own idea how to do it. Now I try a different way, I couldn't use the hole tool to make the hole in the axle. That hole tool can also make threads in the hole and that can sometimes be good. At the base the teeth was all the way out to the end and stopped the hole tool, to override that I can make a sketch as I did in the first version. This time I build the pulley backwards, let the top be the base. As you see on the drawing the end is flat now.


3D CAD: Making a drawing for GT2 pulleys to the focuser of lens

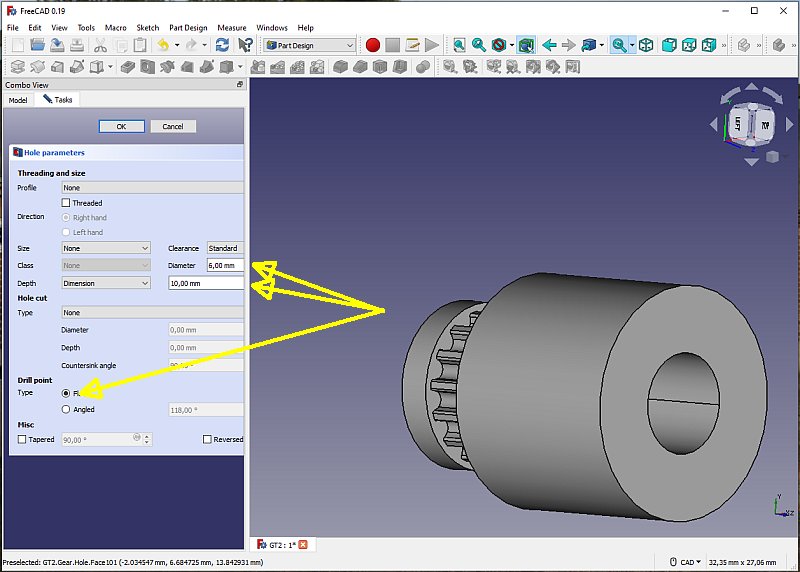
Now the hole tool worked. Just click on the end, use the hole tool. You must be in Part Design mode. Now it's possible to make threads in the hole if it's necesary.


3D CAD: Making a drawing for GT2 pulleys to the focuser of lens

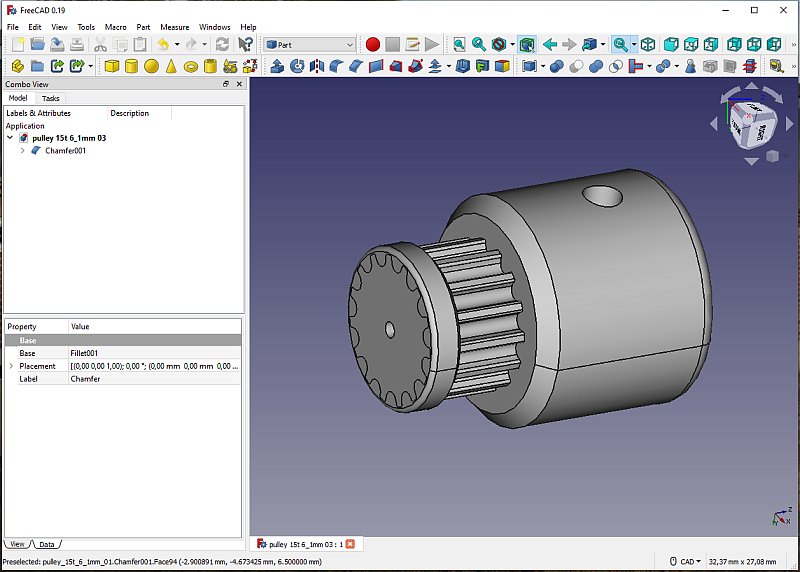
Rounded of the edges and save it and do a STL file. When I 3D print next time I will try to print both these pulleys at the same time.

Go Back to content

Go Back
To page XIV, part 2

Advertisement / Annons: