|
Advertisement / Annons: |
Project:
|
Content: |
5: Second design and 1st testAfter a long delay I have now started up the flat field box project again. As always it come new ideas and I have to change the design once again. Now I made it more like a modular design where I can replace each module individually. Modular system: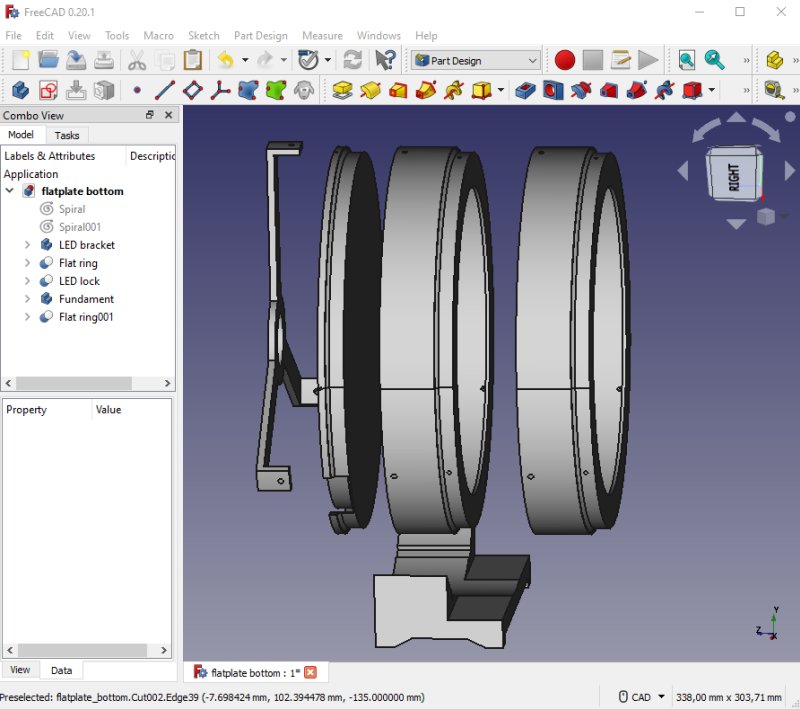
The new flat box system. From left: What's missing here is the connection to the optic, a lens. A telescope can connect directly or via a third extension tube. At bottom a stand for the flat box. I have added all needed screw holes direct in the CAD drawing. 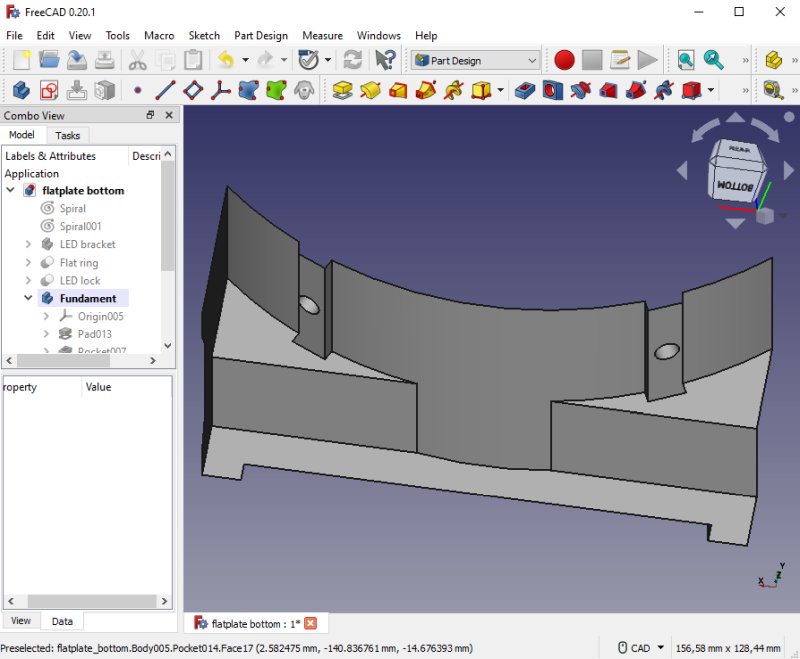
The fundament that the flat box are attached to. The optical center is placed 200 mm above the ground, enough even for my big APO refractor. Two M3 screw attach it to the extension tube. 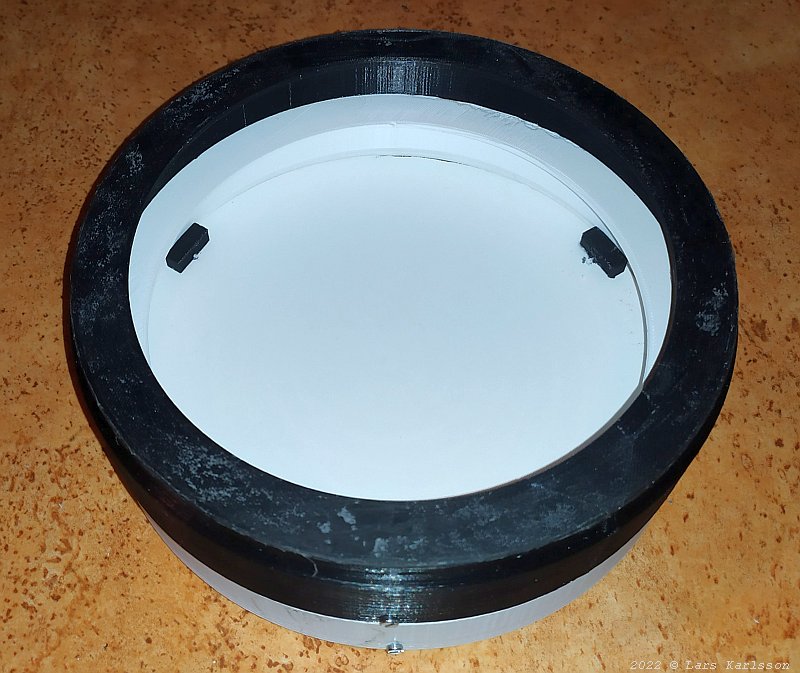
The printer has finished the first part, 2nd extension tube for the 3rd diffusor. The old, the white part I hadn't implemented the screw holes in, always difficult to get in correct places afterwards. When already in the design they will always be correct placed. The small black devices with threaded holes is only a temporary solution. 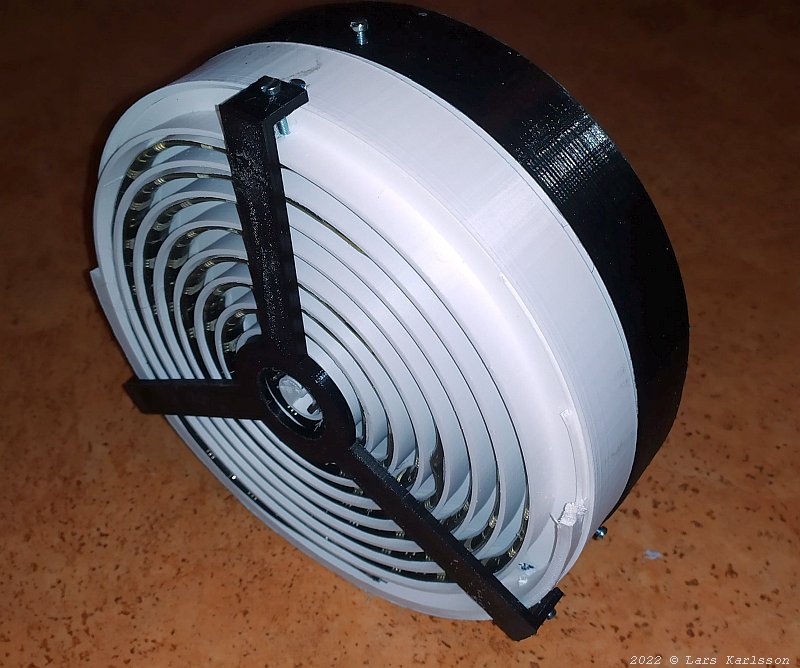
From behind, the bracket that hold the LED stripe in place. The white parts is the prototype and has wrong dimension, if all works well I 3d-print a new one with correct dimensions. Tomorrow I print the stand for it and after that I can start doing some test. The big problems has always been the bright spot in center. With this new modular design it's easy to add one more extension tubes, with or without diffusers. The ones without diffusers only extend the chambers. The first one will always be white to let the light bounce around to even it out. The following chambers will always be black. If I had a 3D-printer that can print with two colors I could have done the white parts with a black outer layer to shield it from out coming light. 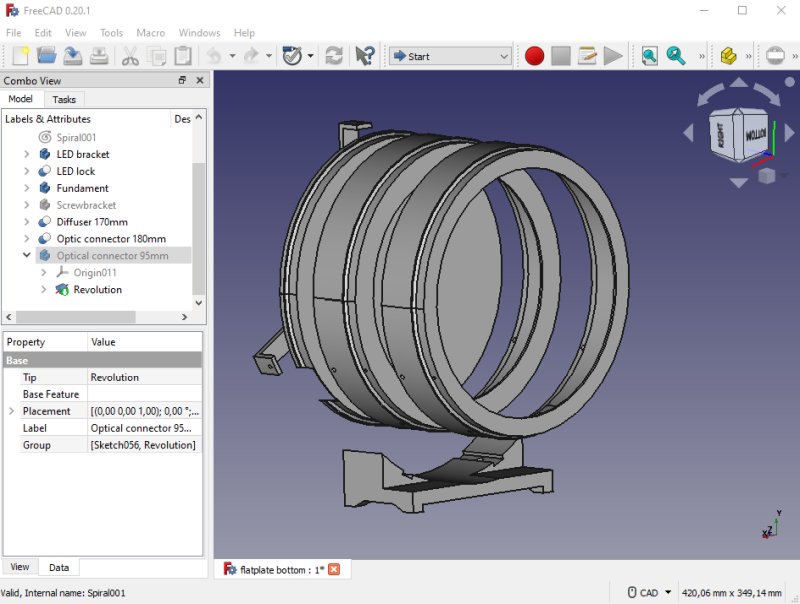
The front extension tube hold the 3rd diffuser, later one more empty extension tube will be added to connect to the telescope. It's a 130 refractor with an outside diameter is 175 mm, the opening in this ring is 170 mm. The 3nd extension tube has an opening of 180 mm. In the new design all of them has an opening of 180 mm, to have all of them with the same design. 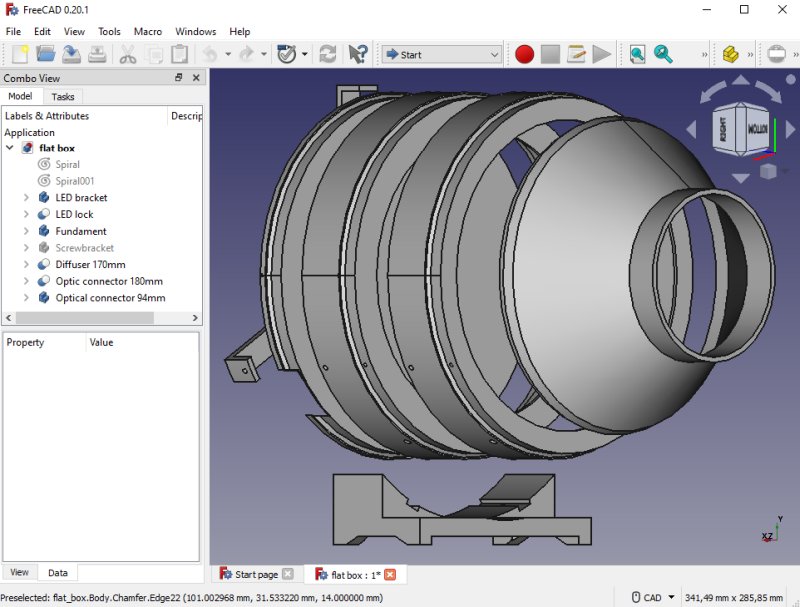
My 300 mm focal length lens has an outer diameter of 93 mm, I let the opening in this adapter ring be 100 mm. I can use it to all my other camera lenses as well. 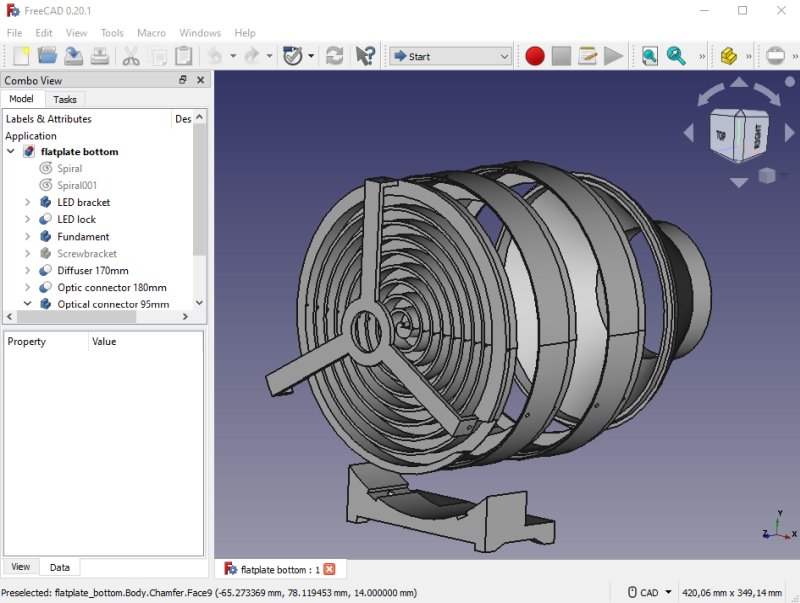
All modules together, about 180 mm long. It had been much easier to just buy one standard flat field plate. But then I miss the opportunity to adjust the color, but that's how most astro-people do. I feel it's fun to design my own tools and I learn a lot from it and get it more adapted for my situation and needs. First test: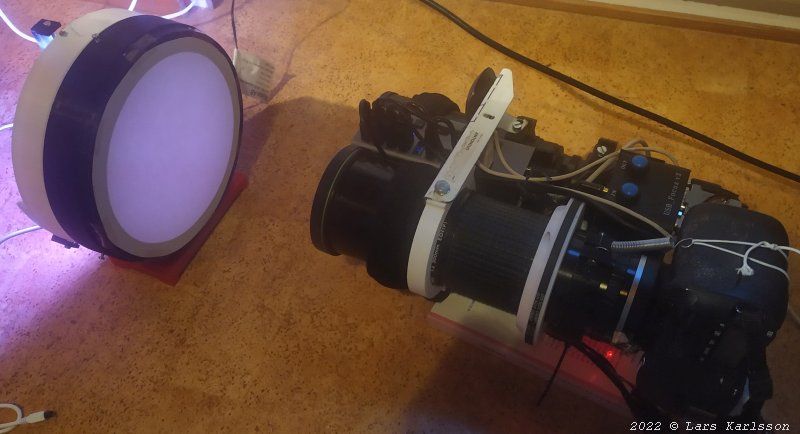
The flat box has now three diffusers, must be enough. The light output is low which it should be, too bright force me to use very short exposures. A LED device like this has the current switched ON/OFF at a high frequency to regulate the brightness output. This switch frequency can interfere with the camera exposure time if it's too short. I prefer about one second. 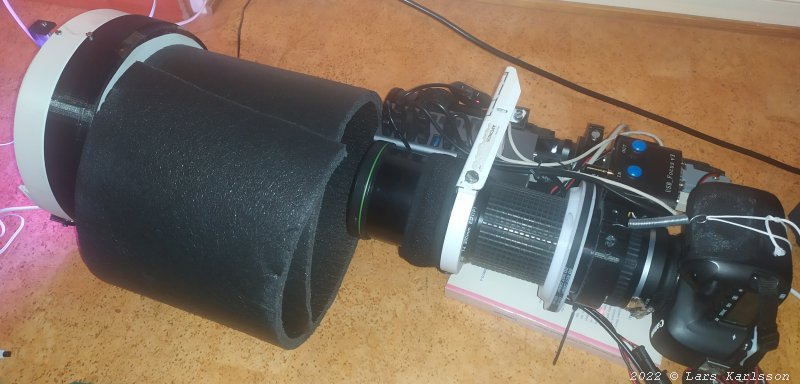
The drawback with low light output from the flat panel is that is very sensitive to disturbance from surrounding light. It must be very effective shielded from this. I'm not finished with all 3D-printed parts. Until then I put a black plastic tunnel between and a thick dark towel on top. 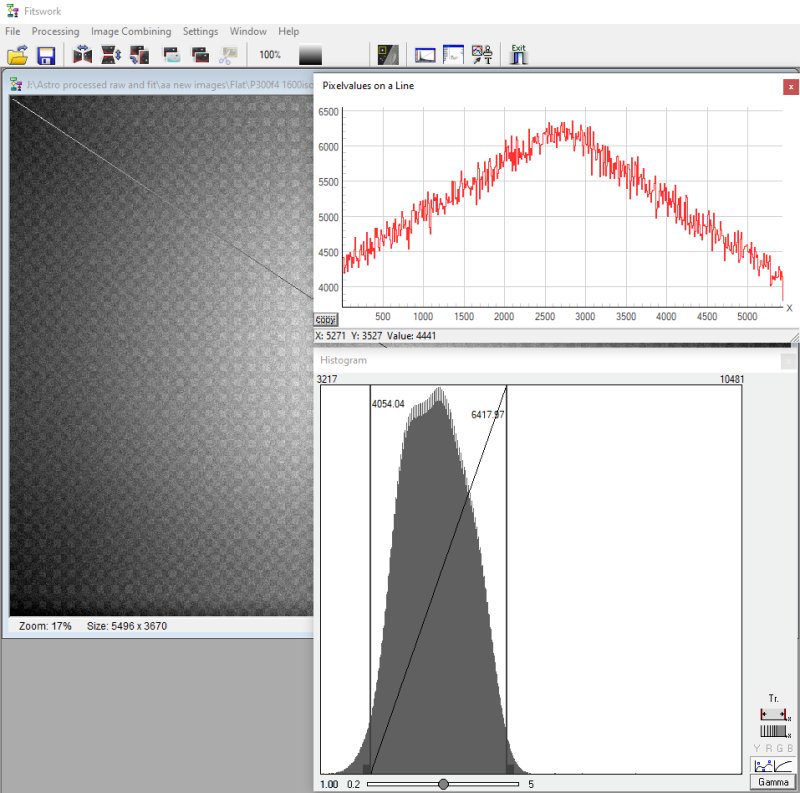
I can regulate each color channel output with high precision. This LED stripe has a much better control device compare to others that I have tested, see page 1. After some testing with different setting I got this, all three RGB channels line up on top of each other. This is the CFA image I analyze in my favorite software Fitswork, old but still a charm to work with. The highest level it's in the center where the signal peak, 6500 ADU with bias subtracted. To high and there can be issues with the sensors linearity or saturation, especially at low ISO, about 800 ISO and lower. Too low level and the dynamic range will suffer, say a level of 500 ADU at center. That can happen with a flat field box where it's not possible to adjust each color channel. One more thing, when working in bulb mode the time precision isn't very good, not recommended for shorter exposures than 1 second. 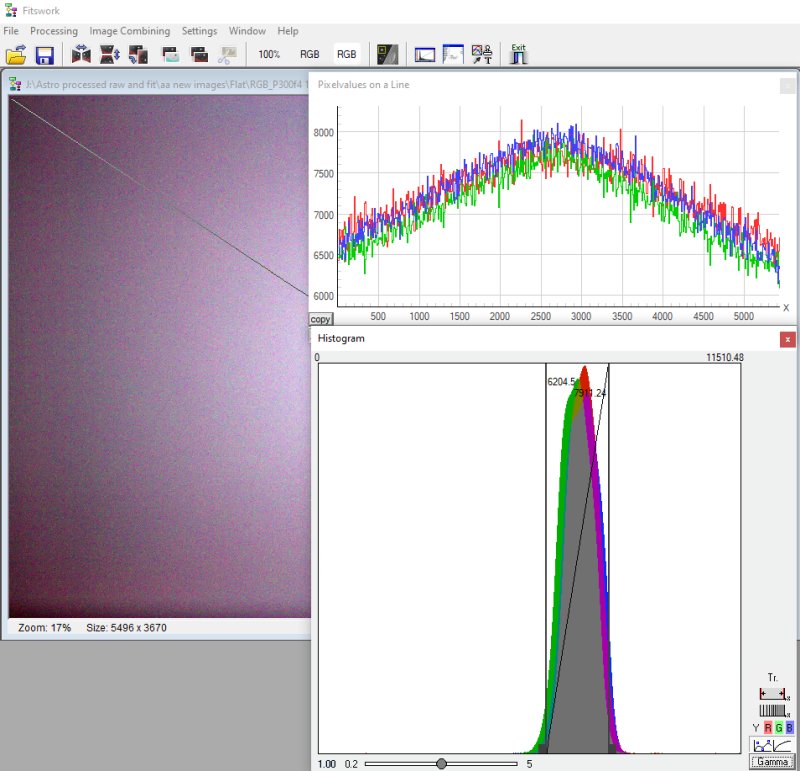
When the image is debayered the RGB gain is set to=1 for each channel and I get this. Looks very good except for one thing, in the line graph at top right there is a sharp peak in center. The line graph goes diagonal from one corner to the other and in the middle it pass through the center of the image. When taking sky flats the center top is more rounded of. This sharp peak can cause over correction when flat calibrating, the center of the calibrated image can get a white spot. I'm not sure why this happen, maybe some unwanted internal reflections in the flat field box. I got this problem even I used computer screens and other flat light sources.
Later:
|
|