|
Advertisement / Annons: |
Project:
|
Content: |
1: Alternative light source, RGB LED stripeI have tried some different technique when making flat frames. I have tried an ordinary light bulb against a diffuser, monitor screen, sky flats, T-shirt trick etc. No one has been perfect, now I try to built a Flat field box around a LED stripe with a control unit and the needed parts is 3D-printed.
Note: Here is I how did flat frames earlier: Flat field calibration. Flat field frame analyze: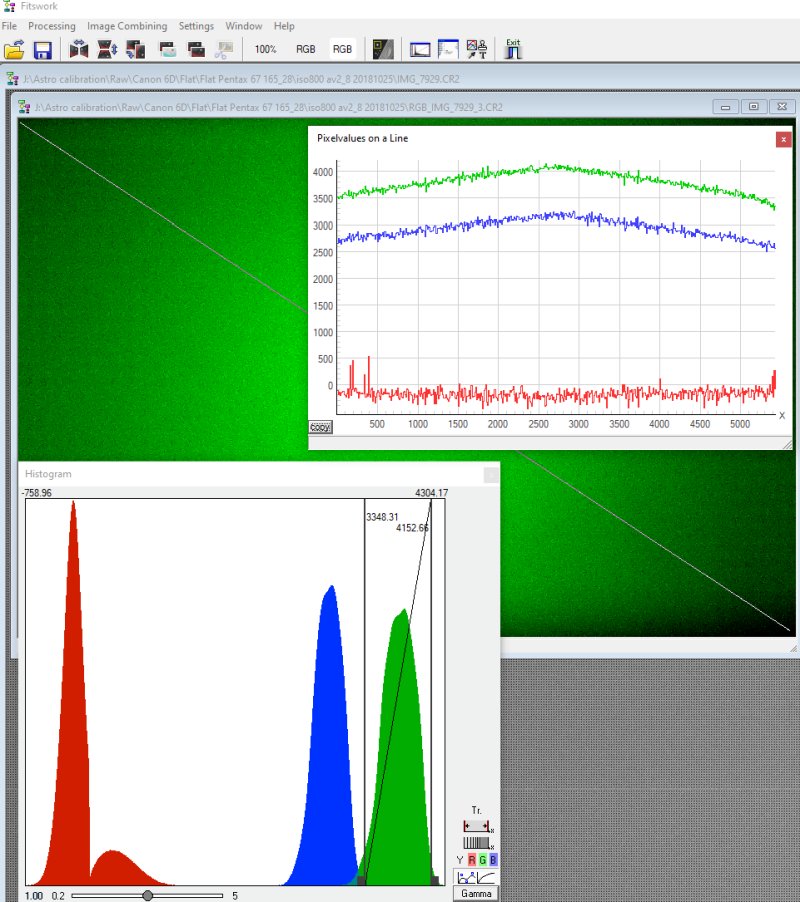
Very often is a white light source used to take flat images. It's fine with monochrome cameras where you can adjust the exposure time to fit each color filter. But with color cameras you take all three colors at once. The sensor has normally much higher sensitivity at the green wave lengths and then the red and blue channels get weak signals. It could look like this, not easy to do a high quality flat frame for the red channel. And that is why I doing this, a light source that have adjustable RGB color strength. RGB LED stripe: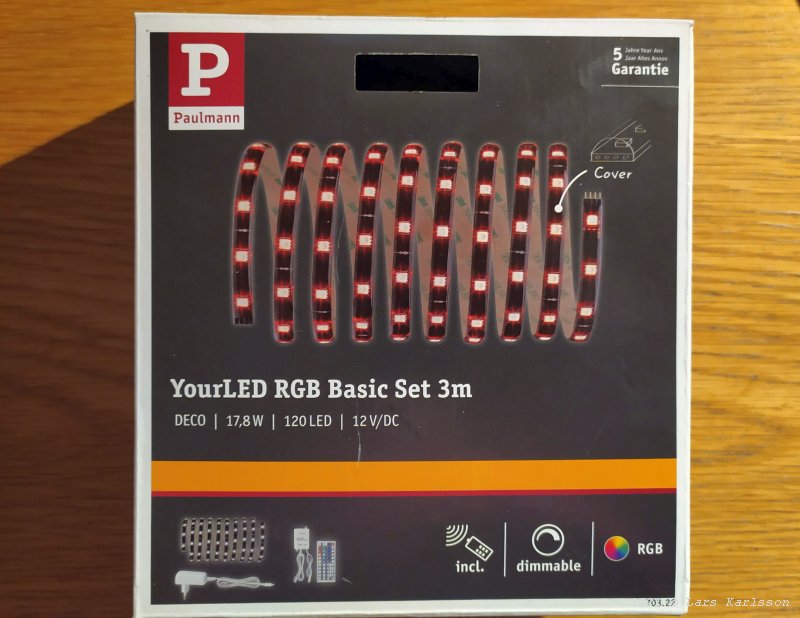
This is the LED strip I will use. This stripe I can wrap around and make a short built length. 
This LED source has much better control of the red, green and blue levels. Each can be controlled separately. There is an adapter included for 230 Volt AC, it deliver 12 Volt DC 2 Amps. So I can easy convert it to be powered from a 12 Volt battery if I want to use it out on the field. 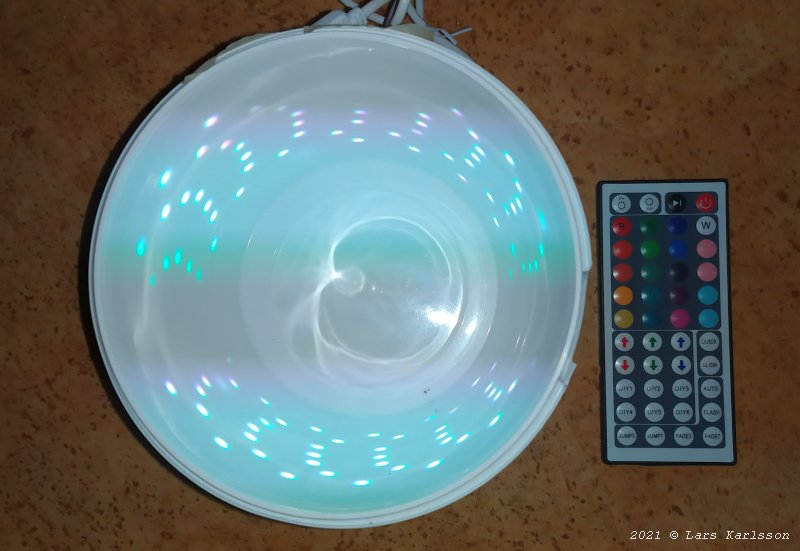
But what shall I use to built it around ? To do the first tests, I use a plastic jar, it was found in the kitchen. It had the perfect size, it's white, transparent and symmetric. I wrapped the 3 meter LED stripe around it on the outside.
Note: 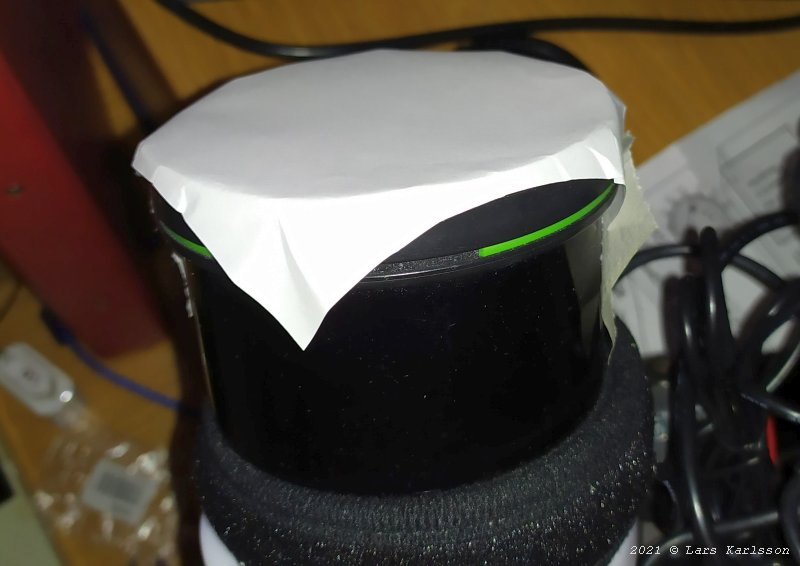
I must also have a diffuser, I start with a white paper taped at front of the lens. Later this must be more advanced, at least two of them stacked on each other with a gap between. 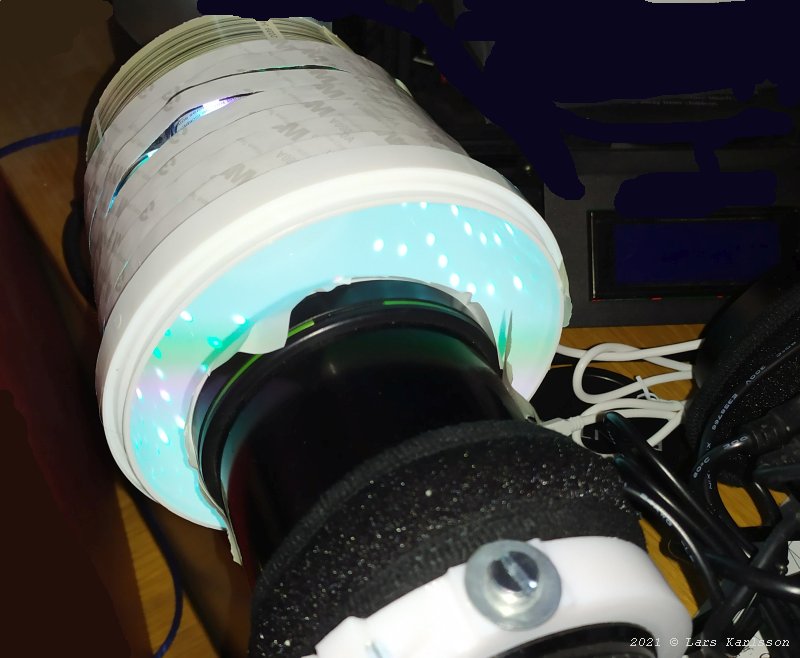
Now it's ready for a first test. At this opening I plan to 3D-print a lid with an opening and holder for the lens. At the backside of it a holder for the diffuser. 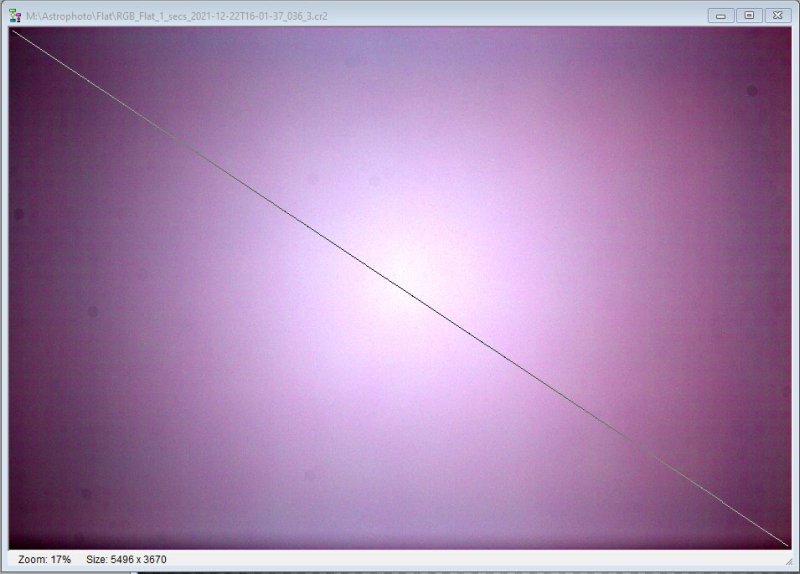
Testing a lot of different color temperatures. The color sensor in the camera is more sensitive to the green channel, the green light power of the light source is reduced and make this purple look. 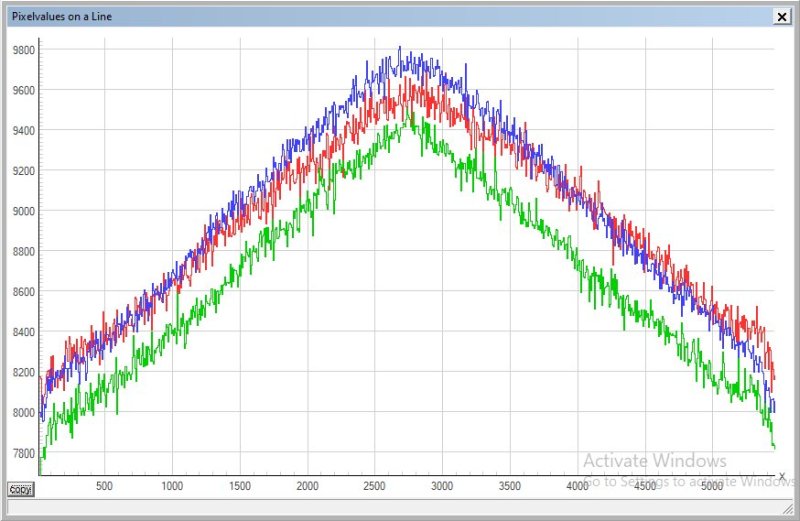
I import the photo to Fitswork, do a debayer transform with the gain set to =1 for the red, green and blue channel. This graph is the level along a diagonal line on the sensor from one corner to the other. It cross the optical center in middle. I try to have the top at half maximum of the dynamic range. With a 14-bit ADC as this camera has and a bias of 2048 ADU the half level is around 7000 ADU, (16384 - 2048) / 2 = 7168, in this graph the bias of 2048 is already subtracted. A bit high level, I can lower the LED brightness next time. The peak in the center look a bit sharp, maybe it cause problem later when flat calibrating. 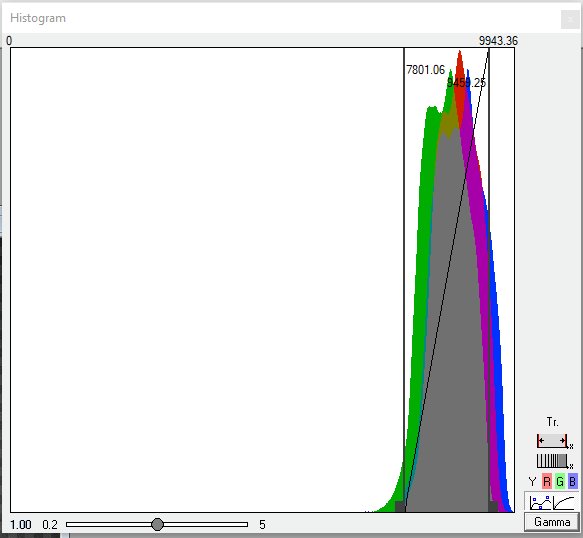
A histogram show that all the three colors match each other in level. If you look at the camera which normally has a logarithmic histogram they are all to the most right at the display of the camera and useless for this purpose. This histogram is made with Fitswork. 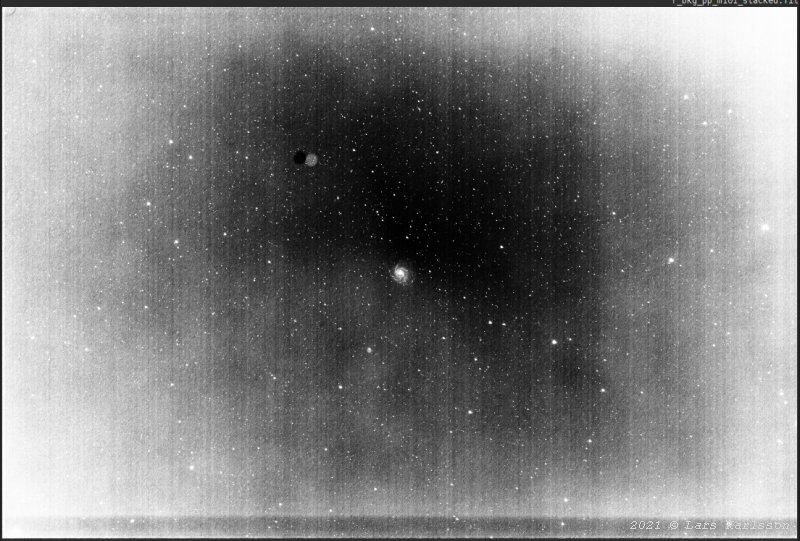
I used the software Sirilto calibrate an image I took of the galaxy M101 with a 300 mm lens. Then I stretched the image to see all artifacts. As I suspected the peak in the line graph above was a bit high and sharp, that cause this dark pit in the center. The image got a bit over compensated when removing the vignetting. But still this is very good, all color channel in balance and there are a lot of small tweaks I can do about the jar and the diffuser. I think I 3D-print some part to make this to work better. The dark line at bottom came from the mirror in the DSLR, it shadows the sensor. The mirror will be removed, no need of it. Something cause the center of the flat to be too bright and that cause the over correction when doing flat calibrating (the dark hole in center). Is it that the diffuser is placed to close to the front lens ? Reflections from the front lens bounce back and fort against the diffuser. The front lens is convex and it give more reflections that hit the center. Maybe I'm wrong but I will test this with a new design of the flat box. Let's do a simple test. 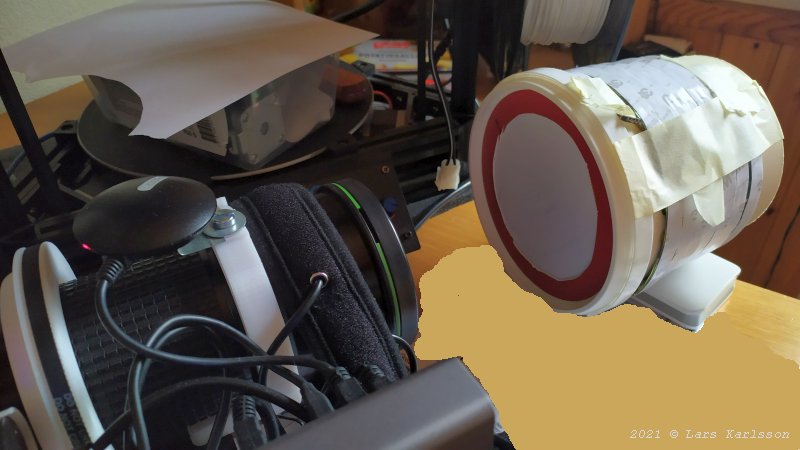
I moved the front diffuser more far away from the front lens and make a new flat. 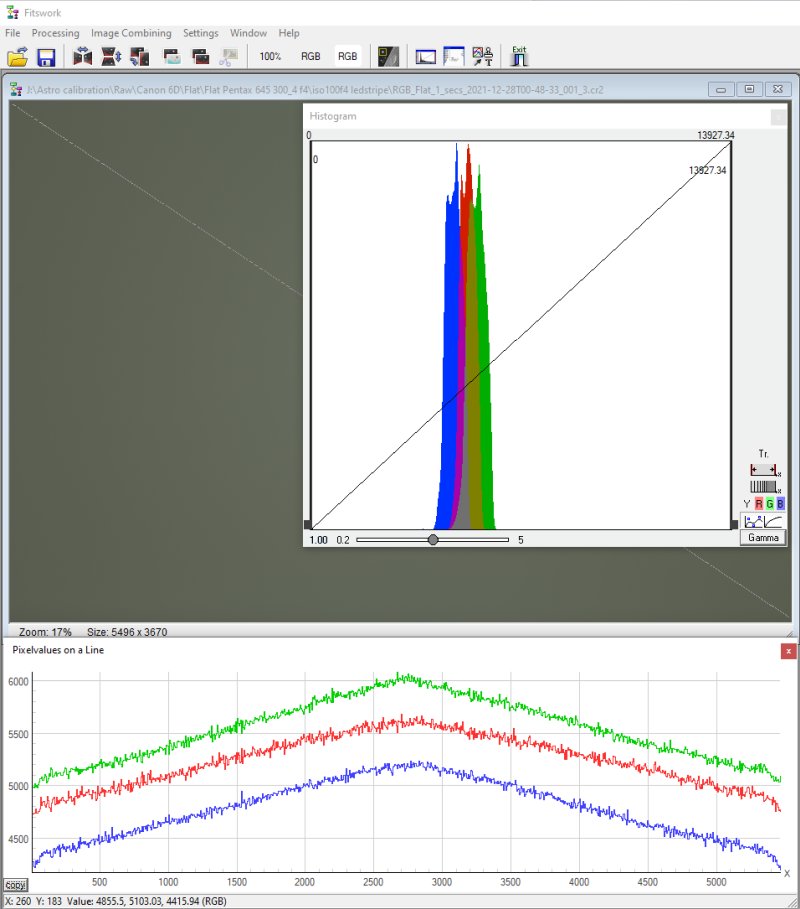
Still the same sharp peak in the middle, it must be something else that cause this peak in center. 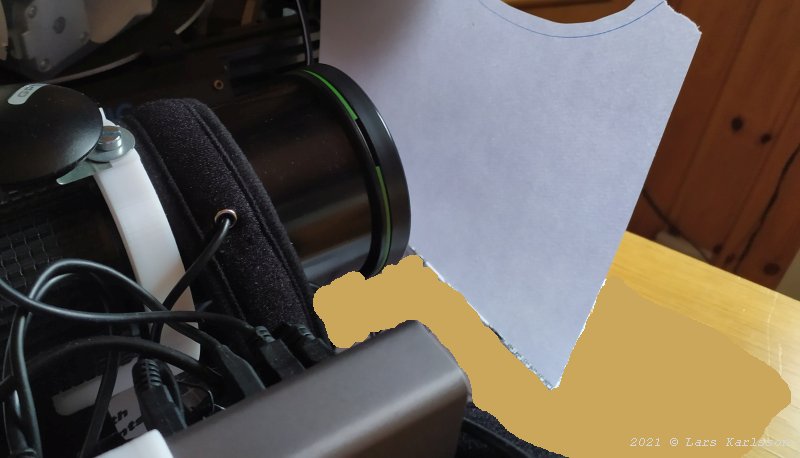
Another test, just a white paper with natural light from backside. 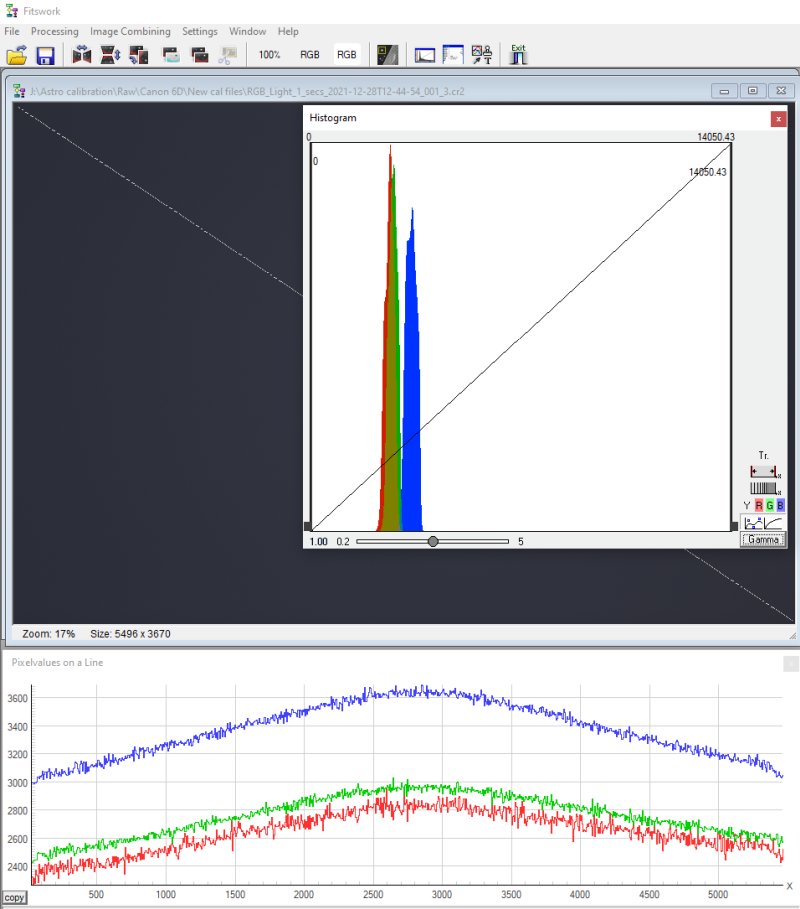
Now the top get more rounded. 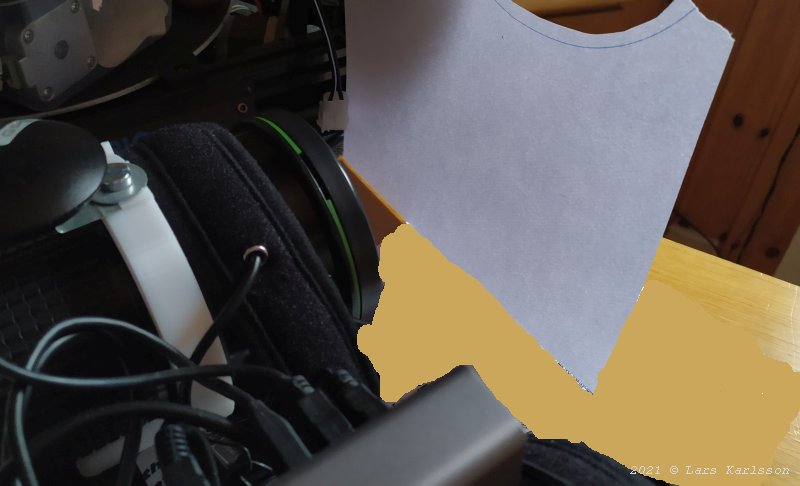
Did also another test with the shield retracted. 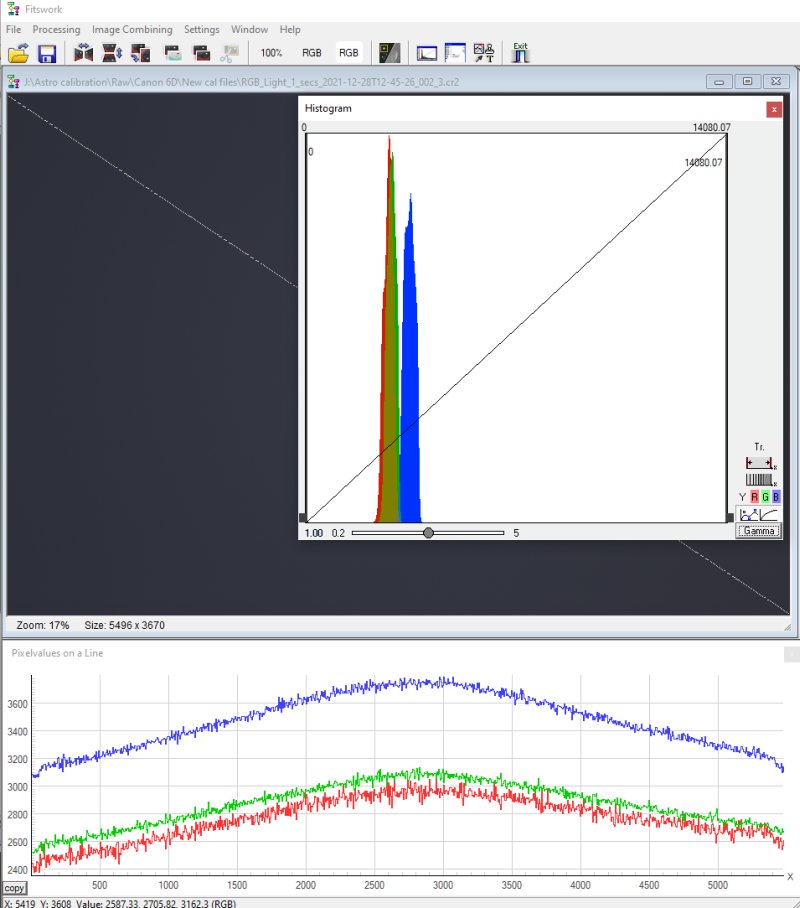
Not very different. From this I now know that my flat box isn't good enough. The color balance is possible to set correct (which I didn't do on the last test photos) but the light is uneven with the bright spot in center.
|
|