|
Advertisement / Annons: |
My astronomy project:
|
Content:
Note: |
9: Red Dot FinderOne thing I noticed now when I have started to use my Star Adventurer, it's very difficult to aim to the object with a 150 mm lens. With my EQ6 mount and computer control I don't have to think about it. But here it's a problem. I got an idea from a person at the Swedish forum Astronet, he told me to try a Red Dot Finder. Here you find Astronet, sorry, only in Swedish:
They have Red Dot Finders at Stjärnhuset in Sweden. There are many different models and I choose the model with a Hot Shoe Holder, with that I can mount it direct on the camera. Maybe I don't get the highest precision, but enough. Stjärnhuset (Starhouse), sorry, only in Swedish:
I ordered one and got it a few days later, just about 13 Euro + shipping cost, look under AstroBoot at Stjärnhuset. 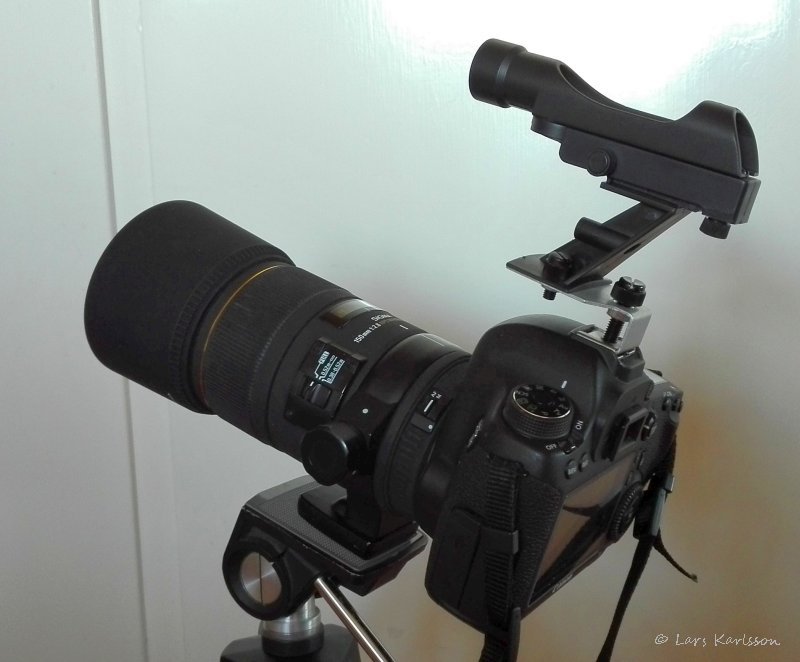
Here how it looks mounted on my DSLR camera. I have never used such a device before so I don't know what to expect from it. But looks nice and it's easy to mount on the camera. No weight to mention and that's good when I use my portable mount. 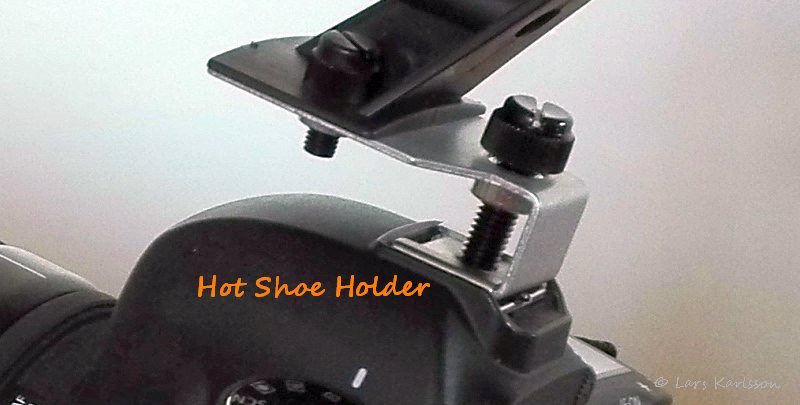
Here is the Hot Shoe Holder, maybe a little bit weak. When you tighten the screw it bends the aluminium frame. But not very big problem, you will learn to use the same force to always get it in correct position, or you can build a new holder from an old flashlight. The screw is made of plastic to not scratch the camera hot shoe. You can of course also take away the hot shoe holder and mount it direct on your mount to get better precision. 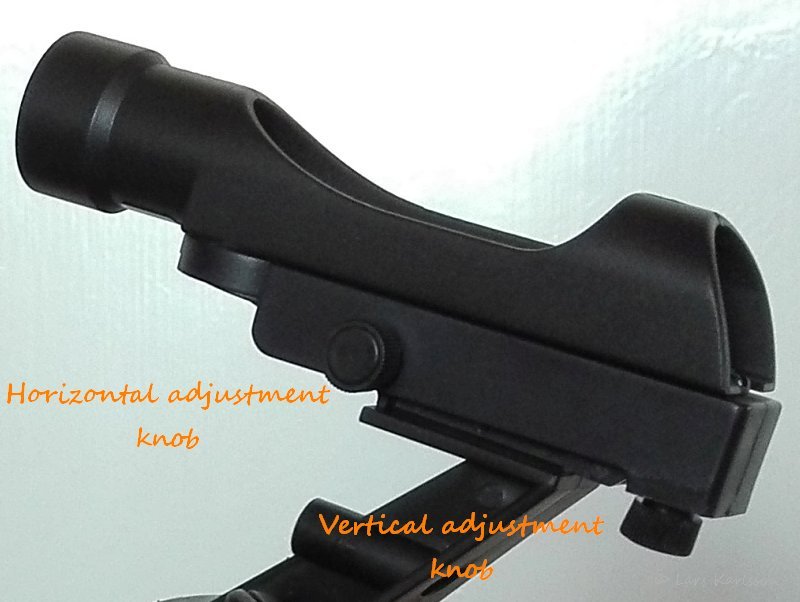
There is a builtin adjustment of the horizontal and vertical position. On backside there is a switch. It has off, low and a high position for the red LED. When I first started it there where no light, just some oxidation on the battery, just rotate the battery and then it work. Now I'm very exited to test this new toy!
|
|