|
Advertisement / Annons: |
My astronomy project:
|
Content:
Related projects:
Note: |
4, Installation of vino VNC, setup screen:Read this very well written help PDF file:
Update the Kernel, according to the help file above you should do that. Open the terminal window. You find it under Applications>System Tools>MATE Terminal: Read the PDF file above item 14, give the following commands in terminal window, you maybe will be asked to type in your password: Note: You must have an internet connection to do this!
As I have told earlier I plan to remote control my Raspberry, I tried to use Tight VNC first, but didn't work in my system, but maybe for you. With help from the INDI forum I instead installed the Vino VNC, much better result. If you didn't set your user account to auto login, read item 8 to 9 in the above help file how to setup auto login to desktop. Read item 16 to 19 in the above help file for Vino VNC installation. Type in this three commands in terminal window, do a return after each.
Maybe you want setup VNC to auto start, then you don't have to connect any monitor or keyboard to Raspberry, you control it from your VNC client.
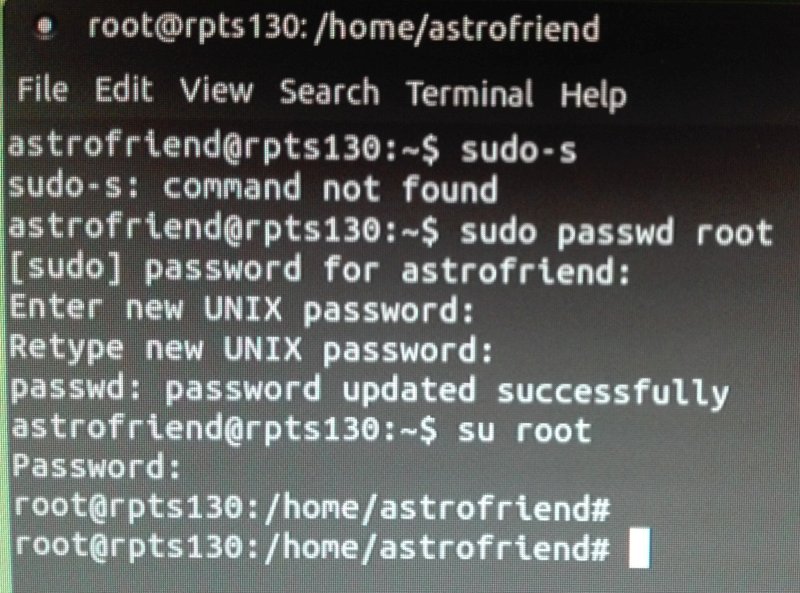
You also have to edit the config.txt file to have the correct screen resolution when over remote control with VNC, when in remote you normally don't have any monitor connected and then you need a virtual one. To edit the config.txt file and some other system files you must be logged in as root, If you haven't already setup a password for root user you do it like this in the terminal:
 Maybe you have to restart your raspberry after this, then from system menu: Log Out and change user to root. You have to type in "root" user. Now you can change config.txt files. Maybe you get an Error message. I just clicked on the OK button, not sure what it's about. You have the full description here:
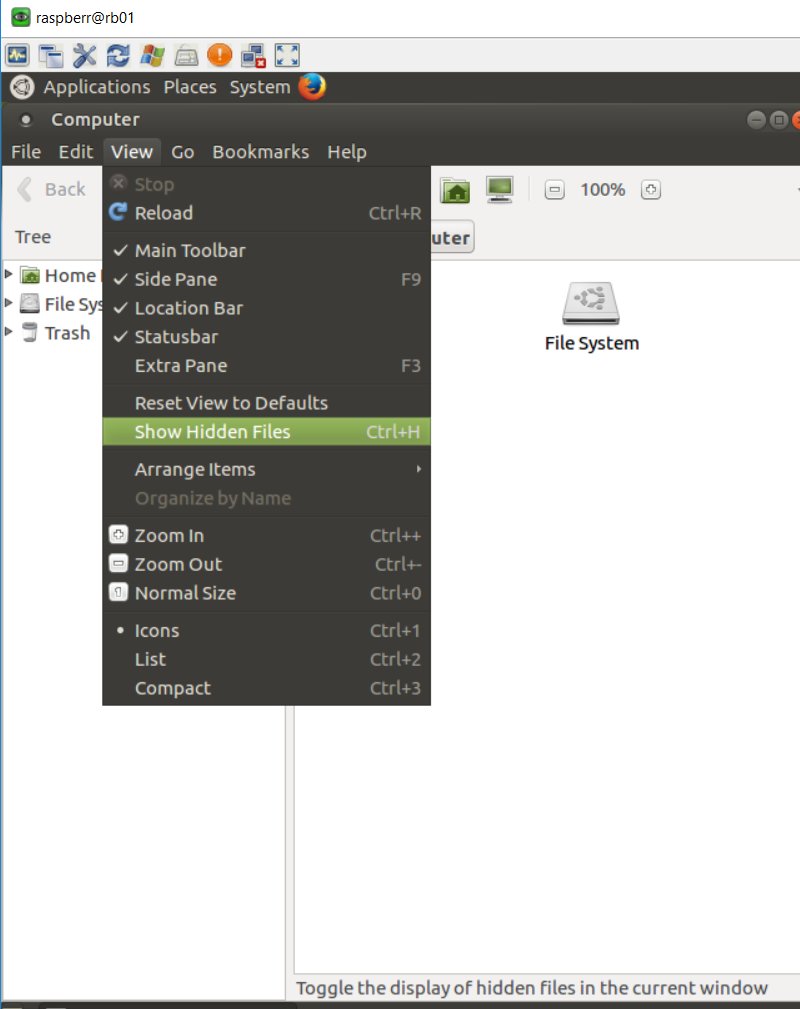
Show hidden files with file manager (under Places menu): 
It's a bit complicated to find some of the files you need to change if you work with terminal (like old DOS window) because they are hidden. You have to check "Show Hidden Files" on to see them, I did it in the menu window Places>Computer check "Show Hidden Files" under View. And I didn't use the terminal later, I use the files under Places menu, much easier if you are a Windows user like me. Find config.txt file: 
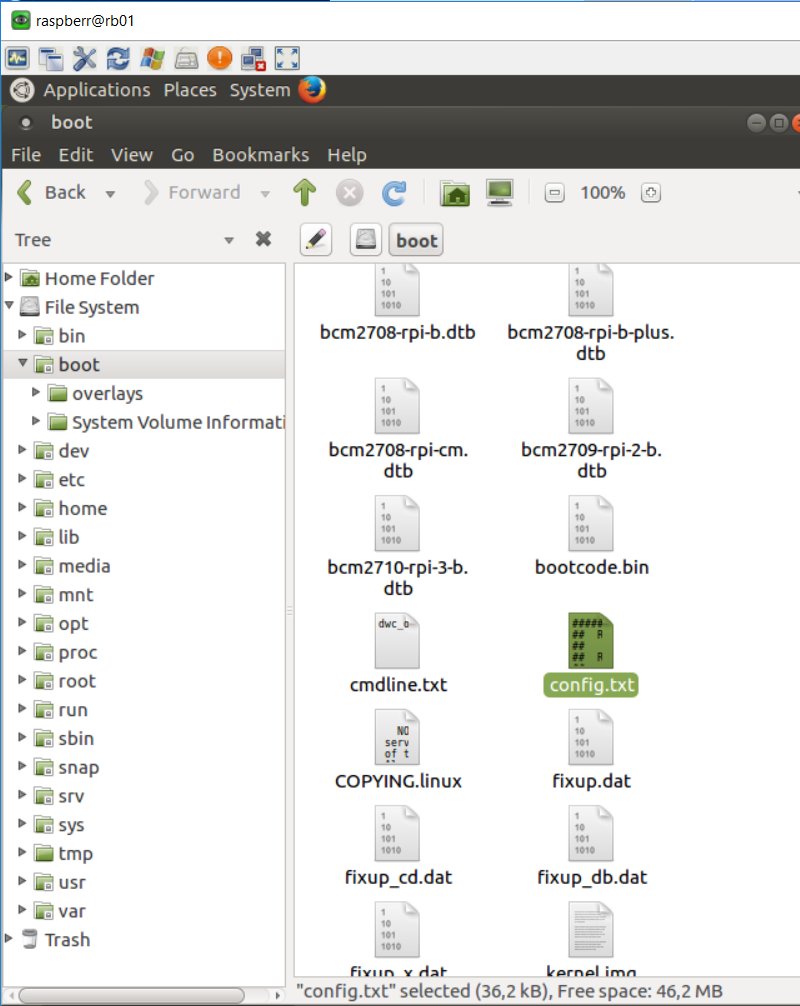
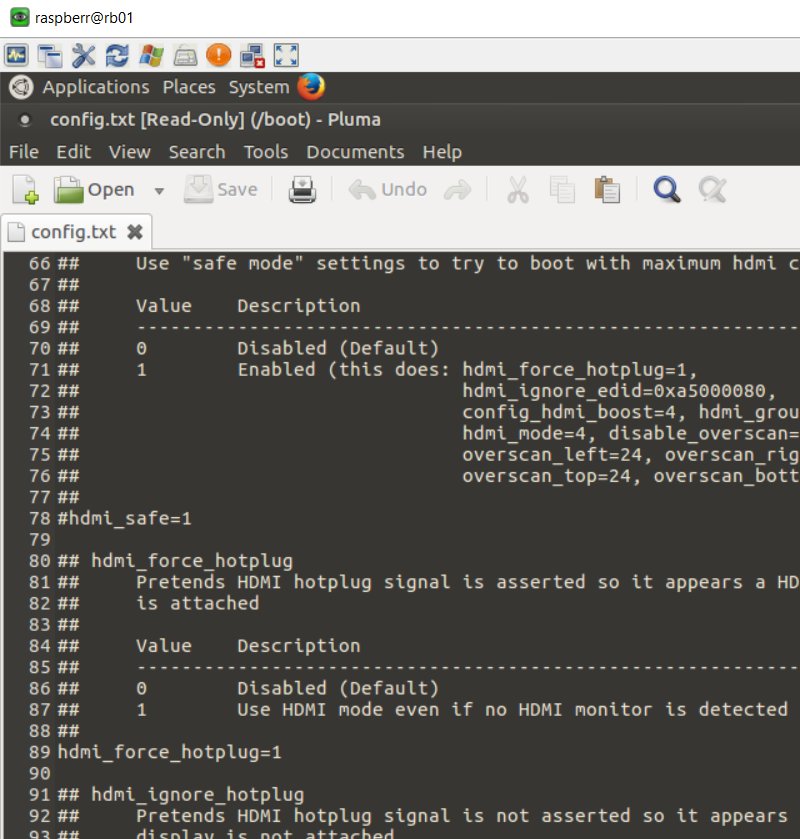
You find the config.txt file under Computer>File System>boot. You are a more serious person than I'm and backup the file before you change anything. Be very careful here, if you do something wrong the machine it maybe don't startup and you have to reinstall everything! Double click on the config.txt file and then "Display" button. You will then see this, scroll down to hdmi_force_hotplug  Now read item 5 in the PDF file above how to edit this config.txt file. Note how I changed the parameter hdmi_force_hotplug to =1. Don't forget to erase "#" in front of the command you want to use! Then according to the help file above I changed hdmi_mode to =2, that means it use the DMT part of the resolution table. Now one last thing to edit, the resolution you want to use. First I tried 1920x1200@60Hz, give me fine big screen to look at, but it slow the system down and I changed once more to a lower resolution, the 1368x768@60Hz and now it update the screen faster, this is only a problem in remote mode over VNC. This was the code I used: hdmi_mode=39. You should set the Power Management also. Open Control Center and click on "Power management" button. Set "Never" on both computer and Display sleep. Close window. Save your config.txt file and change back from root to your own username, but better to restart your Raspberry.
|
|