Astrofriend's homepage

www.astrofriend.eu
Share: Twitter Reddit Facebook Gmail Gmail Email
Search Astrofriend's homepage:

Valid CSS!

All pages shall now have been validated

Info Cookies (Kakor) / GDPR

Navigation

Advertisement /
Annons:

Twitter @AstrofriendLars

Follow Astrofriend

Tutorial News

Advertisement / Annons:

My astronomy project:
Get higher resolution


Contents:

  1. Introduction resolution and undersampling
  2. A first practical test, TS130 APO and object M13
  3. A second practical test, Sigma APO 150 mm and object M13
  4. Workflow details, part I
  5. Workflow details, part II
  6. Workflow details, part III
  7. Workflow details, part IV
  8. Coming soon

Note:
I take no responsibility or liability for what is written here, you use the information on your own risk!


6, Workflow details, part III:

Get higher resolution: Workflow details

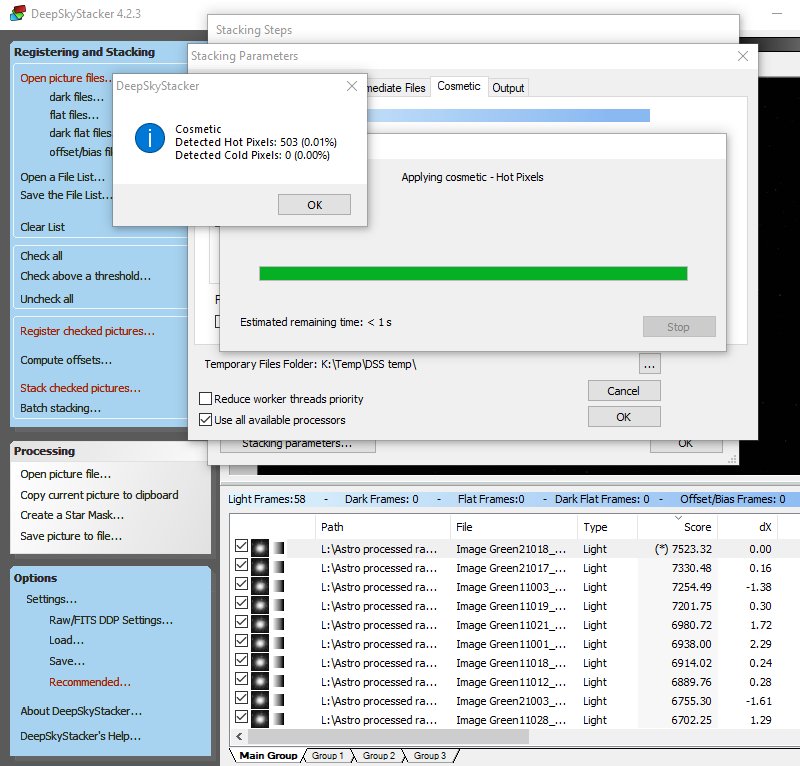
Cosmetic tab (continue):
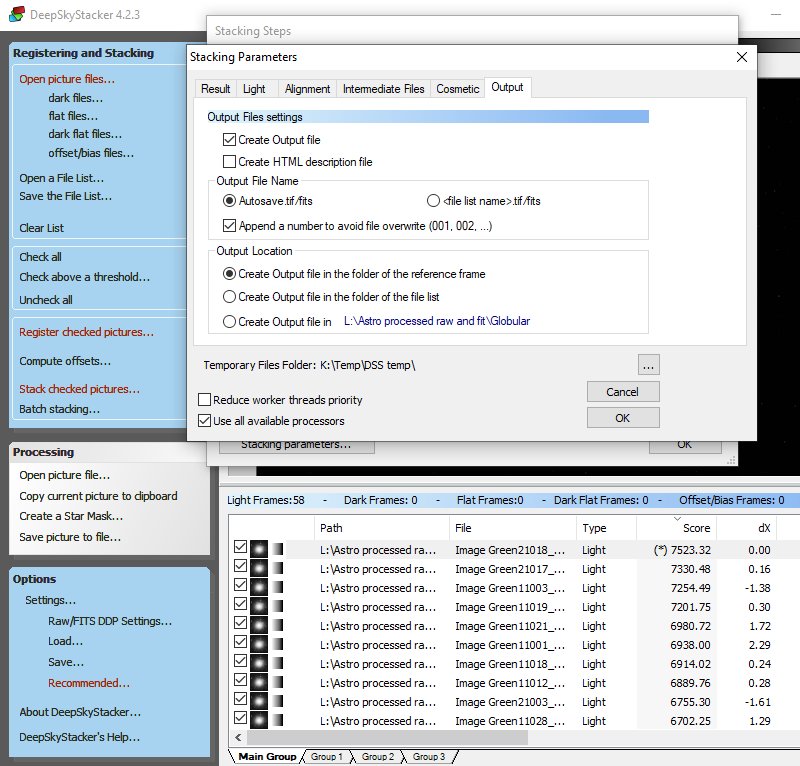
After the test run DSS find 503 Hot pixels. With my camera that level is ok. Click 'OK' button.


Get higher resolution: Workflow details

Output tab:
Enable 'Create output file'.
Enable 'Autosave.tif/fits'.
Enable 'Append a number to avoid owerwrite', this is important, otherwise you will only have one stacked file, the last one.
Output location, I feel it's most convenient to have it in the folder of reference frame.

Go through all parameters once again, if everything looks ok, then click the 'OK' button.


Get higher resolution: Workflow details

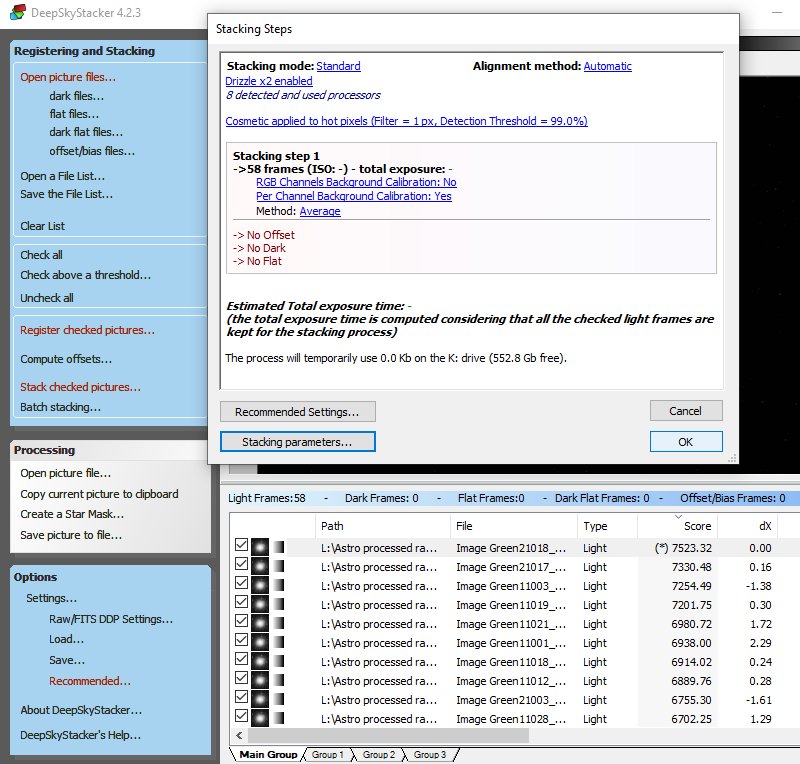
Back to the main Stacking menu. Time to start the first stacking process, the Maingroup where the Green files are loaded and selected.


Get higher resolution: Workflow details

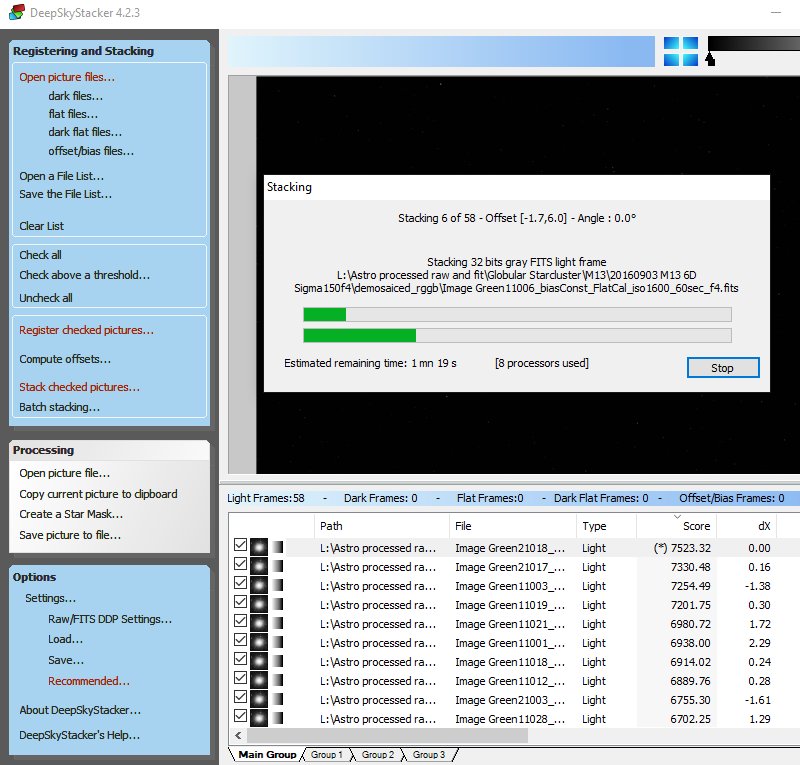
The stacking process starts and give information of what's going on. It's amazing, this will only takes a couple of minutes. When I did this five years ago it could take many hours.


Get higher resolution: Workflow details

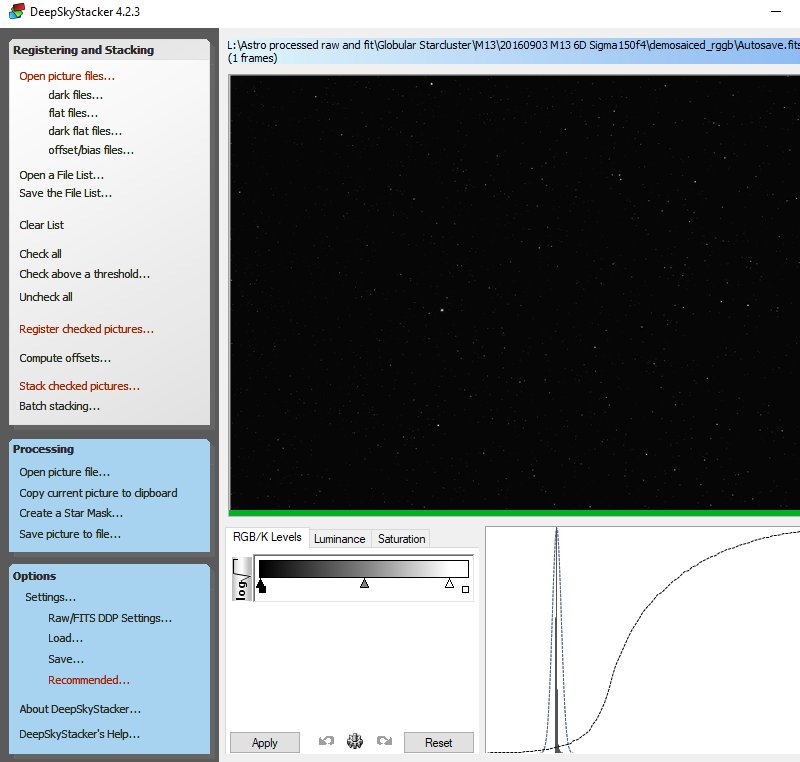
After a while this window pops up when it's finished. Don't do any changes to it, only look and check it's ok. You can increase the contrast, the slider is outside this window, at upper right.

This was the first color, the Green in my case. You can save the file by clicking 'Save picture to file ... ', but I normally wait until I have done all the colors. One important thing if you plan to use Gimp, when saving Fits files DSS set the extension to *.FTS, but Gimp can't recognize that extension, must have *.fit or *.fits. You have to rename the file extension to be correct. But it's strange, because the Autosave files have the extension *.fits. Always use the 32-bit floating point format to not get any rounding errors.

Go Back to content

Go Back
To page VII, Workflow details, part IV

Advertisement / Annons: