5, Workflow details, part II:
Next step is to stack the images, you do it one by one color.
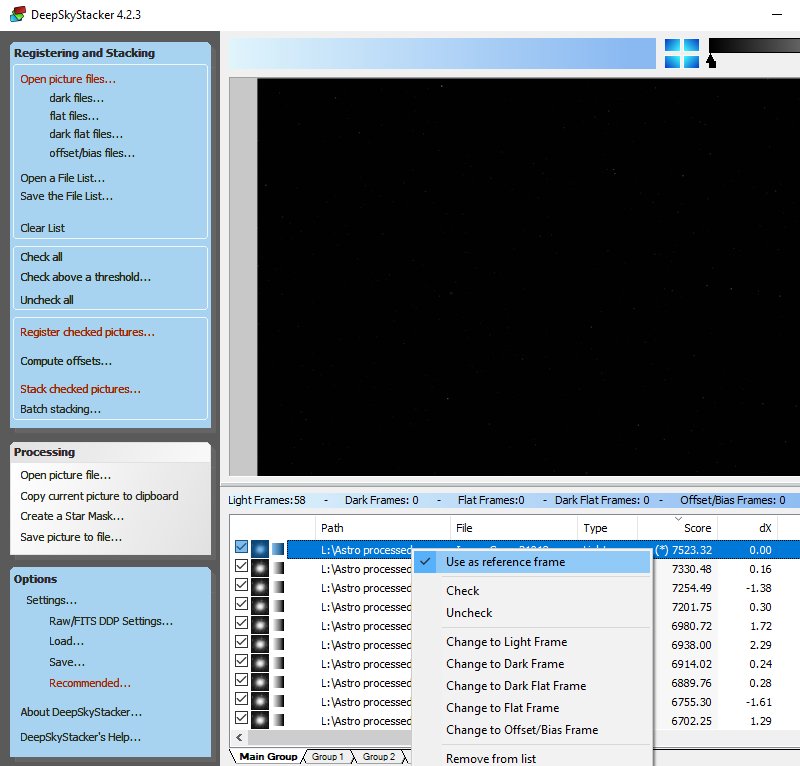
Open the Main group and sort by 'Score', it's a quality measure.
The file with the highest score, right click on it and set it as reference.
This will be the reference for all colors even if the file itself is not included.
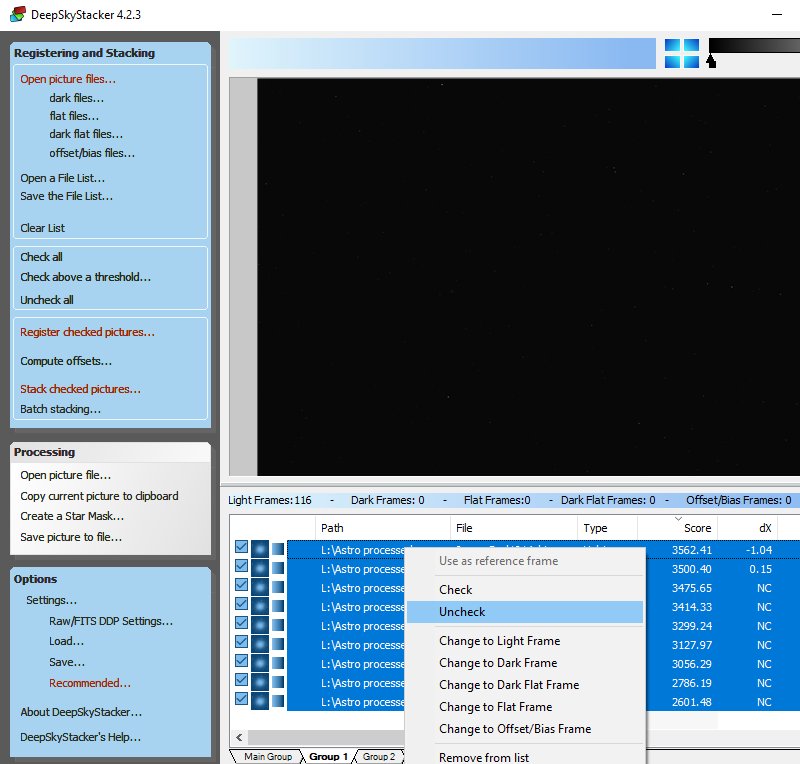
Open Group 2, select all files and right click, 'Uncheck' the files.
Do the same for next group and next until all groups are unselected, but the Main group still selected.
Take a look at Main group files once again. Scroll down and see what scores they have at the lower end.
If they are much lover (bad quality) you can 'Uncheck' the lowest ones and they will not be included in the stack.
If you have calibration files, don't forget to enable the ones that belong to this color.
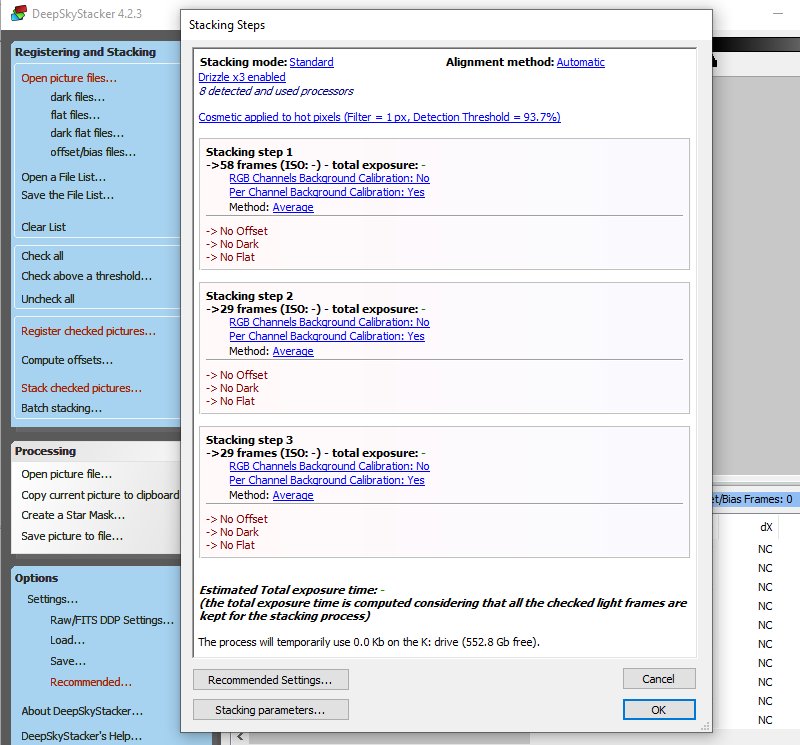
Now click 'Stack checked pictures ... ' , you get an overview how it's setup. As you see I don't have any calibration files.
I only use DSS to align, Drizzle and stack the files.
Before we start the stacking process it must be setup correct. Click on 'Stack checked pictures ... '.
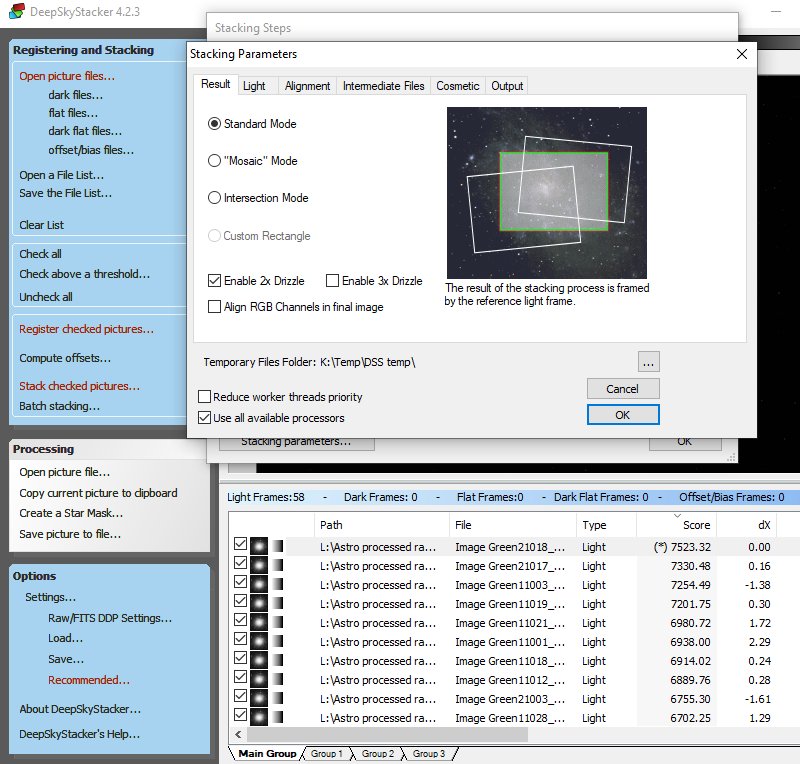
Result tab:
Use standard mode, it's the only that work when stacking separate rgb images.
The other will give different size of the stacked images which most software can't handle.
This time I do only a 2x Drizzle, I had only 29 images to stack and that is not enough for a 3x Drizzle.
Nevertheless I will do a test with 3x Drizzle later.
'Align RGB Channels in final image' only work with files/images that contain all three colors.
But the colors will be aligned anyway because we use the same reference image for all three colors.
Enable 'Use all available processors'.
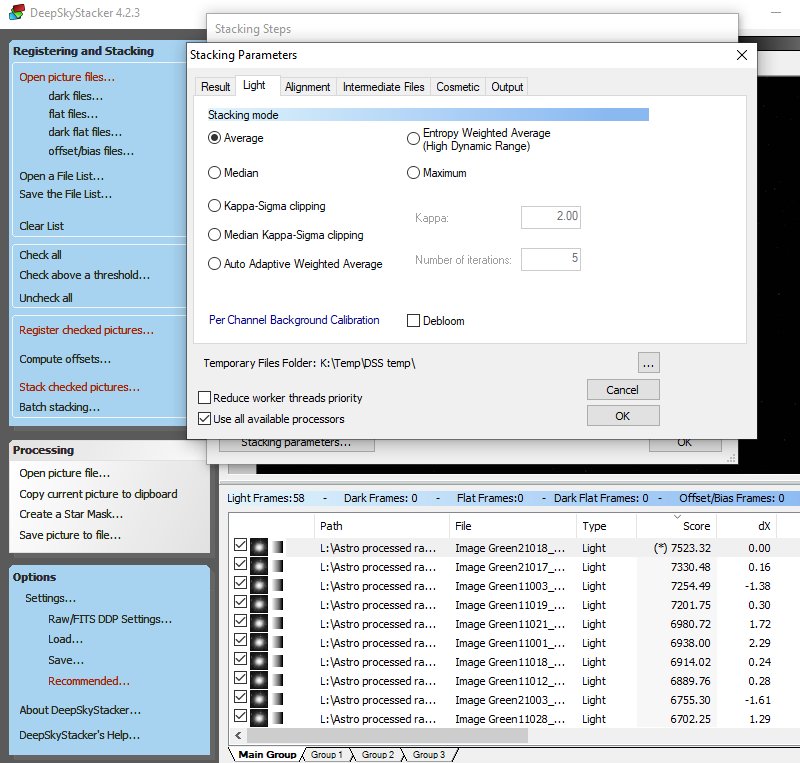
Light tab:
Average is the only mode that's working with Drizzle technique.
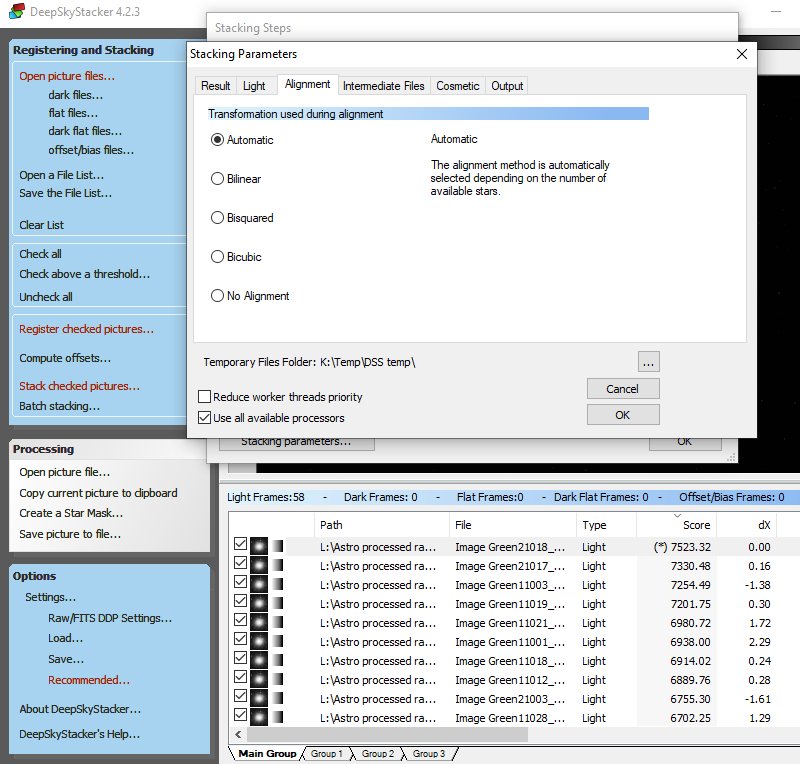
Alignment tab:
Let the default 'Automatic' be enabled, DSS sense the number of images and choose correct method.
When Drizzling it should always be Bilinear I think.
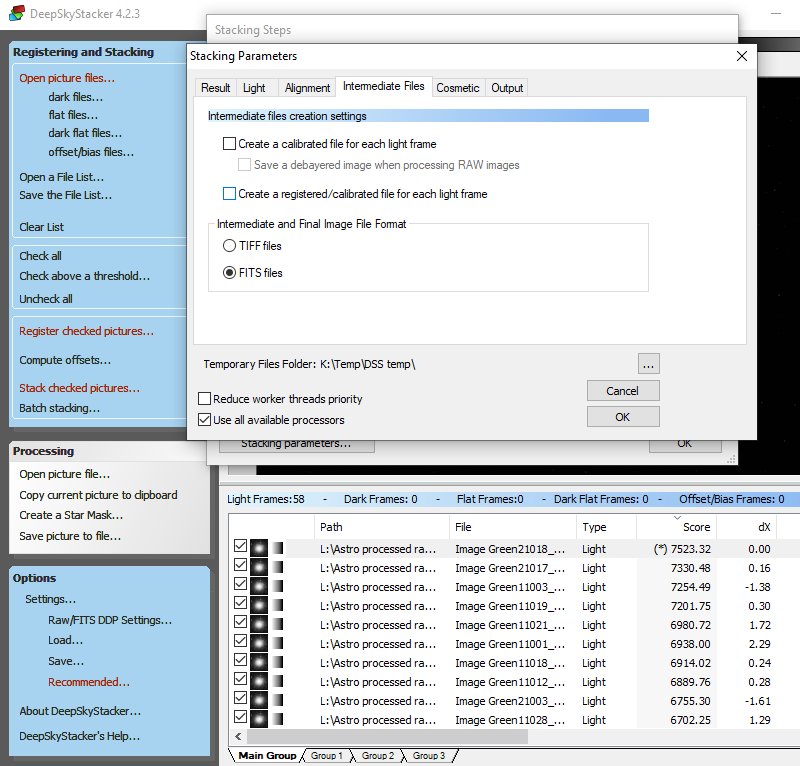
Intermediate tab:
Normally you don't need the intermediate files and leave them unchecked.
The output format depends on which software you continue the processing with.
As it's now I use Gimp. Gimp take both Tiff and Fits files.
But for some reason I don't know Fits works better, it handle the levels much better.
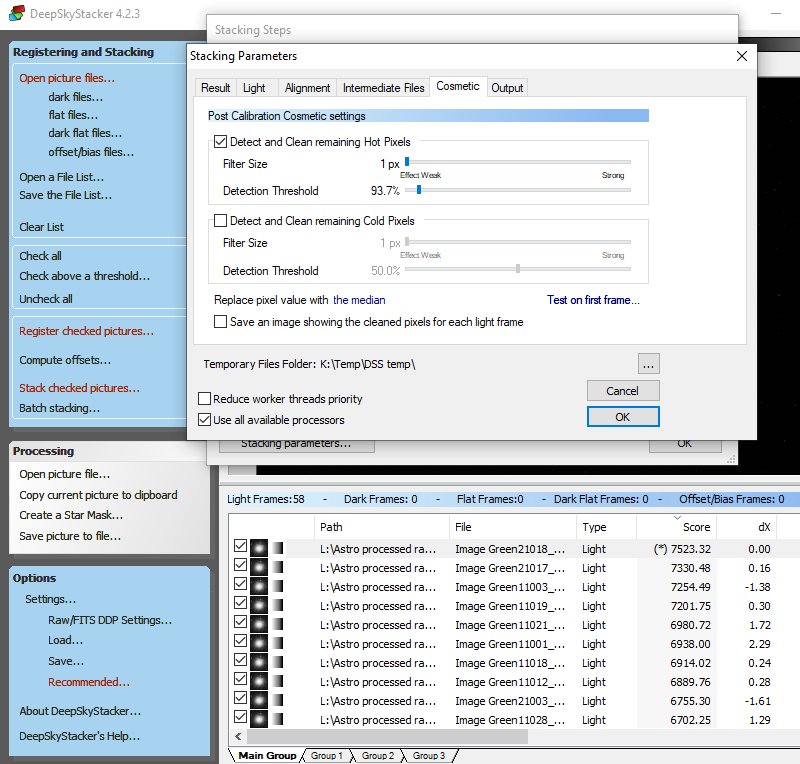
Cosmetic tab:
Drizzling is sensitive for disturbances, it's a good idea to try to reduce the bad pixels.
I only use 'Clean Hot pixels' but depends on the camera what's best.
This setting you have to adjust for each color because the different colors use different pixels on the sensors and they have different levels too.
Click on 'Test on first frame ... ' .
Note:
When enable the cleaning you can't have both Green1 and Green2 images in the Main group.
It works as long you don't use this cleaning procedure.
Load them something like this: Green1 = Main Group, Red = Group 1, Green2 = Group 2, Blue = Group 3.
You also need to merge the Green1 and Green2 together in some step later.
|