|
Advertisement / Annons: |
My astronomy project:
|
Contents:
Related projects:
Note: |
9, Test of auto guiding:Today I have come long. First I got the mount's parking position setup to work. Took a while because I have the camera rotated 90 degree to have it in landscape mode relative star charts. Then also the parking position must be rotated 90 degrees, camera pointing to polar star and rotated to East. Next thing today was to setup the auto guiding parameters. Here I do a test of the guide function. Test of RA unguided: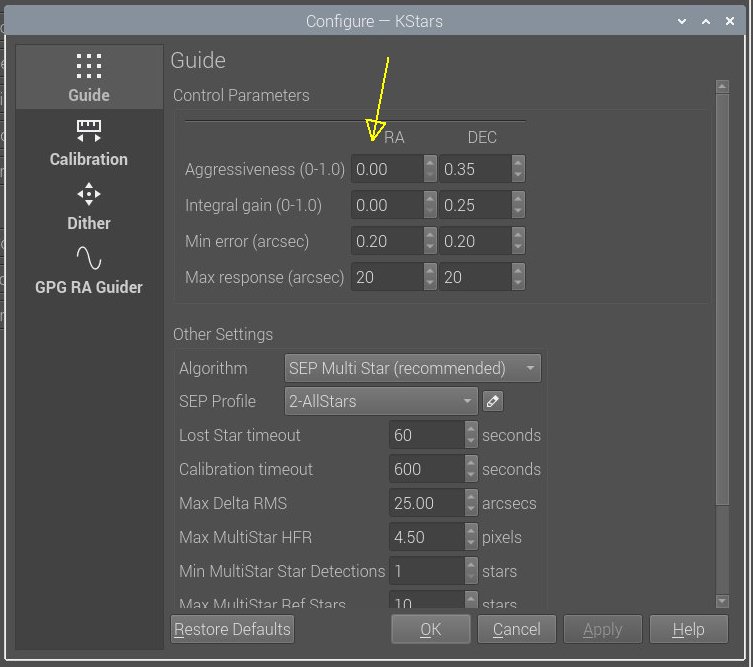
I set the RA aggressiveness and integral gain to 0 to disable the RA guiding. It let me investigate the performance of the mount and its mechanic precision. 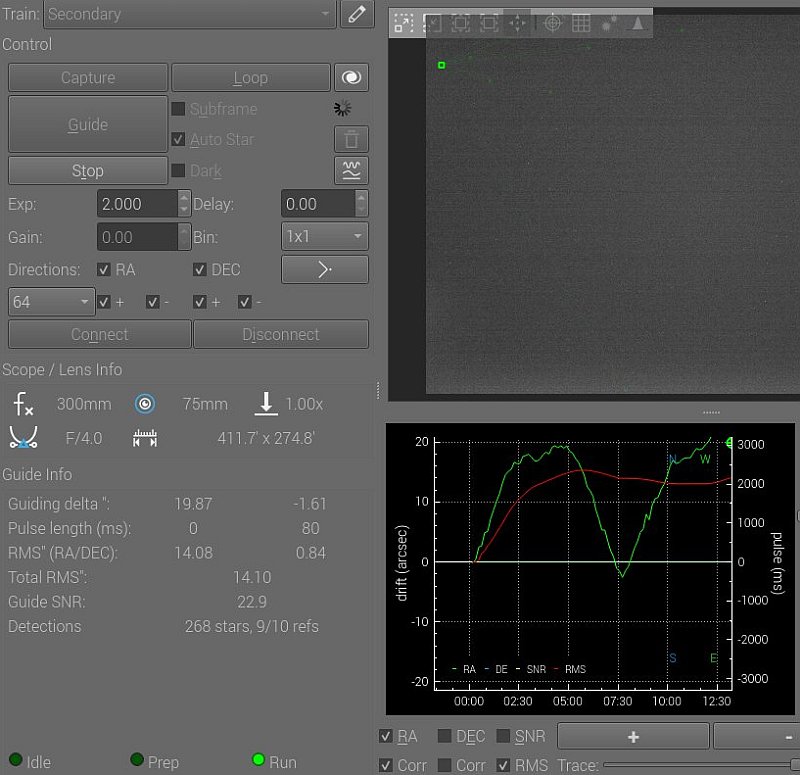
I let it run for 15 minutes. It plot the deviation from a reference star, it's a periodic error, a PEC curve, it comes from one rotation of the worm gear. One period is 7 minutes and the deviation is +/- 10" in RA. It's not centered around the X-axis, the RA stepper motor runs a bit too fast it looks like. Frequency adjustment: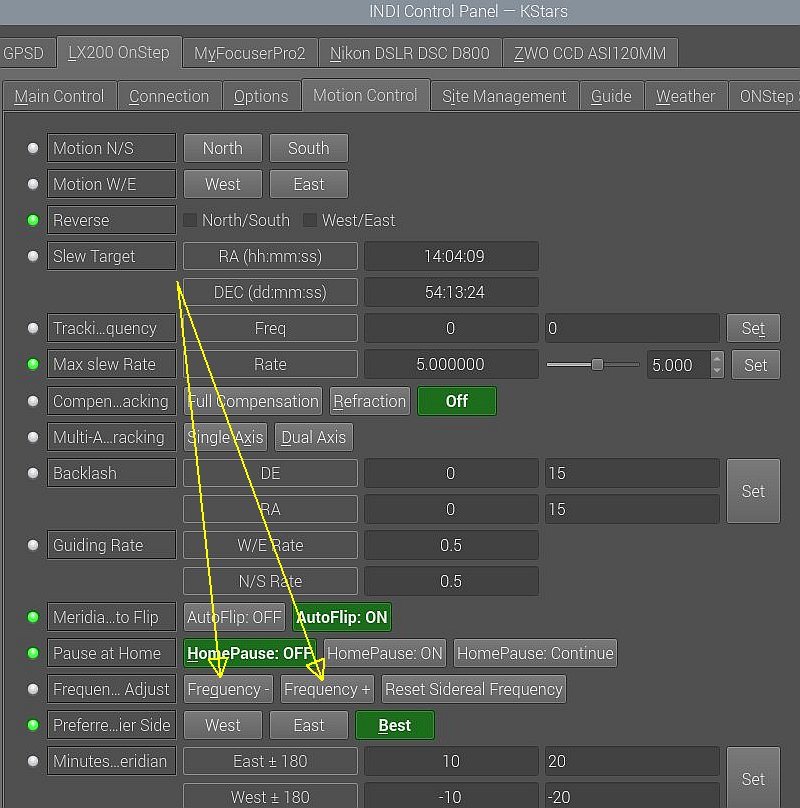
The crystal clock that controls the speed of RA motor and other things can be fine adjusted. You find it in INDI control panel at LX200 OnStep. One click on the minus or plus button change the MCU clock by 0.02 Hz, that correspond to 0.005 arcsec/sec. The function is like the old EQMOD RA drift compensation, but much more advanced. Set RA guide parameters: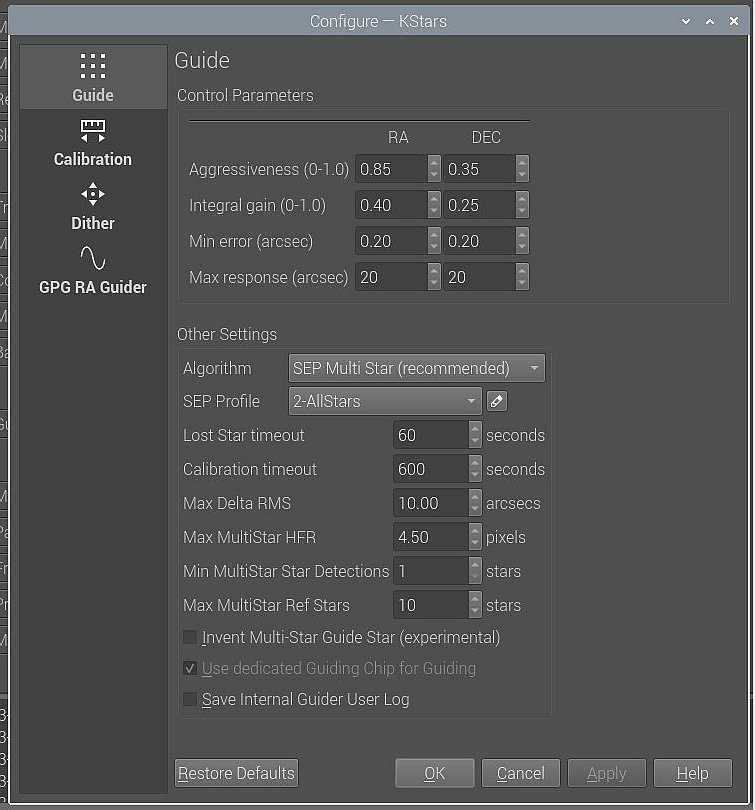
After investigated the behavior of the unguided mount it's time to setup the parameters. For the moment only RA auto guiding. It's about the same values as with the old driver board and EQMOD. 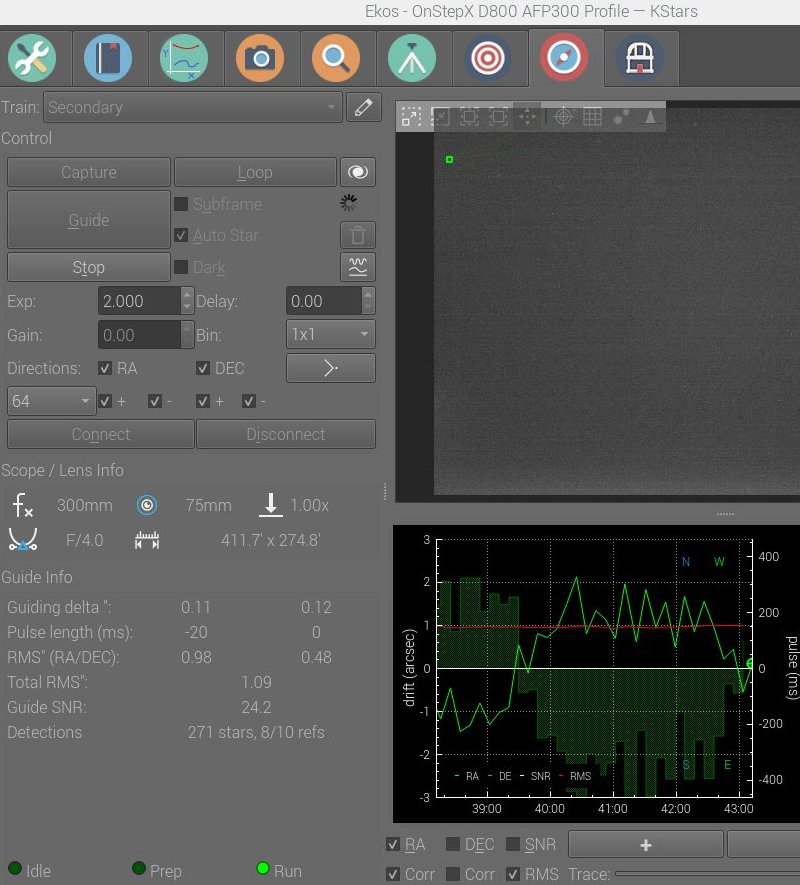
This night I didn't have very good sky, but at least I could do some test. The RMS RA error I got to 0.98". When perfect I can come to below 0.5" in tot RMS error, but normally around 0.6" - 0.7". The guide pulses could be longer or more of them if I shorten the exposure time to 1 second. Test of DEC guiding: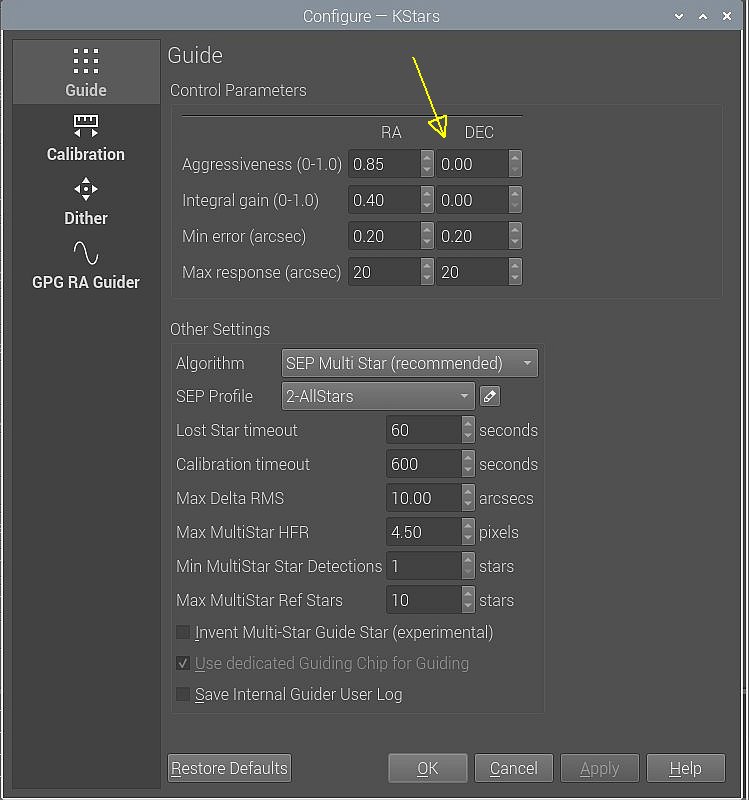
I repeat the test for the DEC axis. In the perfect world it shouldn't need any corrections, but in reality it have to. 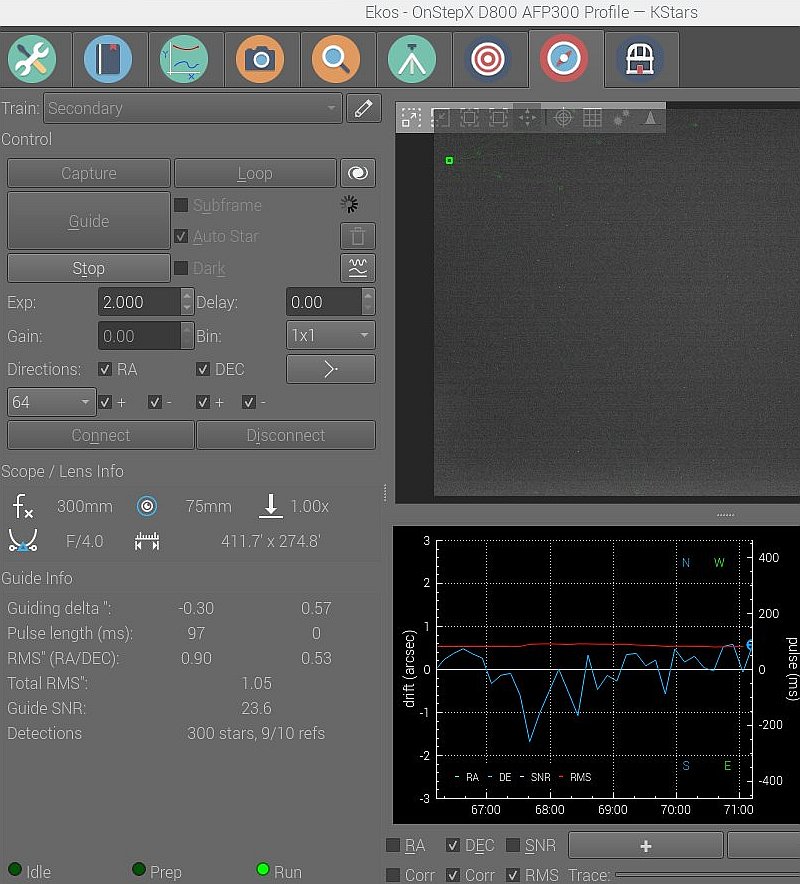
A RMS error of 0.53" unguided isn't bad, very precise polar alignment made it. The deviation could be caused by dirt in the roller bearings in RA axis, heavy wind. The mount stands on the balcony which isn't that stable as it should be for astronomical work. Enable the RA and DEC auto guiding: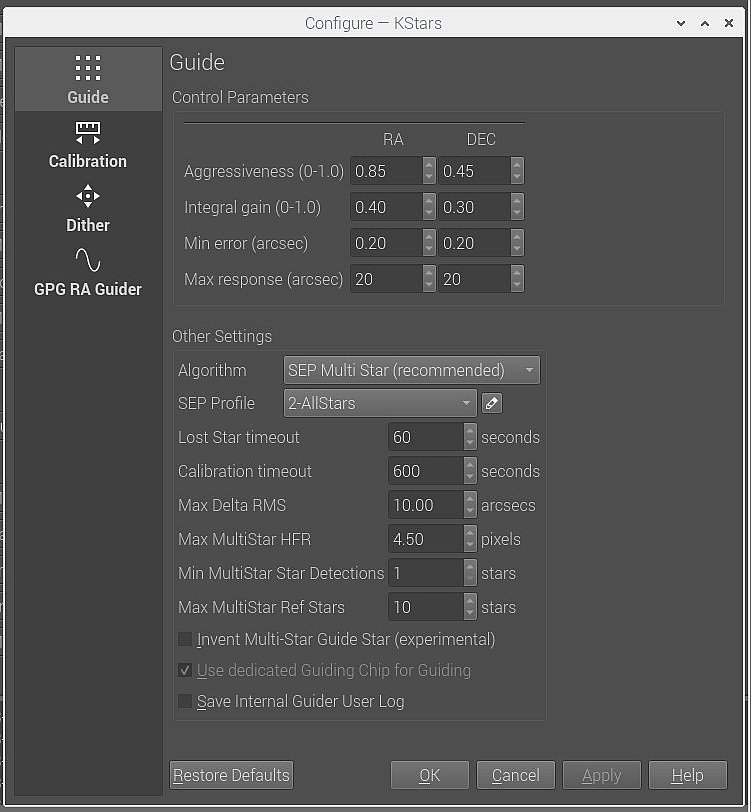
The integral gain is difficult to setup, many people skip that parameter. I set min error to 0.2", to low value and it will try to correct the position all time. Max response is set to 20", mostly when setup for dithering. Auto guiding: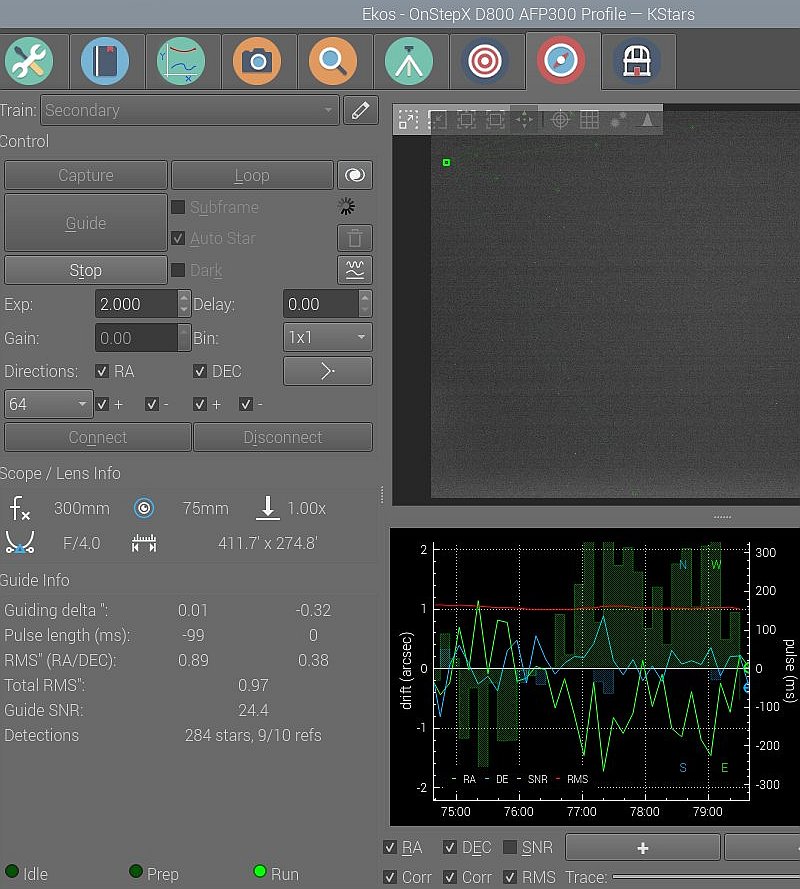
Total RMS error of 0.97", it could be much better in the future I hope. Here the pulses that adjust the RA/DEC stepper motors can be seen in the background. This evening I used 2 seconds guiding exposures because of the bad sky quality. With better weather I can shorten it to 1 second exposure, but it doesn't all times improve the result. It's sensitive in what direction the telescope is pointing. |
|
|