|
Advertisement / Annons: |
My astronomy project:
|
Contents:
Related projects:
Note: |
6, Enclosure and peripherals:My plan is to have the circuit board installed inside the EQ6 mount. I then only need a new lid where I can install the circuit board and other things. That lid can be 3D-printed. 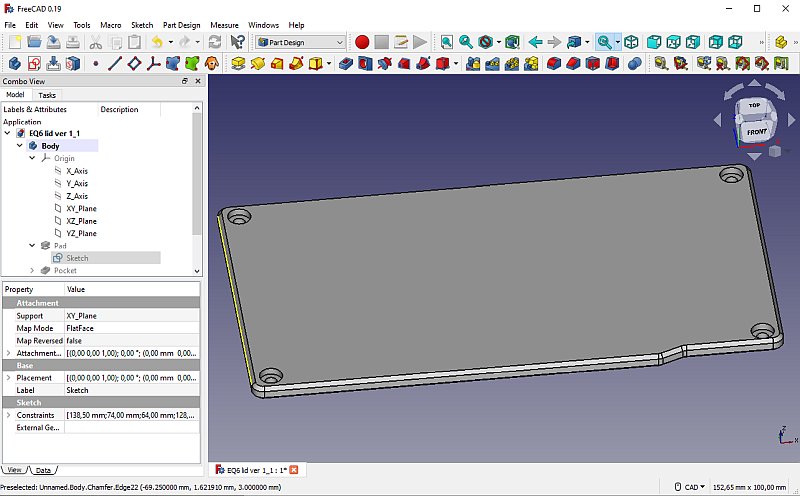
The replacement lid that I designed long time ago, now I will add all extra I want to have here. 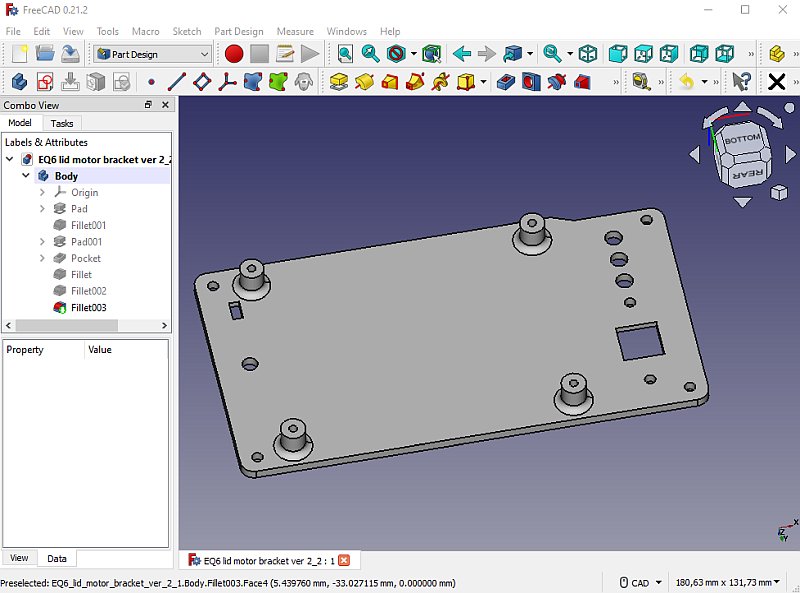
From backside, 4 pillars to mount the circuit board on, a panel mounted USB B connector. Openings for temperature and humid sensors. 
With the circuit board installed on the face plate. The power on LED to the left. To the right, space for the USB B connector and temperature sensor. 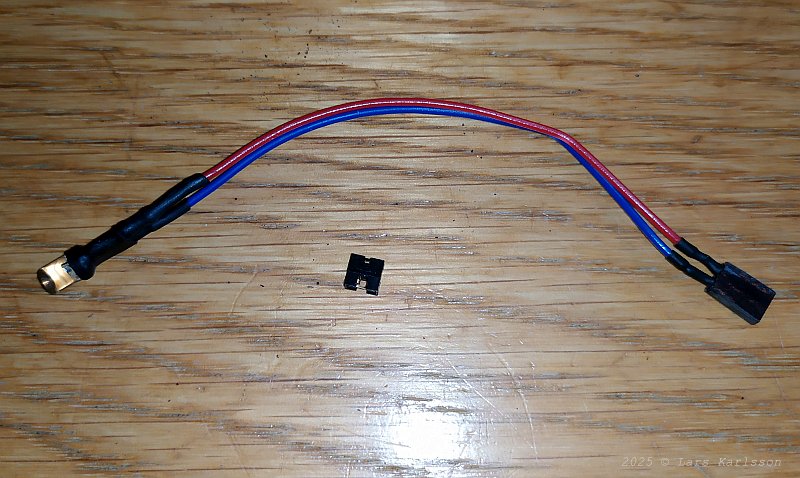
Solder a new cable to the LED, note that there is a resistor inside the cable. Recommended value was 1.2kOhm, but too bright for me and replaced it with 4.7kOhm. A jumper is also needed. 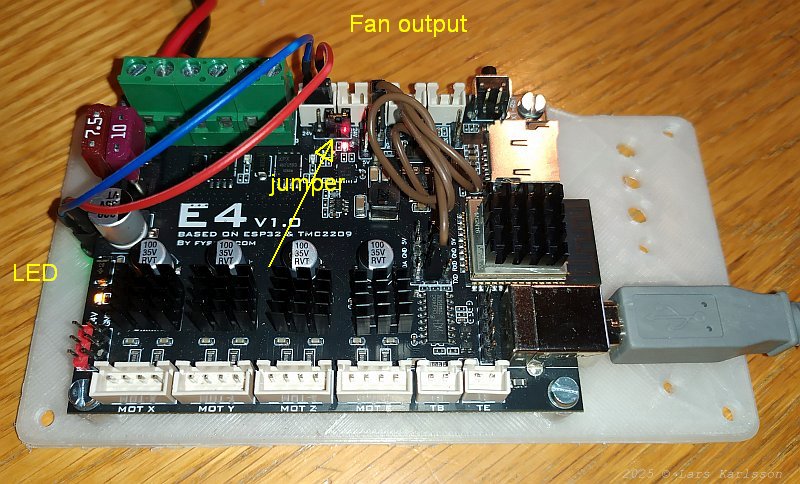
Connect the LED to the Fan output. Note the jumper, it power the Fan output with 5 Volt. Instructions here: FYSETC E4, Wiki. 
The rectangle that protrude out is the WiFi antenna. USB connection: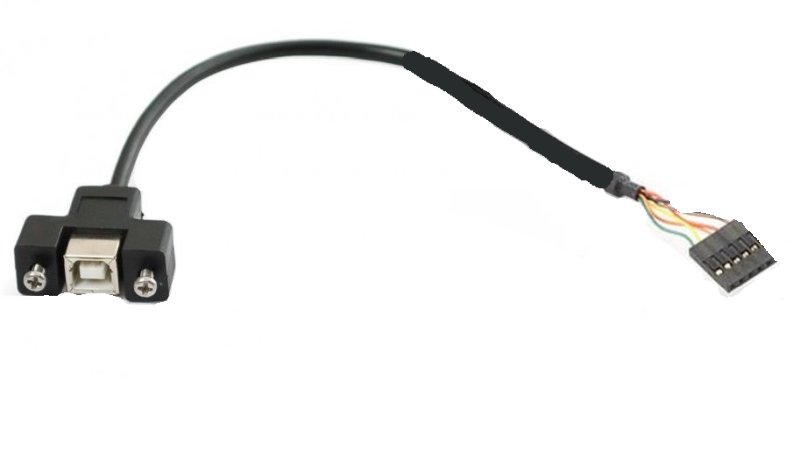
The internal USB connector must be attached to an USB B panel mount. But there isn't space enough for a cable with an USB B house. I can instead connect it to the 5 pin connector. Then I need a cable like this to solve that. 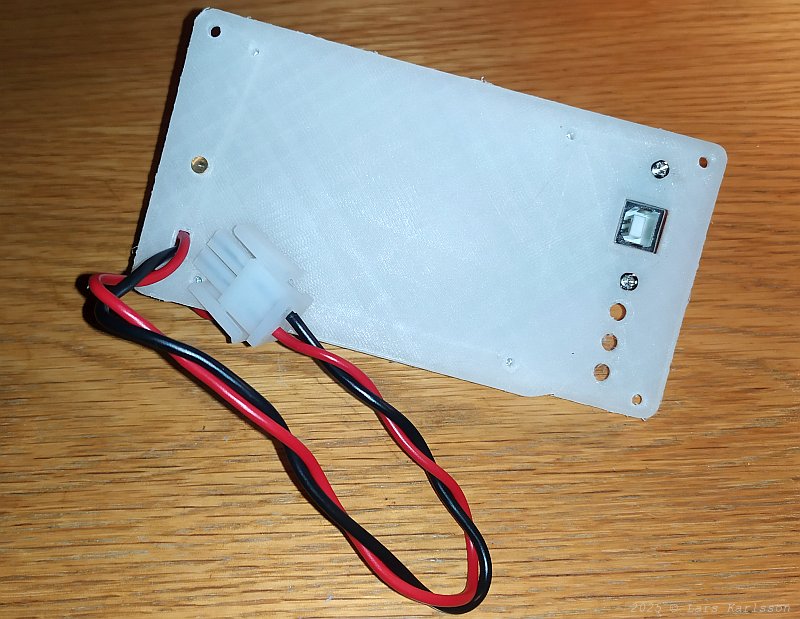
The USB B mounted on the lid. 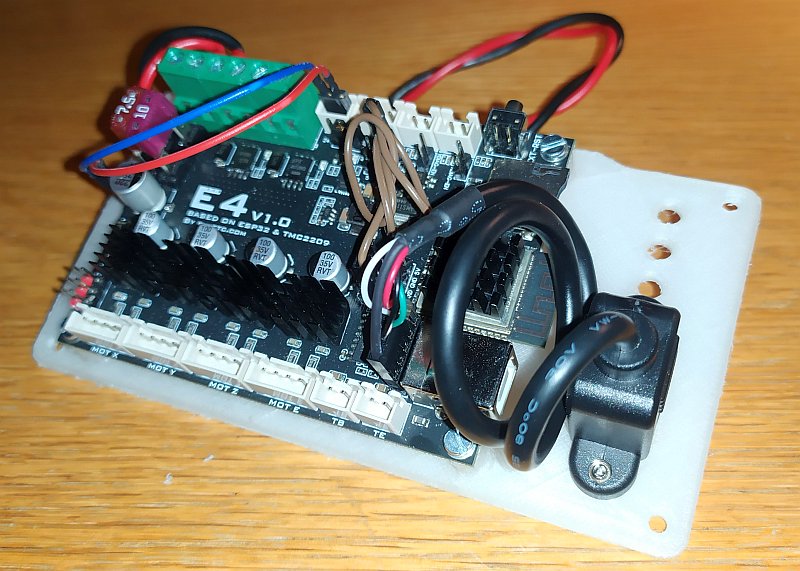
Backside of the lid, much more compact now. I must check the polarity of the 5 pin connector before power it up, it can be mounted in two directions. The fuses to the left doesn't need to be that strong, 3 ampere each will be enouh in my case. 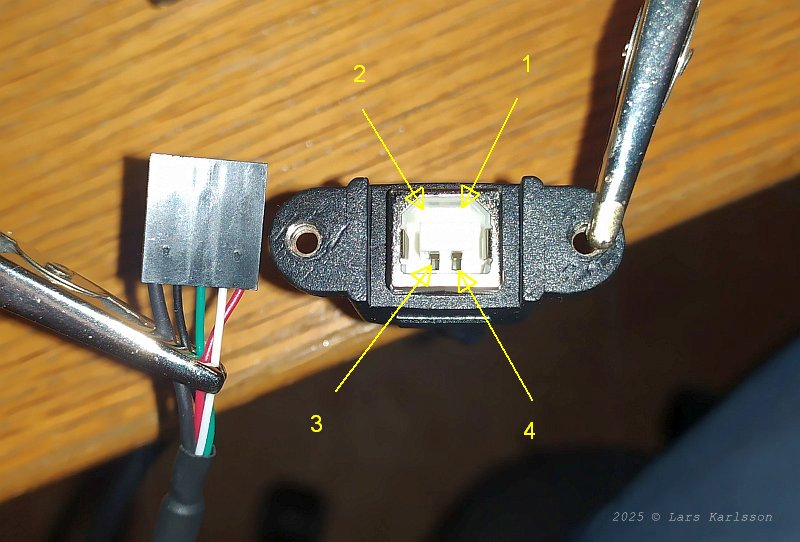
The adapter USB B cable I bought, is the pinout correct ?
Ground and shield are separated on the USB 5 pin connector, even when an USB cable is inserted. The USB pinout can be found here: USB hardware, Wikipedia 
Circuit board pinout, there are no numbers, the order in my table is from right to left.
The GND and shield are connected together. On the circuit board can be seen that USB5V p2 is connected to pin 1 +5V on the USB B connector. 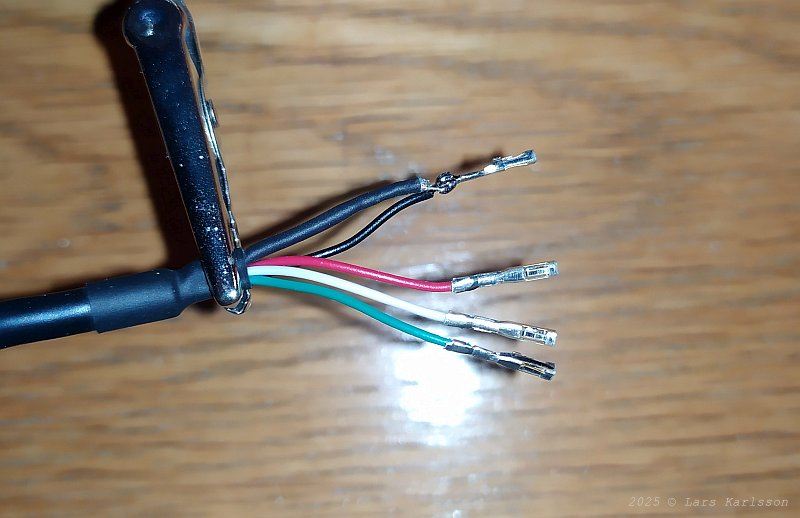
Lucky me that I checked the pinout, it has been a disaster if I had powered it up. I solder the shield to the same cable as the GND. Very difficult, the shield isn't copper, only the core is. Try to find a USB B cable adapter with correct pinout. 
Inserted in the new order. |
|
|