|
Advertisement / Annons: |
Tutorial:
|
Content: |
4: The real image and its components
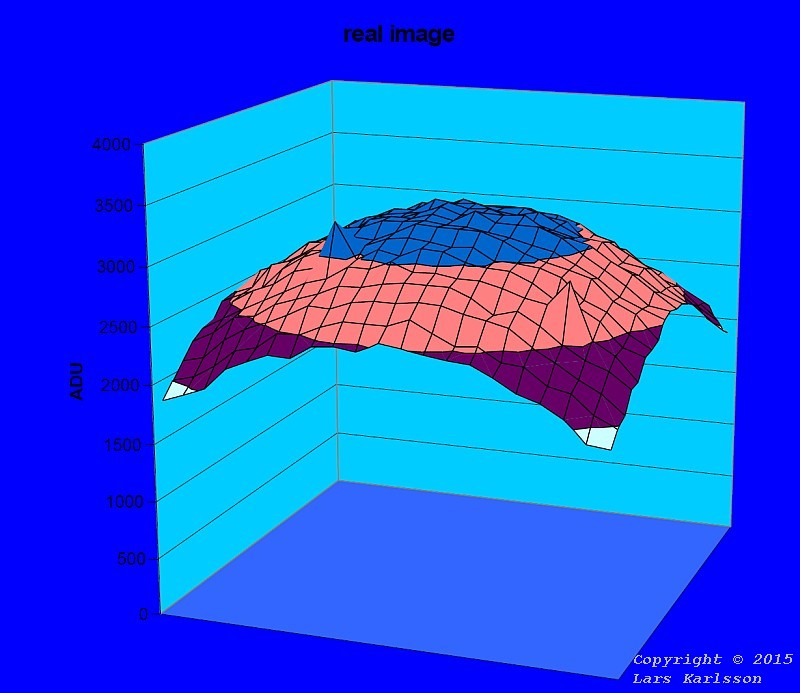
This is how bad it looks in the normal case! The picture illustrates how the signal falls towards the edges because of optical effects, vignetting. Surface roughness is telling us that we have noise and different sensitivity of the different pixels. Sharp peaks are often hot pixels, pixels that give signal without there is any light, also called static pattern. Can we do something about it to get resemble our earlier perfect picture? Yes, it is possible, especially if the image is close to linear as it is from a digital camera that stores images in raw-format. To understand what problems we have to deal with, we divide this image in its separate components. Bias component
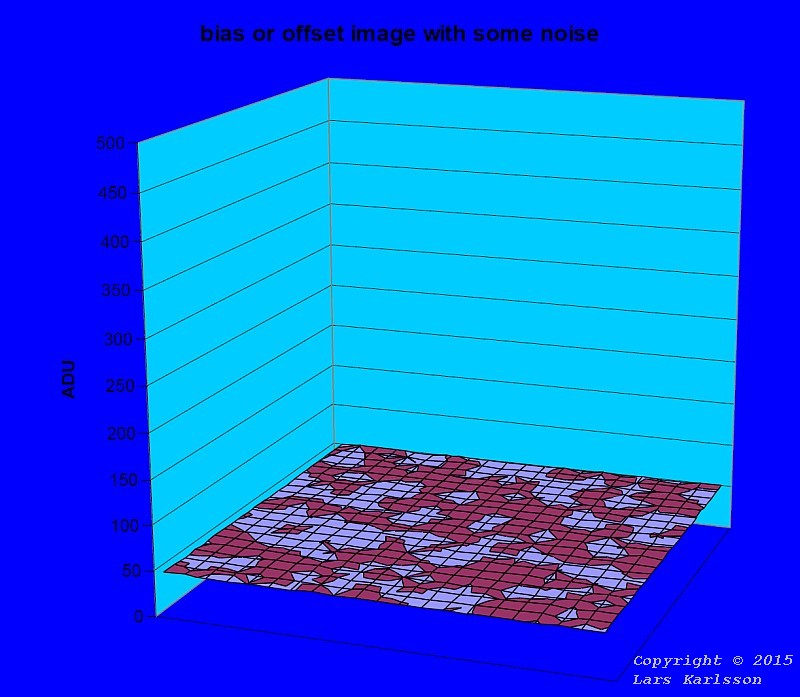
In most digital cameras, there is added a offset to the signal (picture), called also bias or constant. This is done to prevent the noise should not give negative values for the lowest levels, negative signal will clipped to zero because we can only handle positive values in raw-format files. There is also technical aspects that make it beneficial that the signal does not begin at zero. How large this constant is are different between camera models, but typically between 50 to 1000 ADU. ADU is one step on the digital scale. This constant is now unfortunately not really a constant but also has a weak noise. Constants we can easily subtract but the noise is worse because it is random. The nosie come from when we read out the bias. The bias component is something we want removing from our image to restore to its original (real) condition. The editing program in the computer can normally handle negative values. Dark component
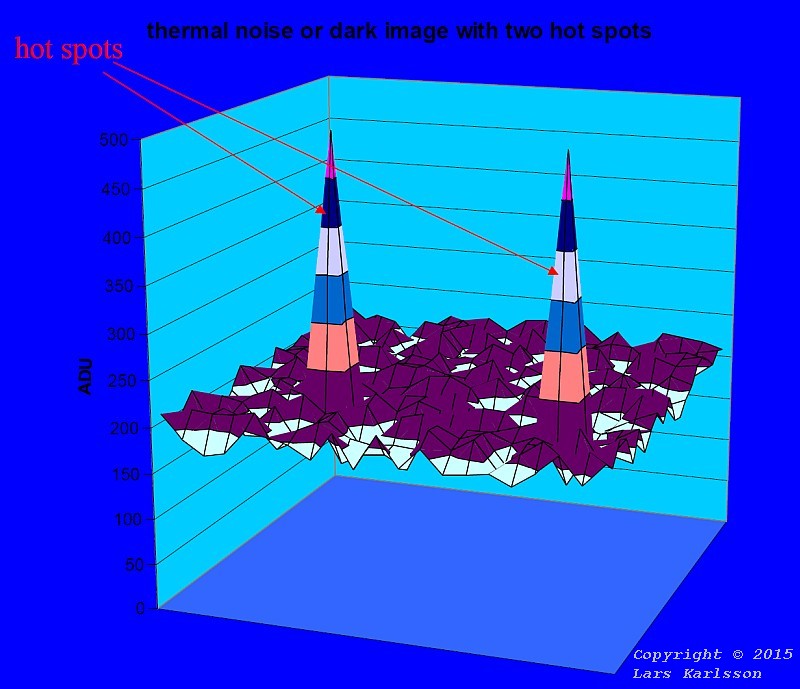
When the sensor (exposure) is activated it start an unwanted signal to be built up, regardless of the image that we want to capture. There is a thermal current that generates this. We want to also remove this component of our image because it doesn't have any thing to do with the object we taking photo of. If an extra picture taken with camera cover on (no light), we get precisely this picture (plus a bias signal). In the darksignal there could also be sharp peaks that belongs from defect pixels, called hot pixel. Here are two represented but typically it will be 500 or more! As the name thermal current say it is temperature dependent, increase with increasing temperature. More expensive cameras have a built-in cooling device of the sensor. How we handle this problem we will come back to later. Besides in older cameras the amplifier in the sensor emit a light (ampglow) that is not desirable, can be canceled or reduced with darksubtraction. Note, in modern low noise cameras it could be a good idea to replace dark calibration with dithering technique, especially the static pattern "noise" of the camera must be low, take a look here: Flat component
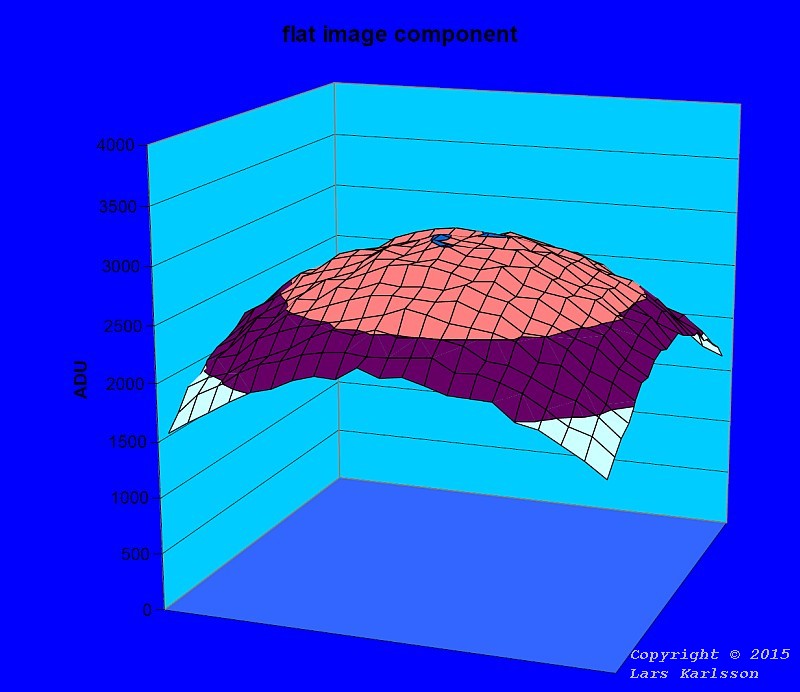
This component shows three of the problems we have at the same time.
Decreasing of the brightness (signal) because of the optics towards the edges relative the image's central part. Large aperture lens's usually provides stronger loss on the edges. This is known as vignetting. Choose a lens or telescope that gives an even illumination of the sensor as possible. It is possible to correct but severe vignetting produce more noise outward edges. The use of a lens (a telescope usually has no variable aperture) at full aperture is usually no good ide. Set the lens down one or two steps from full aperture is generally given a considerably better result. Vignetting cause two stars of the same brightness, where one is in the central part of the image and the other at the edge, they will recorded with different brightness. Something we have to correct for.
|
|