Astrofriend's homepage

www.astrofriend.eu
Share: Twitter Reddit Facebook Gmail Gmail Email
Search Astrofriend's homepage:

Valid CSS!

All pages shall now have been validated

Info Cookies (Kakor) / GDPR

Navigation

Advertisement /
Annons:

Advertisement / Annons:

Tutorial:
Dark and flat calibration

And an illustration and explanation why it's important to do dark and flat calibration


Content:

  1. The digital DSLR camera features
  2. Linear and nonlinear
  3. The ideal image
  4. The real image and its components
  5. Vignetting
  6. Making of the calibration images
  7. What happens in the stages when we calibrate?
  8. Did we came back to the ideal picture?
  9. The math behind it

5: Vignetting

Vignetting

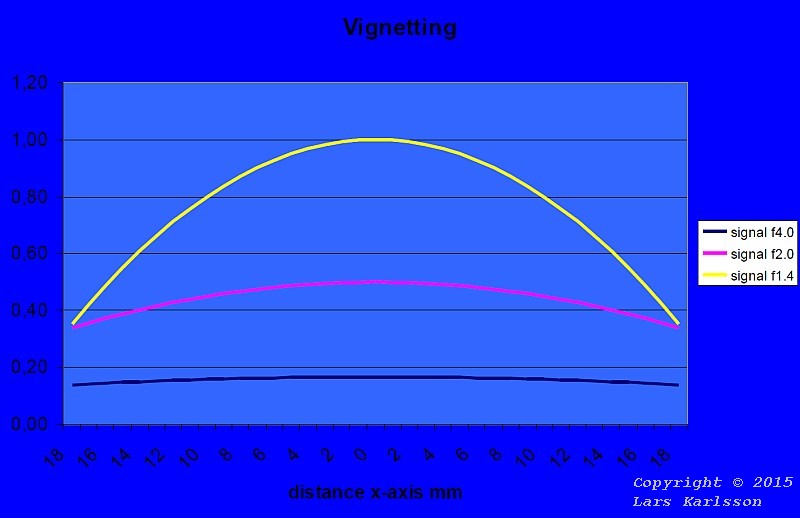
This is a simulation of a lens to illustrate the lens vignetting at different apertures and the signal we get along a line across the sensor. The advantages obtained at stop down:

  • Prons

  • Usually sharper image.
  • More even brightness.
  • Cons

  • In the example takes we must compensate with exposures that are 8 or 2 times as long (3 or 1 aperature step) compared with full opening. Aperature steps: 4.0, 2.8, 2.0, 1.4.
Vignetting normalized

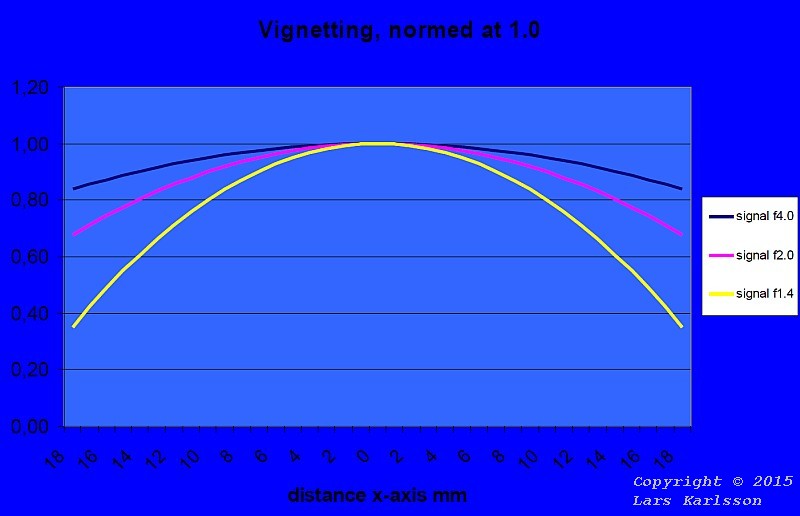
As you can see in the figure which now is normalized, equal signal at center. It is only in the central parts we get full advantage of more light when we open the aperture of the lens, at the edges we don't get the same improvement.

Go Back to content

Go Back
To page VI

Advertisement / Annons: