Astrofriend's homepage

www.astrofriend.eu
Share: Twitter Reddit Facebook Gmail Gmail Email
Search Astrofriend's homepage:

Valid CSS!

All pages shall now have been validated

Info Cookies (Kakor) / GDPR

Navigation

Advertisement /
Annons:

Twitter @AstrofriendLars

Follow Astrofriend

Tutorial News

Advertisement / Annons:

My astronomy project:
Riccardi field flattener and off-axis adapter


Content:

  1. Overview wide field and planet configuration * (You are here!)
  2. Calculation of the optical system
  3. First light test
  4. Investigation of vignetting problem
  5. Vignetting analyzes
  6. Why do we get vignetting from the DSLR camera house?
  7. Calculation of free opening to avoid vignetting
  8. Modify of the adapters
  9. Lathe and milling of the adapters

1: Overview wide field and planet configuration

Note:
I take no responsibility or liability for what are written here, you use the information on your own risk!

Certainly more than I have struggled to get together the mechanics so that the optical parts end up at the right distance. This is my first draft that and I will try it out, thinking it surely are of interest to many so I took some photos to show and wrote some text to it.

First Goal:
Pairing a full-frame camera with a field flattener and an TS130 APO refractor with 3" connection. 73.5 mm distance from the sensor to the flattener. I can say that it took a lot of research to find suitable parts. It gets a lot harder when you persist in using a full frame camera.

01 Overview offaxis flatcorrector dismantled

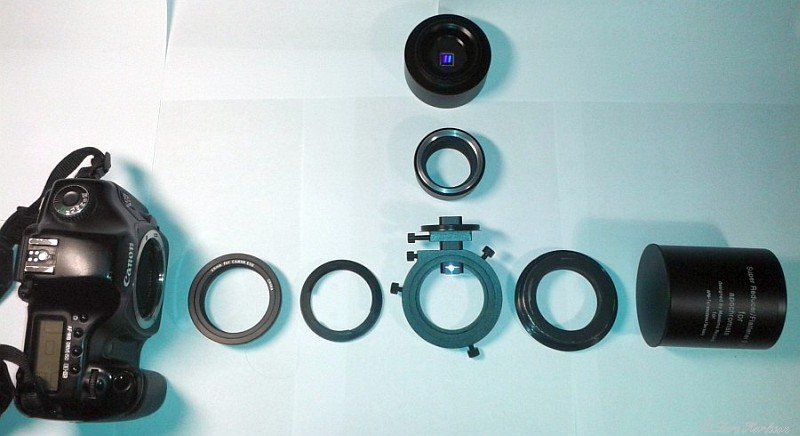
Here is an overview of the parts, from left to right:

no description comment built length
1 Canon EOS 5D full frame   44mm
2 The EOS bayonet to the M48 with rotatable function 11mm
3 M48 to jaw clutch    
4 TS off-axis guider free opening 44.5mm, T2 against guide camera 11.2mm
4a Distance.    
4b QHY5 guide camera T2 connection.  
5. M48 to M63 adapter also holds M82 thread to telescope side connection and then not using the 3" connection 7mm
6 Riccardi 2.5" field flattener with 0.75 reducer. working distance to sensor 73.5mm

M48 adapters has been selected to handle the full frame camera (which will be a big disappointing later as you will read).
TS off-axis adapter was selected with M48 at both ends, the one with EOS bayonet towards the camera feels wrong in it's construction, because the guide camera ends up in a strange angle. The tube that goes to guide the camera is rectangular unlike some other off-axis adapters that only have round holes. Rectangular is better but will still vignetting a lot, becoming so in all the off-axis adapters with "thin" (short length) construction. This off-axis adapter has a opening of 44.5mm, a bit to small for a full frame camera. It is more than 50mm away from the sensor and the light cone is bigger here. With a CCD camera that does not have mirror (shorter overall length) makes it easier to arrange.

Achieved optical length is 73.2mm, 0.3mm difference from the optimal, but some day the camera will be IR filter modified, the optical distance is changed so that margin is good to have. If necessary I put shims between the parts until exact distance is achieved.

Unit no. 2 may be replaced with a more compact version that is only 1mm thick in case more accessories has to be mounted. Riccardi field flattener with reducer with 2.5" diameter is in the smallest limit to be used with a full frame camera, optical image circle is about 42mm. But the border is not as sharp so I think it will work pretty good.

Overview offaxis flatcorrector assambled

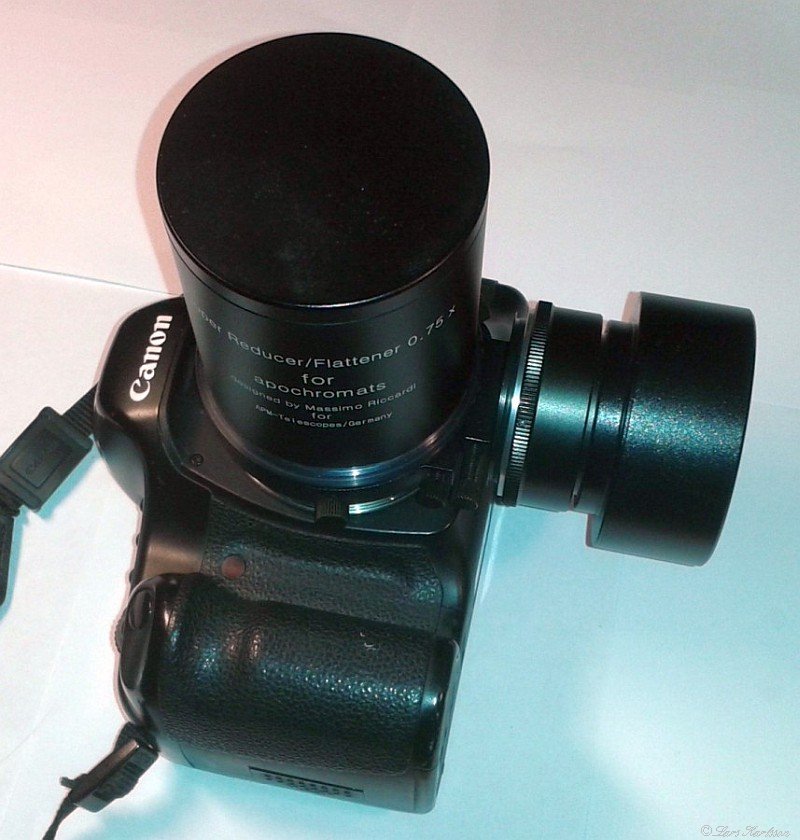
Here you have all the parts assembled, feels quite sensibly, have used threads as much as possible because it is more stable than the 2" pipe coupling.

1 03 Overview offaxis flatcorrector assambled and connected

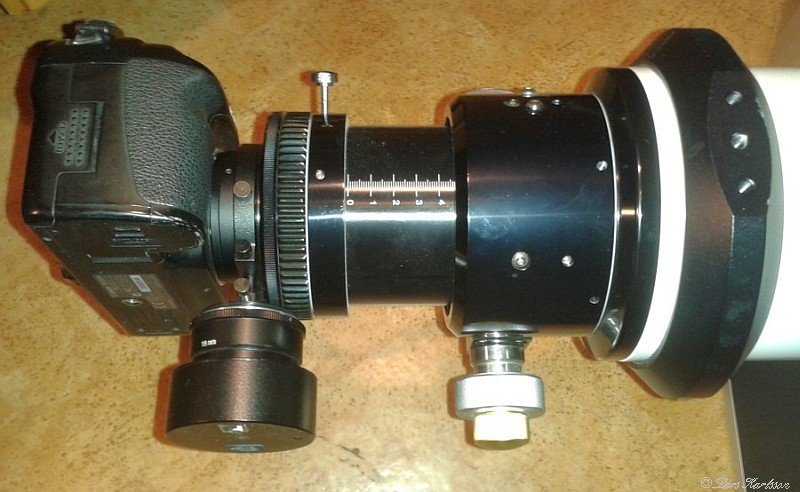
Here is the optic package mounted on the telescope. It has not very much space for the guide camera, but the distance will be sufficient if the calculations are correct. Everything is relatively steady, the only thing that's a little bit weak is the bayonet connection to the camera. With the bolt protruding, the entire package can be turned relative the telescope.

See also my new tutorial about off-axis adapters.

Second goal:
I also wanted to have a configuration in which it was given the opportunity for planet/moon photo even if the telescope has relative short focal length, 900mm. Here the distances are not as critical, just have to get the threads to mate with each other.

2 02 Overview plane configuration dismantled

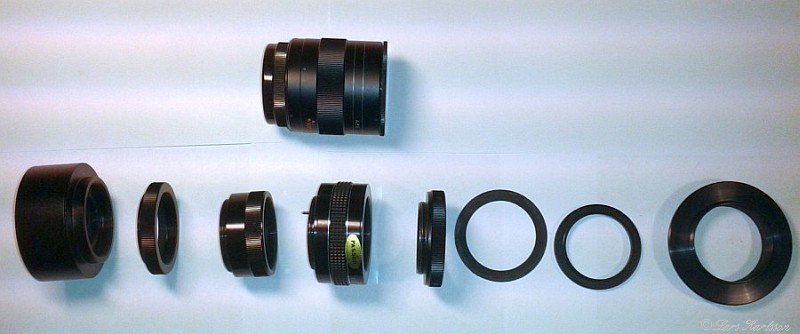
Overview of the parts, from left to right:

no description
1 QHY5 camera with T2 connection
2 T2 to M42 adapter
3 M42 (Pentax) extension tube
4a 2x tele-extender Pentax or
4b 3x tele-extender Pentax
5 M42 to T2 adapter
6 T2 to M48 adapter
7a,b Shims not needed in this configuration
8 Place of possibly filter wheel in the future
9 M48 to M82 adapter to connecting to the telescope

I chose this Pentax tele extender, not sure if the optical quality is good enough, but provides a good mechanical stability. I already have them so natural to try these first, moreover planet photo is not the main purpose.

2:02 a.m. Overview planetary configuration assembled

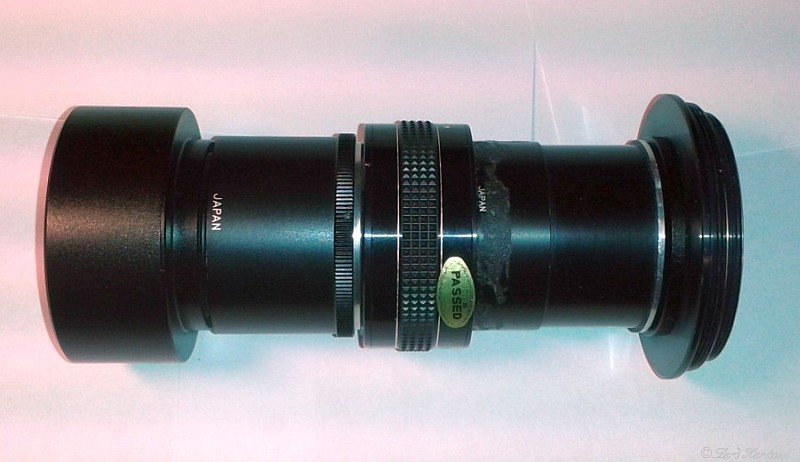
Here are the parts assembled, without T2 to M42 adapters that I will use later. T2 and the Pentax M42 threads is quite similar, differing only in the pitch. But you must have an adapter between them, otherwise the threads will be destroyed.

2 03 Overview planet configuration dismantled connected

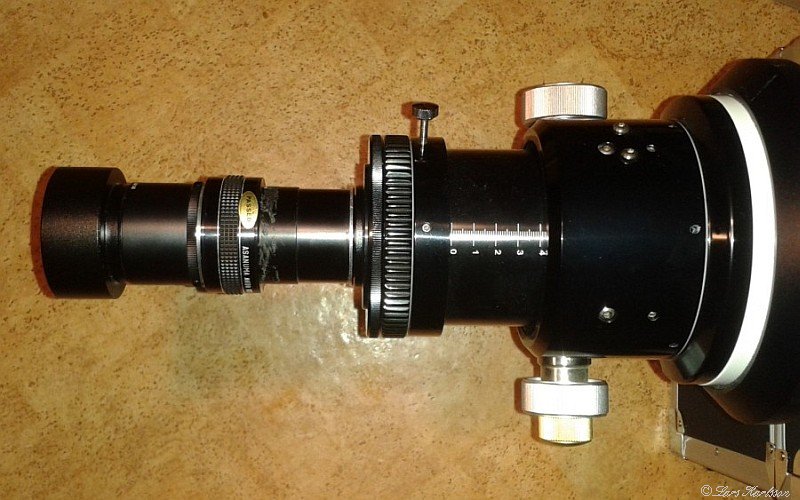
Here camera and tele extender attached  to the telescope. Steady and good fitness, also possibly to add an additional tele extender.

Go Back to content

Go Back
To page II

Advertisement / Annons: