|
Advertisement / Annons: |
Tutorial:
|
Content:
Note: |
5, Setup Flatfield plugin and how to use it:This plugin is the heart of making a synthetic flat image. It is used in the software AstroImageJ which is built on Java. Install the Flatfield plugin:Download it, unpack it and install it in AIJ's plugin folder. 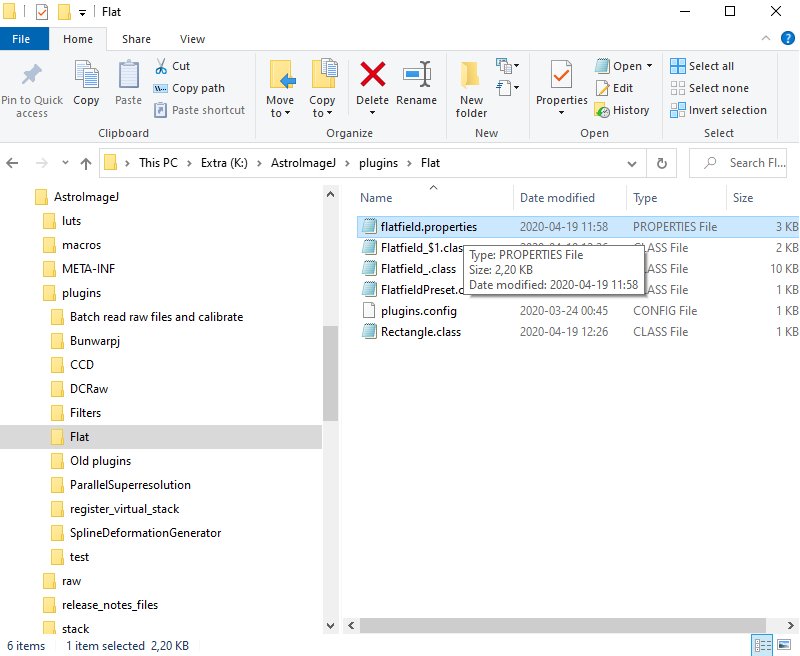
All these files are needed. Flatfield.properties: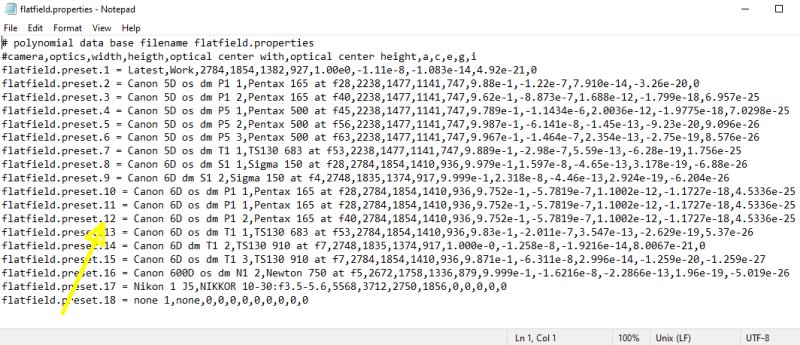
These file hold the camera data to make it easier to work. It's very primitive and I use Notepad and type in new camera data in this file. Be careful to have the running number correct! The fields you have to setup are:
If you don't use the higher parameters as g and i, set them to = 0. Flatfield menu: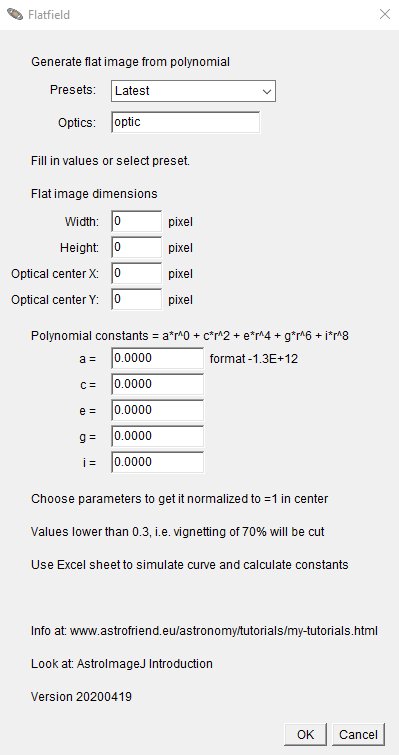
The opening menu of Flatfield. Choose camera and optics: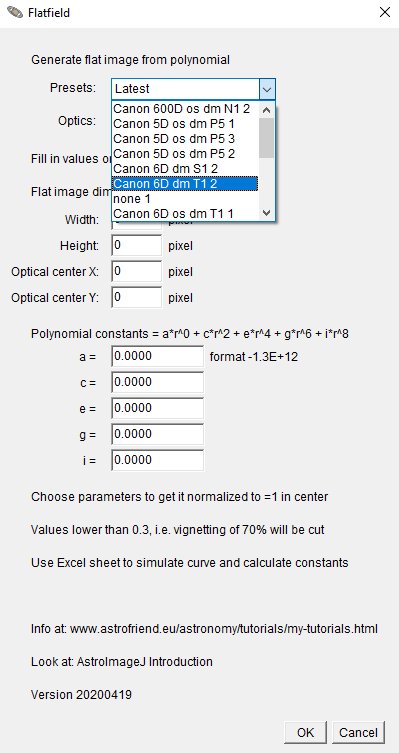
From the dropdown menu, choose the camera and optics you use and want to make a synthetic flat image to. Fill the fields with figures: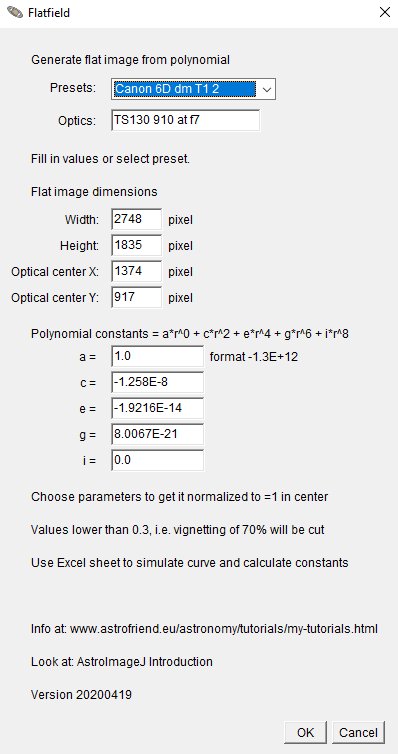
Overwrite the parameters with your new figures. If it fits well, update the properties file with this new values on a new line. Sorry if it's a bit primitive. Example of data for a synthetic flat image. When everything is checked, click the 'OK' button and soon a flat image will popup. Save the image in the window that pop up in the format you want to have it in. I always have them in 32-bit floating point format. Fits when working with DSS and Gimp, Tiff when working further in AstroImageJ and Fitswork. Or save in both format if you don't know which to use. Download the Flatfield plugin:The download page is moved to here: AstroImageJ download Flatfield plugin: Instructions how to use AstroImageJ: Tutorial AstroImageJ Introduction. Conclusion:One good thing with a synthetic image is that it doesn't introduce any random noise. The pixel to pixel variation (small variations of gain) can be handled separate. Lot of thanks to Lars who helped me with the JAVA setup and instructions.
Update:
|
|