|
Advertisement / Annons: |
Tutorial:
|
Content:
Note: |
3: Use of the app "Camera Connect"Setup the exposure of the camera:I have the camera in manual exposure mode (M), but depending of the situation it could be better to have it in some other mode. If you set it to bulb mode (B), you start the exposure by tap the exposure button and then closed it by tap it again. You change it on the camera (hardware). The start exposure button is the big white circle. 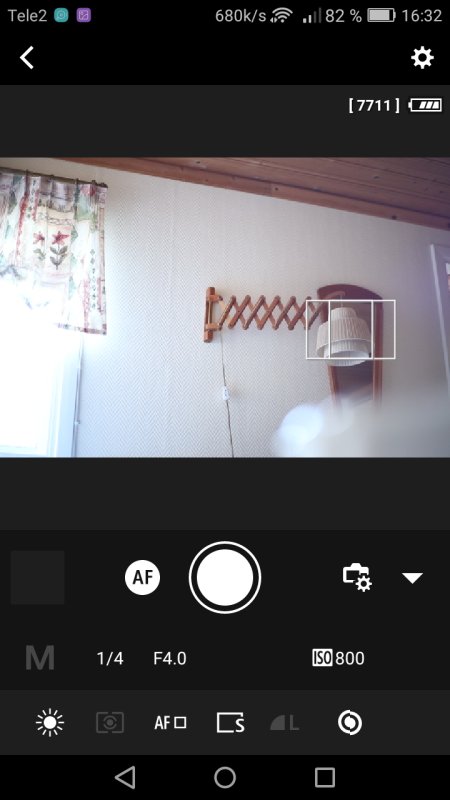
Play around with the exposure setting to get a feeling how to use them, the window reflect the exposure. To dark, increase the exposure, to light, decrease the exposure. Just tap the parameter you want to change and adjust it with the scroll list that comes up.
Note: Set focus modeIf you have set the parameter as I did following will happen, maybe different if you have a different camera. 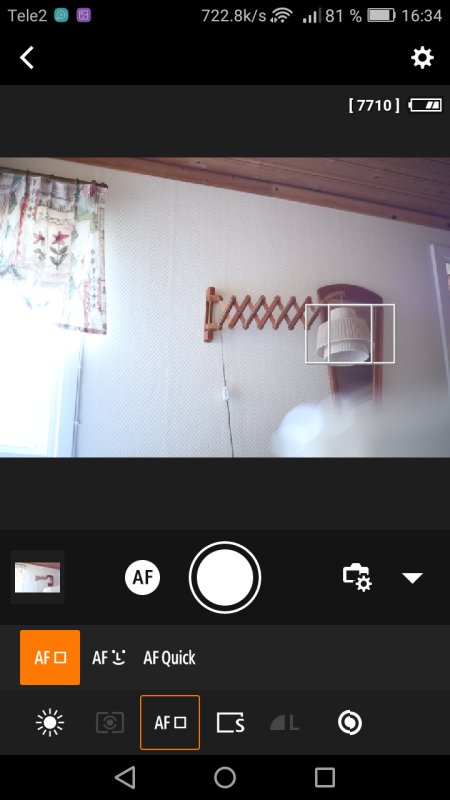
Tap the window where you want to have the focus. The rectangle move to that place. Tap the AF focus, nothing happens more than the display change to focus mode. Set manual focusYou set the manual mode in phone window, the orange rectangle below. Important, the camera lens shall be in autofocus mode! 
If you have a manually focus lens or set a autofocus lens to manually mode, just adjust the lens focus (on the lens) manually and look in the phone window when in correct focus. Note: You should normally try to set focus in the center of the field. Zoom in and adjust the focus manuallyDouble tap the center of the rectangle, the windows zoom in. 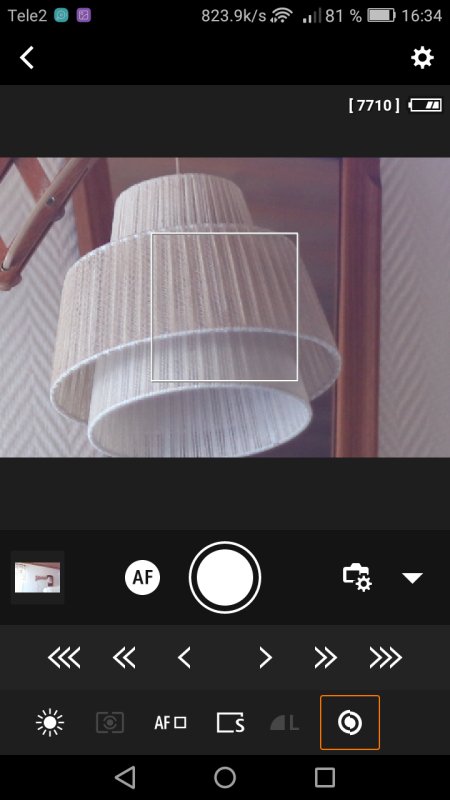
Tap the left and right arrows until you have the object in focus, windows is in live mode and update direct (almost). You can also tap and hold the AF round button in the window and it will focus automatic (but first change from manually mode to AF mode from the bottom line menu). It normally doesn't work very well on stars. That's all ! Now I set the lens to manually focus, shut down the camera interface. As I told in the beginning of this tutorial it is in a very early stage. I will do complement when I got more experience. I understand most of you already have used this app, but for some maybe it was useful information.
|
|