|
Advertisement / Annons: |
Tutorial:
|
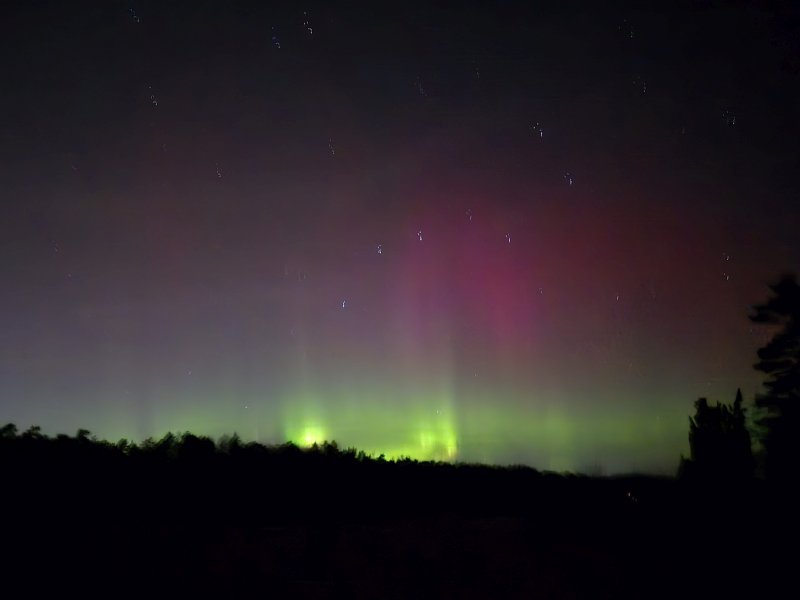
Meteor Shower equipmentIntroduction:This is new to me, in November 2024 I was out to a dark place with my friend Rolf to take some deep sky images. He told me that this night there will be auroras. I thought, okay, but here in Stockholm there will be very weak and of no interest. But what wrong I was, it was fantastic. So now I want to catch the next one with my DSLR and not only the smart phone.  Photographer: Rolf J
This is Rolf's photo of a aurora with only his smartphone, fantastic. We live at a Latitude of +59 degree and the auroras isn't common on this Latitude. More to read about Auroras: |
|
This is my plan to what equipment to use and how to setup: Camera, Lens:
Of what equipment I already have I think the Sigma 24-70mm f/2.8 will be the best to use. A 20mm f/1,8 lens had been better of course. When choosing lens and how wide. I got an advice on internet, if you don't want distorted trees at the sides, don't tilt the lens upwards. Have it horizontal and crop the lower part later when editing the image. Then you must have a bit wider lens to get some sky in the photo. Settings:
To store one image on camera's SD card takes 7 seconds (Canon EOS 6D). Other equipment:
Source of information:From this video I got a lot of useful information:
Useful links from my friend Rolf:
My preferable equipment for auroras:Almost the same as I use when I photographing meteor showers. 
An ancient Manfrotto tripod, I have shorten the legs of it to make it more transportable. Heavy and sturdy, only used when I go by car. I have another one which is more lighter if I have to walk a long way or take the bus. 
On top of the tripod I have this head. It let me fine adjust the pointing. This is the altitude adjuster. 
On the backside is the azimuth adjuster. 
Left:
Middle:
Right: 
You don't want to manually exposure 500 photos during the night when taking a time lapse sequence. An intervallo meter is needed. But normally I only use the shutter button and lock it, set the time on the camera and in continuous mode. With this the time loss between the photos will be minimal. Normal exposure times in time lapse sequences I (plan) to use is: 7 seconds. That is the time it take for the camera to download the image to the SD card. If I want to speed it up I maybe can lower the resolution of the image in the camera settings. Always jpg format for time lapse. It's about the same as when taking meteor shower photos. When taking stills I only use the shutter button with and a mirror flip up, normal exposures: 2 or 4 seconds for fast moving aurora. If the aurora is somewhat static I can use 10 or 20 seconds exposures. Longer exposure time give elongated stars. 
The camera is my old Canon EOS 6D, it's a full frame camera. When I focus I can use the camera's live view, very practical. But shut it off when finished the focusing procedure, because the live view take a lot of power and drain the battery, it heat the camera's sensor too. In my country it's always cold when there is something astronomy related going on on the sky. The batteries doesn't last very long in cold. Have extra camera batteries and fully charged. 
At the front of the lens is the heater band wrapped around. Without it the lens will fog up, a dew heater is normally a must. This one is powered through an USB cable. Note that I locked the zoom to widest with the lock button. The dew heater with its cable can easily move the zoom ring. The lens I plan to use, a Tamron 24-70mm f/2.8. Compare to the Sigma 16 mm fisheye lens this one is 24 mm at the widest setting. A fisheye lens is heavily distorted, this one is linear, rectilinear. It has an opening of f/2.8, a bit slow due. When taking photos like this it can be many hundreds of photos, it wear the shutter on the camera and the lens' aperture. Another problem with the aperture, if stop it down, say to f/4, it will not come exactly to this position every time it opens and close. If you plan to do a time lapse movie it will flicker because of this. On Canon cameras the lens can be fouled to stop it down all time. When stopped down to the opening you want, say f/4, loosen the lens and turn it a little bit off until the lens' electric contacts are not engaged anymore. Note, the lens may easily fall to the ground and get damaged. The older lenses I used earlier didn't had this problem because they were totally manually. 
I have the battery mounted on one of the legs, a stripe hold it in place. A bracket will be better and it can be 3D-printed. 
The intervallometer has a long cable. I just have it hanging down from the tripod. Note, when taking many photos as we do when taking time lapse sequences the camera's shutter wear out. Better with a camera with an electronic shutter. 
The white lid cover the view finder and block light coming into the camera backwards through the viewer. This lid is important, most cameras comes with a devices like this that you can use to cover the viewer. |
|
| Go Back |