|
Advertisement / Annons: |
Macro photography
|
Content:
Note: |
2. Macro lens systemTime for an update of my macro setup system:In astronomy I have used stacked lenses sometimes. That technique is also possible to use in macro photography. |
Sigma APO 150 mm f/2.8 lens: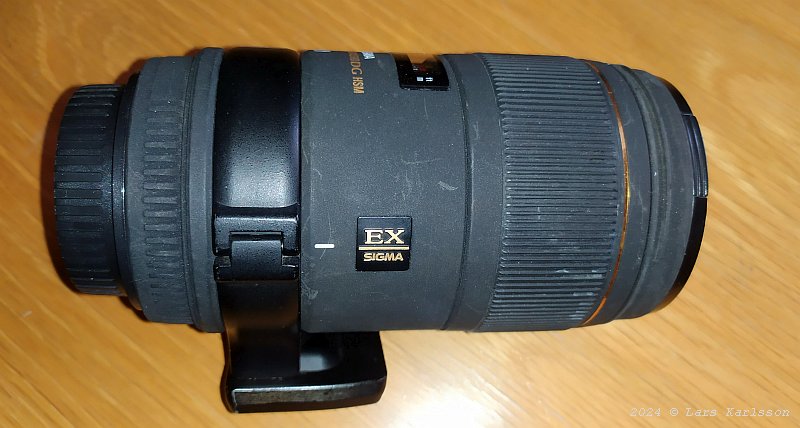
As the main lens I use my Sigma APO macro 150 mm lens. I have read about that it's common to use this lens in advanced macro photo setups. Something I wasn't aware of when I bought it many years ago. Canon EF 50 mm f/1.8: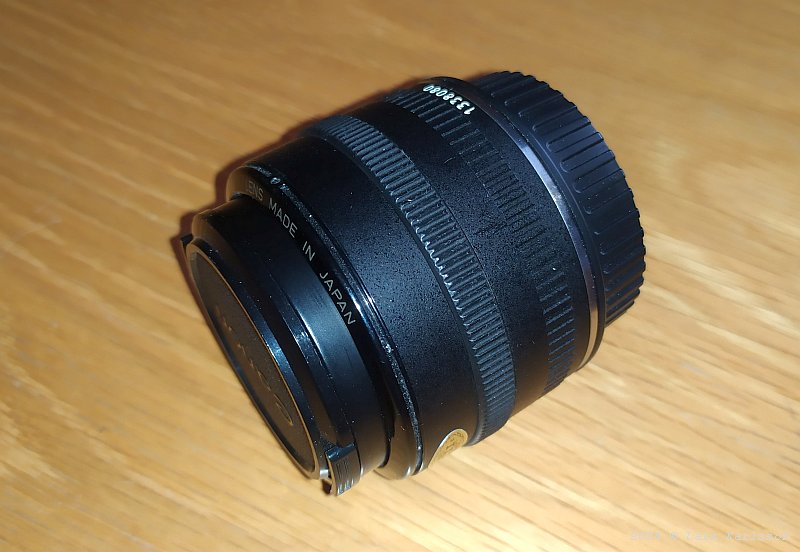
The second lens, a Canon standard 50 mm f/1.8 lens. This one attach to the main lens, in reverse direction with a adapter filter ring. Adapter filter ring: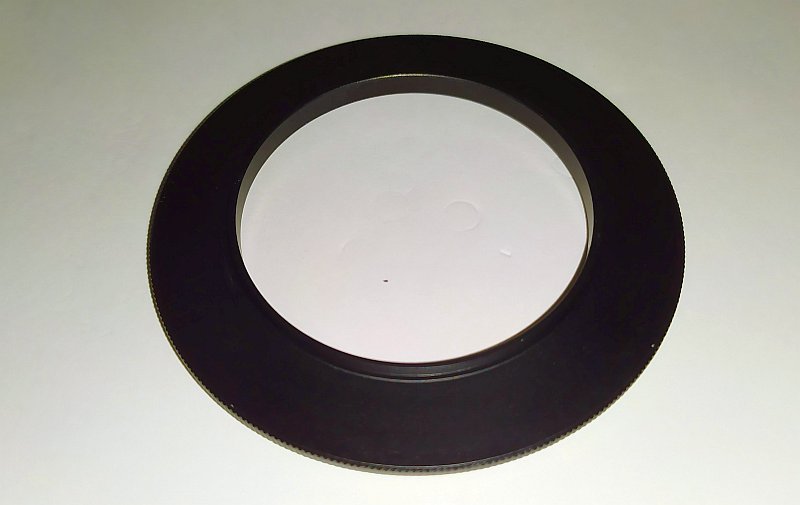
Front side of the adapter ring, it has a M52 thread that connect to the 50 mm lens. 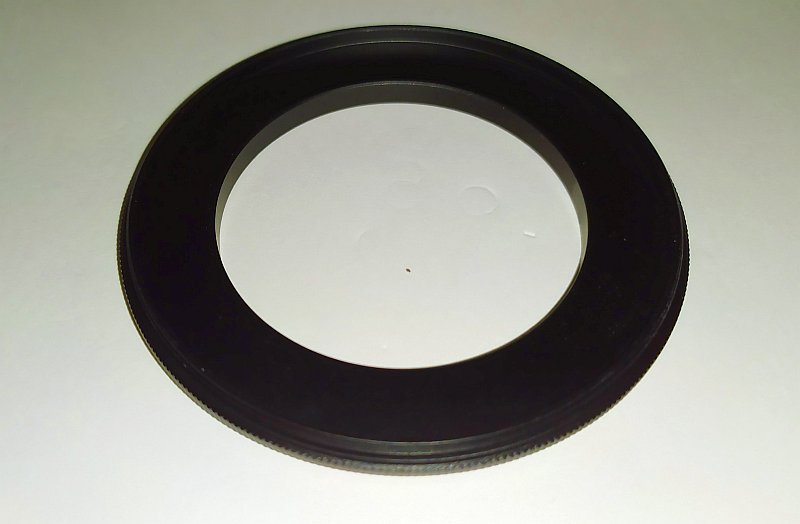
The other side of the adapter ring has a M72 thread that connect to the 150 mm lens. 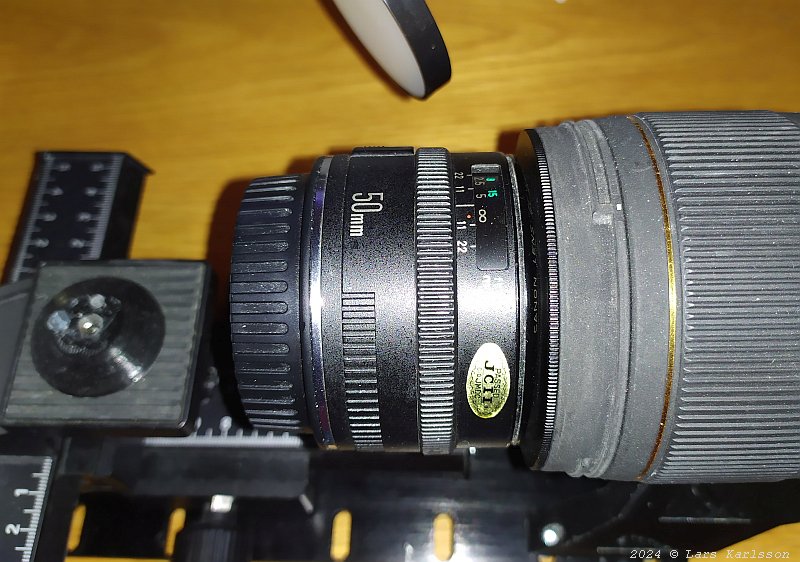
The two lenses coupled together, very stable between them but need a support from a bracket to the bottom. Overview of the optic system: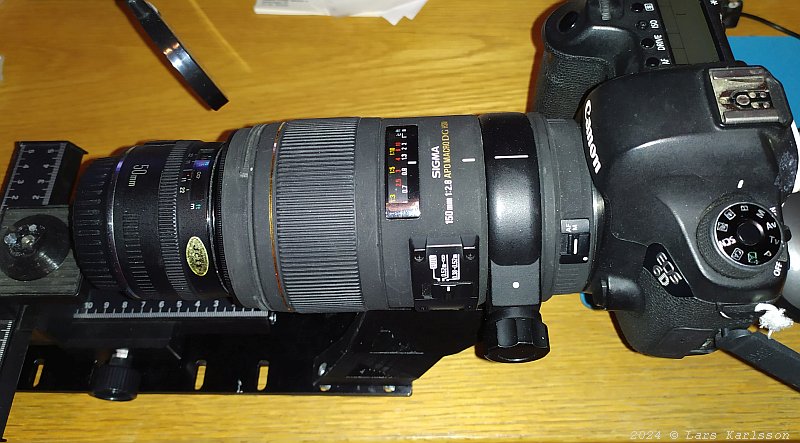
A top view of the lenses and with a camera attached. It's easy to rotate the camera 90 degree, landscape or portrait orientation. This combination of these lenses give a magnification of about three times. Apertures:On the main lens I set the aperture to f/5.6 to f/8 were it's sharpest and have a reasonable depth of field. The second lens is used fully open at f/1.8. At least I start with these settings. When focus stacking the recommendation is to use the aperture fully open. Focus:A normal lens usually has its best optical performance when it is focused at infinity. With this, we want the light rays between the lenses to be parallel. Both lenses set to focus at infinity. That's the idea behind to use two stacked lenses. The object is moved so that its nearest part is in focus, with some margin outside. Now I can focus either by changing the focus ring on the main lens or moving the object closer with the sled. Suitable setup if you want to do focus stacking. A technique where you move the focus in small steps over the object, you then join together the sharp parts from all the pictures you took. Since it can be 25 images or more, it is practical if you can automate it. There are programs and controls for this. It can be a motor-driven sled or that you use the lens's built-in focus motor. I intend to focusing on the main lens that is directly connected to the camera. It is a worse solution from an optical performance point of view but much easier to implement. |
|
|