Astrofriend's homepage

www.astrofriend.eu
Share: Twitter Reddit Facebook Gmail Gmail Email
Search Astrofriend's homepage:

Valid CSS!

All pages shall now have been validated

Info Cookies (Kakor) / GDPR

Navigation

Advertisement /
Annons:

Twitter @AstrofriendLars

Follow Astrofriend

Tutorial News

Advertisement /
Annons:

Advertisement / Annons:

3D CAD:
GT2 pulleys for focusing a camera lens


Contents:

  1. Calculating number of teeth
  2. CAD of 15 teeth pulley, part 1
  3. CAD of 15 teeth pulley, part 2
  4. CAD of 15 teeth pulley, part 3
  5. CAD of 15 save and prepare to print, part 4
  6. CAD of 174 teeth pulley, part 1
  7. CAD of 174 teeth pulley, part 2
  8. CAD of 174 teeth pulley, part 3
  9. CAD of 174 save and prepare to print, part 4
  10. CAD of 174 clean from support material, part 5
  11. CAD of 174 new version, part 6
  12. CAD of 174 slicing and printing, part 7
  13. CAD of 12 and 15 teeth, new design, part 1
  14. CAD of 12 and 15 teeth, printing, part 2
  15. CAD of 180 teeth pulley, part 1
  16. CAD of 180 teeth pulley, part 2
  17. CAD of 180 teeth pulley, part 3
  18. To be continued

Note:
I take no responsibility or liability for what are written here, you use the information at your own risk!


3, CAD of 15 teeth pulley, part 2:

To make a hole isn't that easy, I'm new to this but after some practicing I could make a hole.


Making the shaft hole:

3D CAD: Making a drawing for GT2 pulleys to the focuser of lens

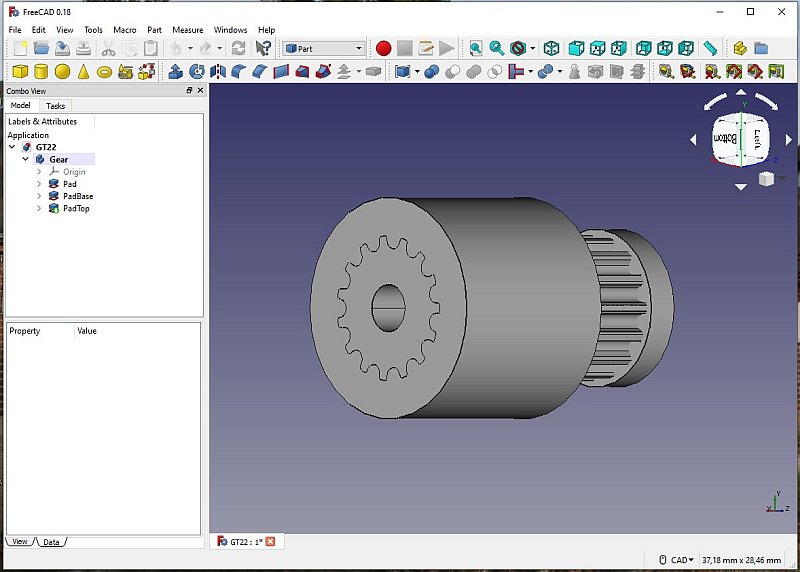
In my case I want the shaft hole from the bottom, tilt the pulley to have a look from that side.


3D CAD: Making a drawing for GT2 pulleys to the focuser of lens

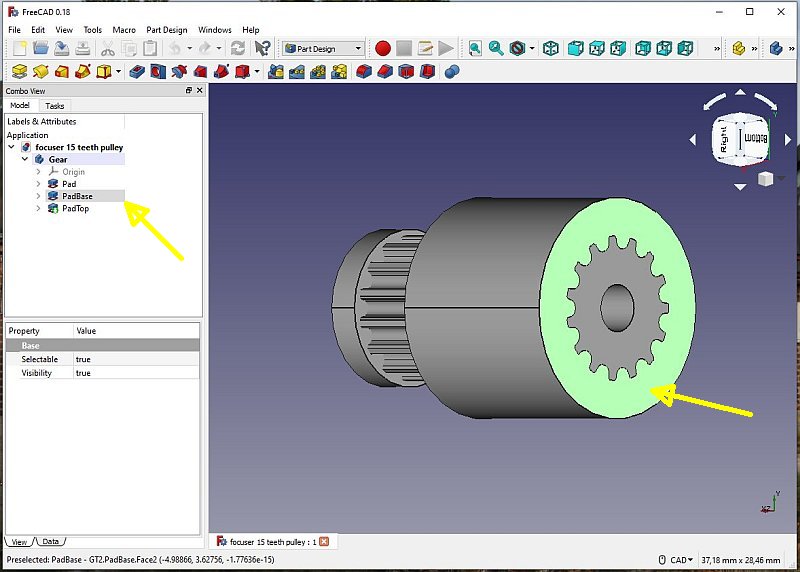
Mark one of the plane where the holes start from. It lights up and also in the table to the left.


3D CAD: Making a drawing for GT2 pulleys to the focuser of lens

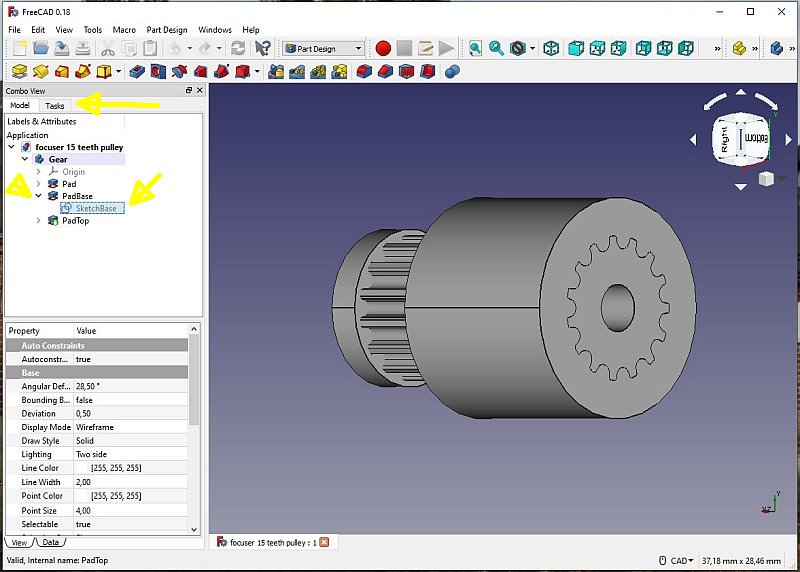
Open the PadBase map, click on the SketchBase, then change window to Tasks.


3D CAD: Making a drawing for GT2 pulleys to the focuser of lens

A new window appears.


3D CAD: Making a drawing for GT2 pulleys to the focuser of lens

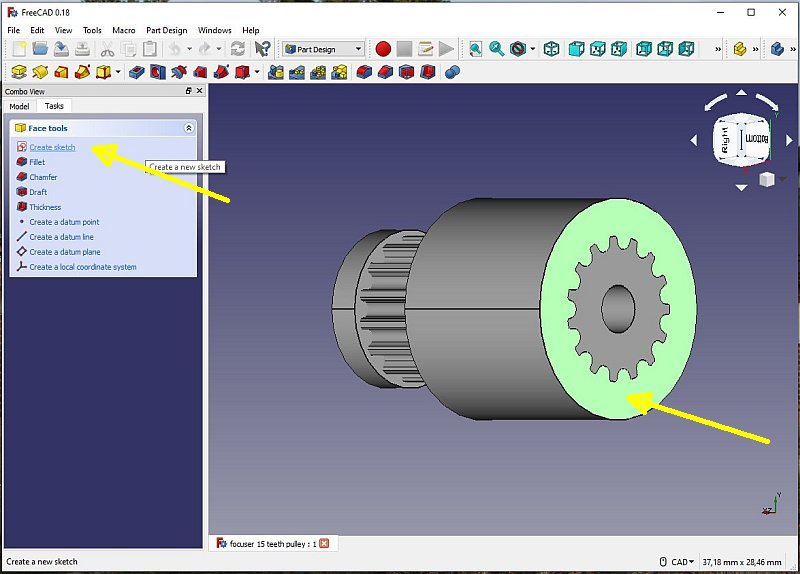
Click on the plane again where the hole shall start from. Then double click on Create sketch.


3D CAD: Making a drawing for GT2 pulleys to the focuser of lens

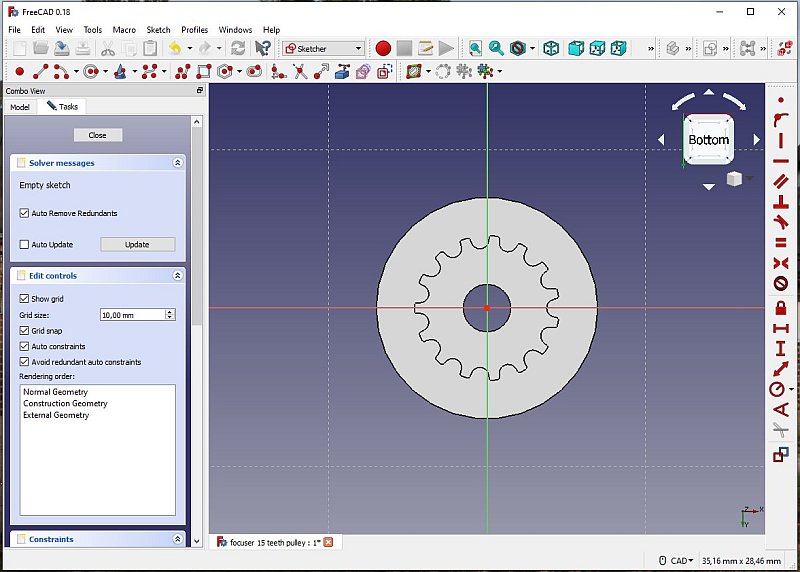
The screen change to a 2D drawing.


3D CAD: Making a drawing for GT2 pulleys to the focuser of lens

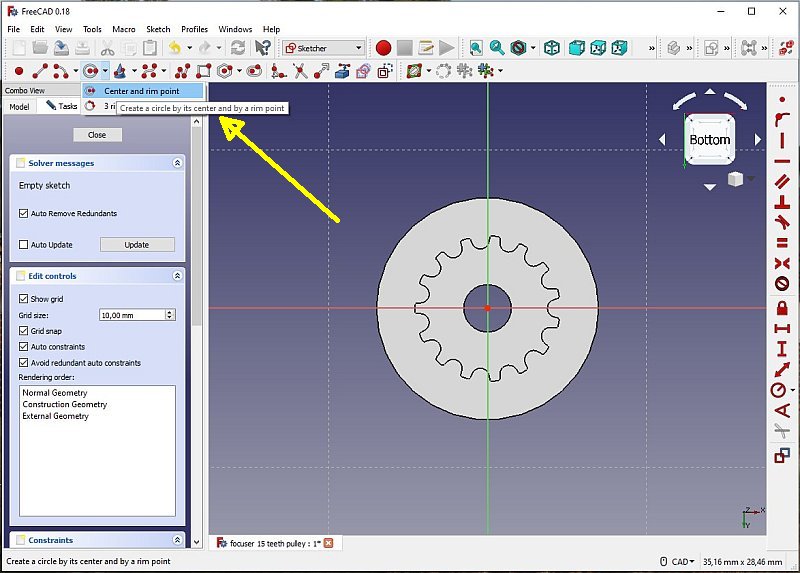
Use the tool Draw Circle.


3D CAD: Making a drawing for GT2 pulleys to the focuser of lens

First click at origo, then move out to the radius you want, it don't have to be exact, it will be corrected in next step. Click a second time where the radius ends. Click the Esc button to stop drawing circles.


3D CAD: Making a drawing for GT2 pulleys to the focuser of lens

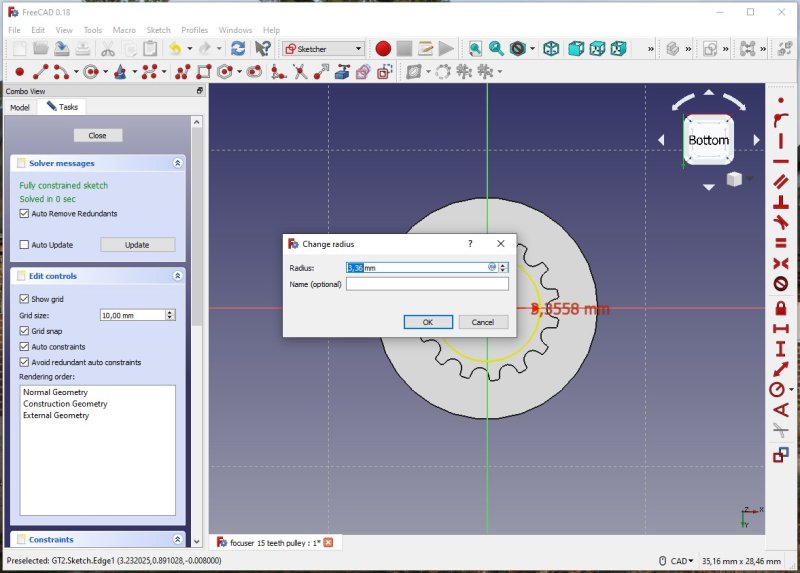
From the right menu, choose the radius tool, click on the radius. Type in the radius you want, in my case 3 mm. Click okay.


3D CAD: Making a drawing for GT2 pulleys to the focuser of lens

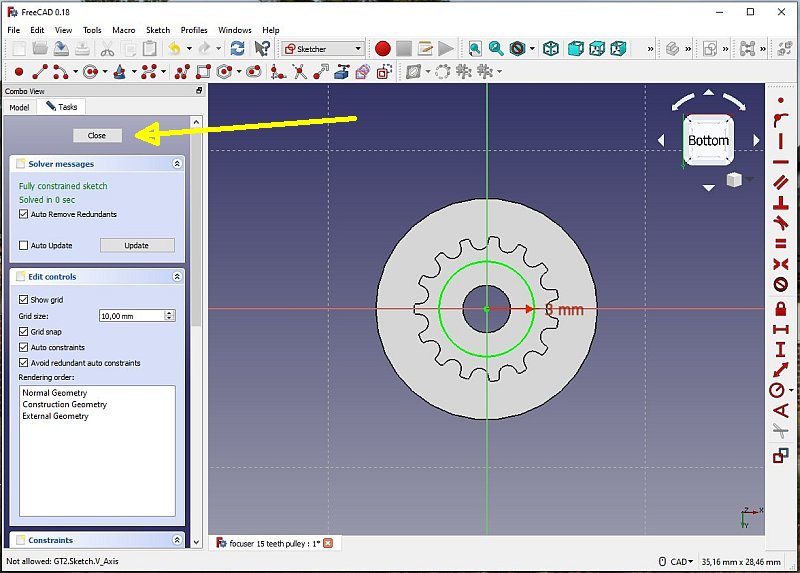
Click on Close.

It's wise to save the drawing, sometimes you do something wrong and have to start all over again. With several saved drawings you can start from any of them.


3D CAD: Making a drawing for GT2 pulleys to the focuser of lens

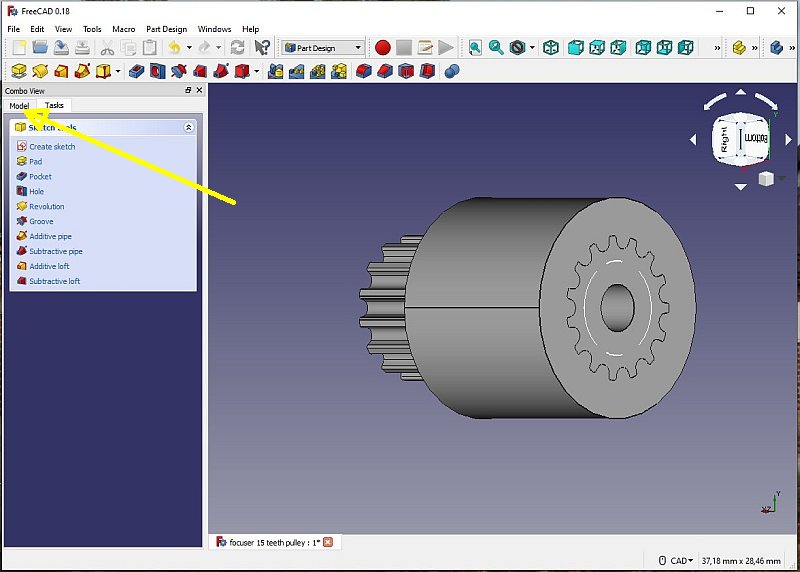
Change back to Model window.


3D CAD: Making a drawing for GT2 pulleys to the focuser of lens

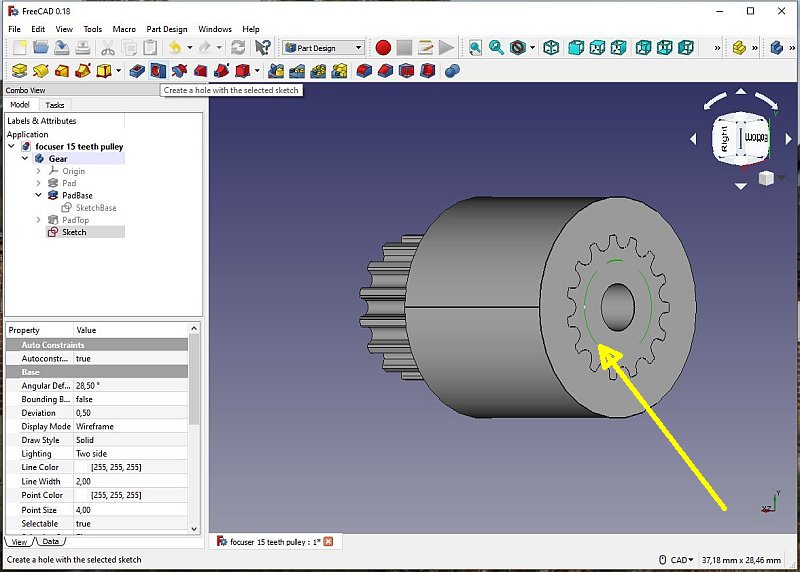
Click on the ring you drow earlier and click on the Hole Tool.


3D CAD: Making a drawing for GT2 pulleys to the focuser of lens

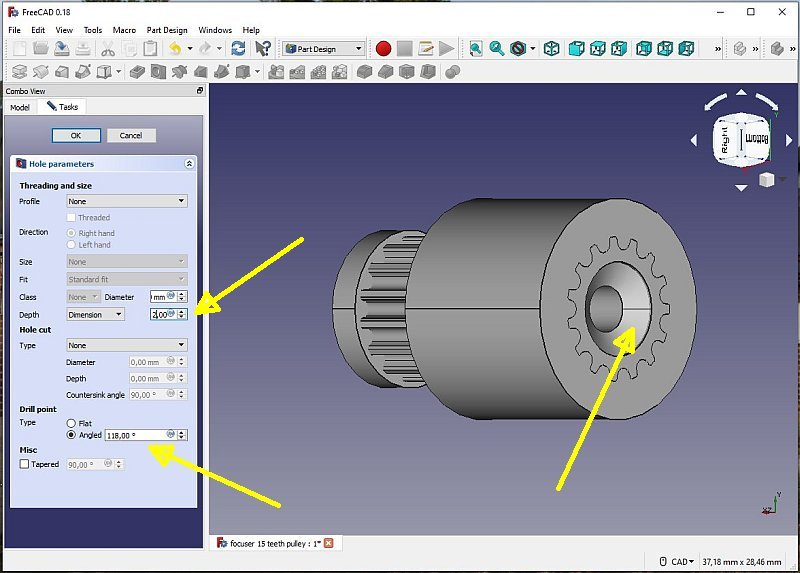
I do a ground hole here just to show how it works. The transition from one hole to the other are angled.


3D CAD: Making a drawing for GT2 pulleys to the focuser of lens

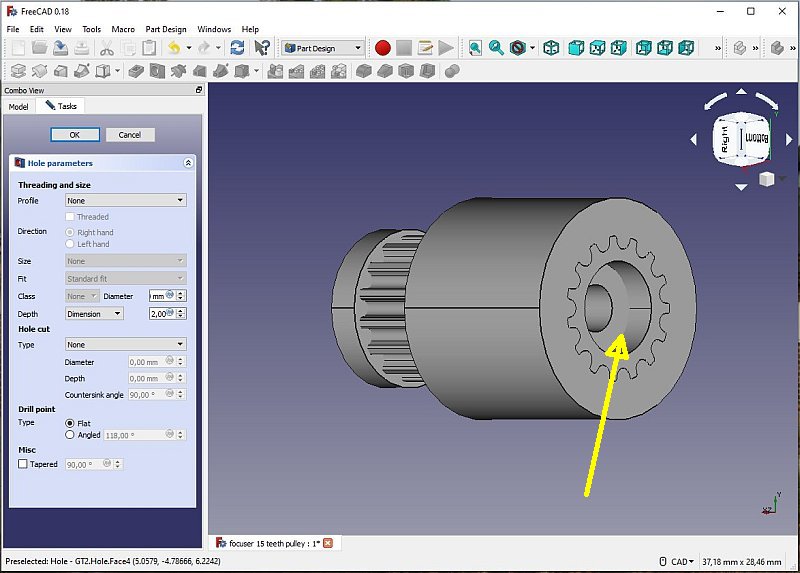
Click on Flat and see how it changes, this is how I want it.


3D CAD: Making a drawing for GT2 pulleys to the focuser of lens

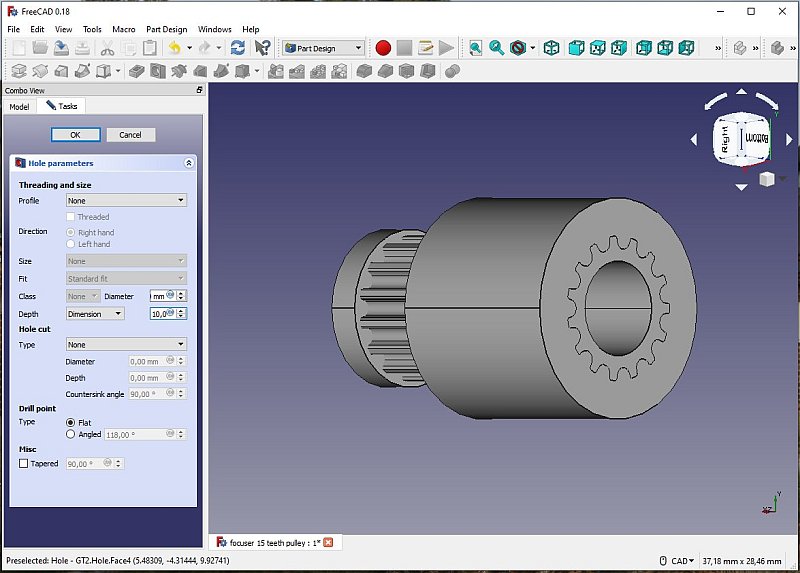
At last I change the Depth to 10 mm and with a shaft hole of 6 mm. Finished with the shaft hole. Next, make a hole for the lock screw. Save the file with a new name.

Go Back to content

Go Back
To page IV (part 3)

Advertisement / Annons: