|
Advertisement / Annons: |
Tutorial:
|
Content:
Note: |
1: Cleaning the camera sensorIntroduction:I always had a lot of problem to get the dust away from the interior of the camera and the sensor. When taking normal photos the dust is difficult to see but when stretching the astrophotos you see them clearly and they look very ugly. The best is of course to hand over the camera to a professional to clean it. But I feel it's bit time consuming and it cost a lot of money too. Here I describe how I do the cleaning of the sensor. But a warning, this is very risky and you shouldn't do it. Your camera can be destroyed and be very expensive to repair. I have done this many times, but never get it perfect but almost. It had been better to have a dedicated camera for astrophoto and let it be on the telescope / lens all the time. It's when removing the camera most of the dust get on to the sensor. Here are a couple of links how other do this, read it carefully:
Tools I use:There are no expensive tools to do this cleaning. 
In my photo tool box I have these two types of dust cleaning spatulas. Type 1 is about 10 mm wide and type 2 about 15 mm wide. The type 1 is new to me and I have not used it before, I bought it to better reach the corners of the sensor. I have a full format sensor (36x24 mm) and 24 mm has been better I think, when I buy new ones I go for wider spatulas that take the whole 24 mm wide sensor in one sweep. 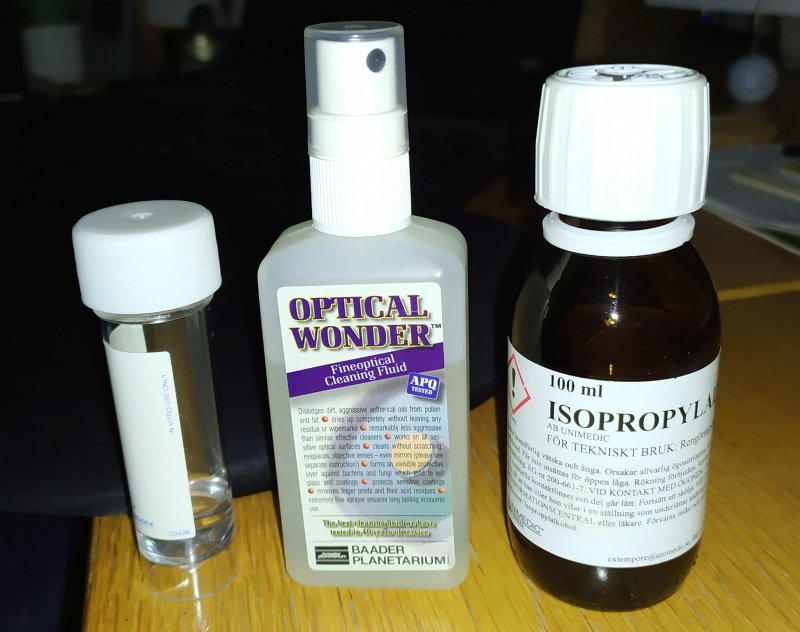
The solvent I use is Isopropyl, I also found an old Optical Wonder from Baader in my boxes. Never used that one earlier but will give it a try now. The one most left is a mix of 70% Isopropyl and 30% distilled water. I buy the distilled water and Isopropyl at the pharmacy. All these solvent are flammable, be very careful ! 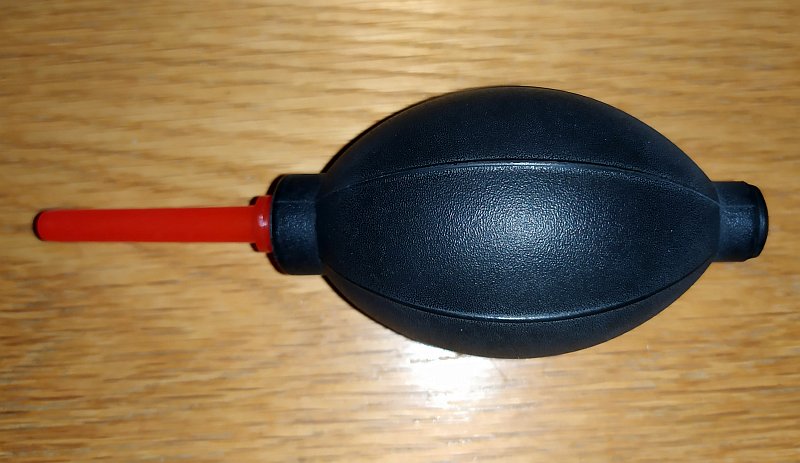
The bulb blower, the best tool to blow the dust away. Don't use compressed air, it will destroy your camera ! Analyze the sensor for dust and dry stains:These images is taken against the clouds at f/8 and a 150 mm lens, time automatic. It started with 1/125 sec and later in the evening it got 30 sec exposures. This is how the image looks when it have some dirt on it:  (click on the image to get it in full resolution)
It doesn't look very bad, but when stretching the image as you do when processing astrophotos it looks like this: 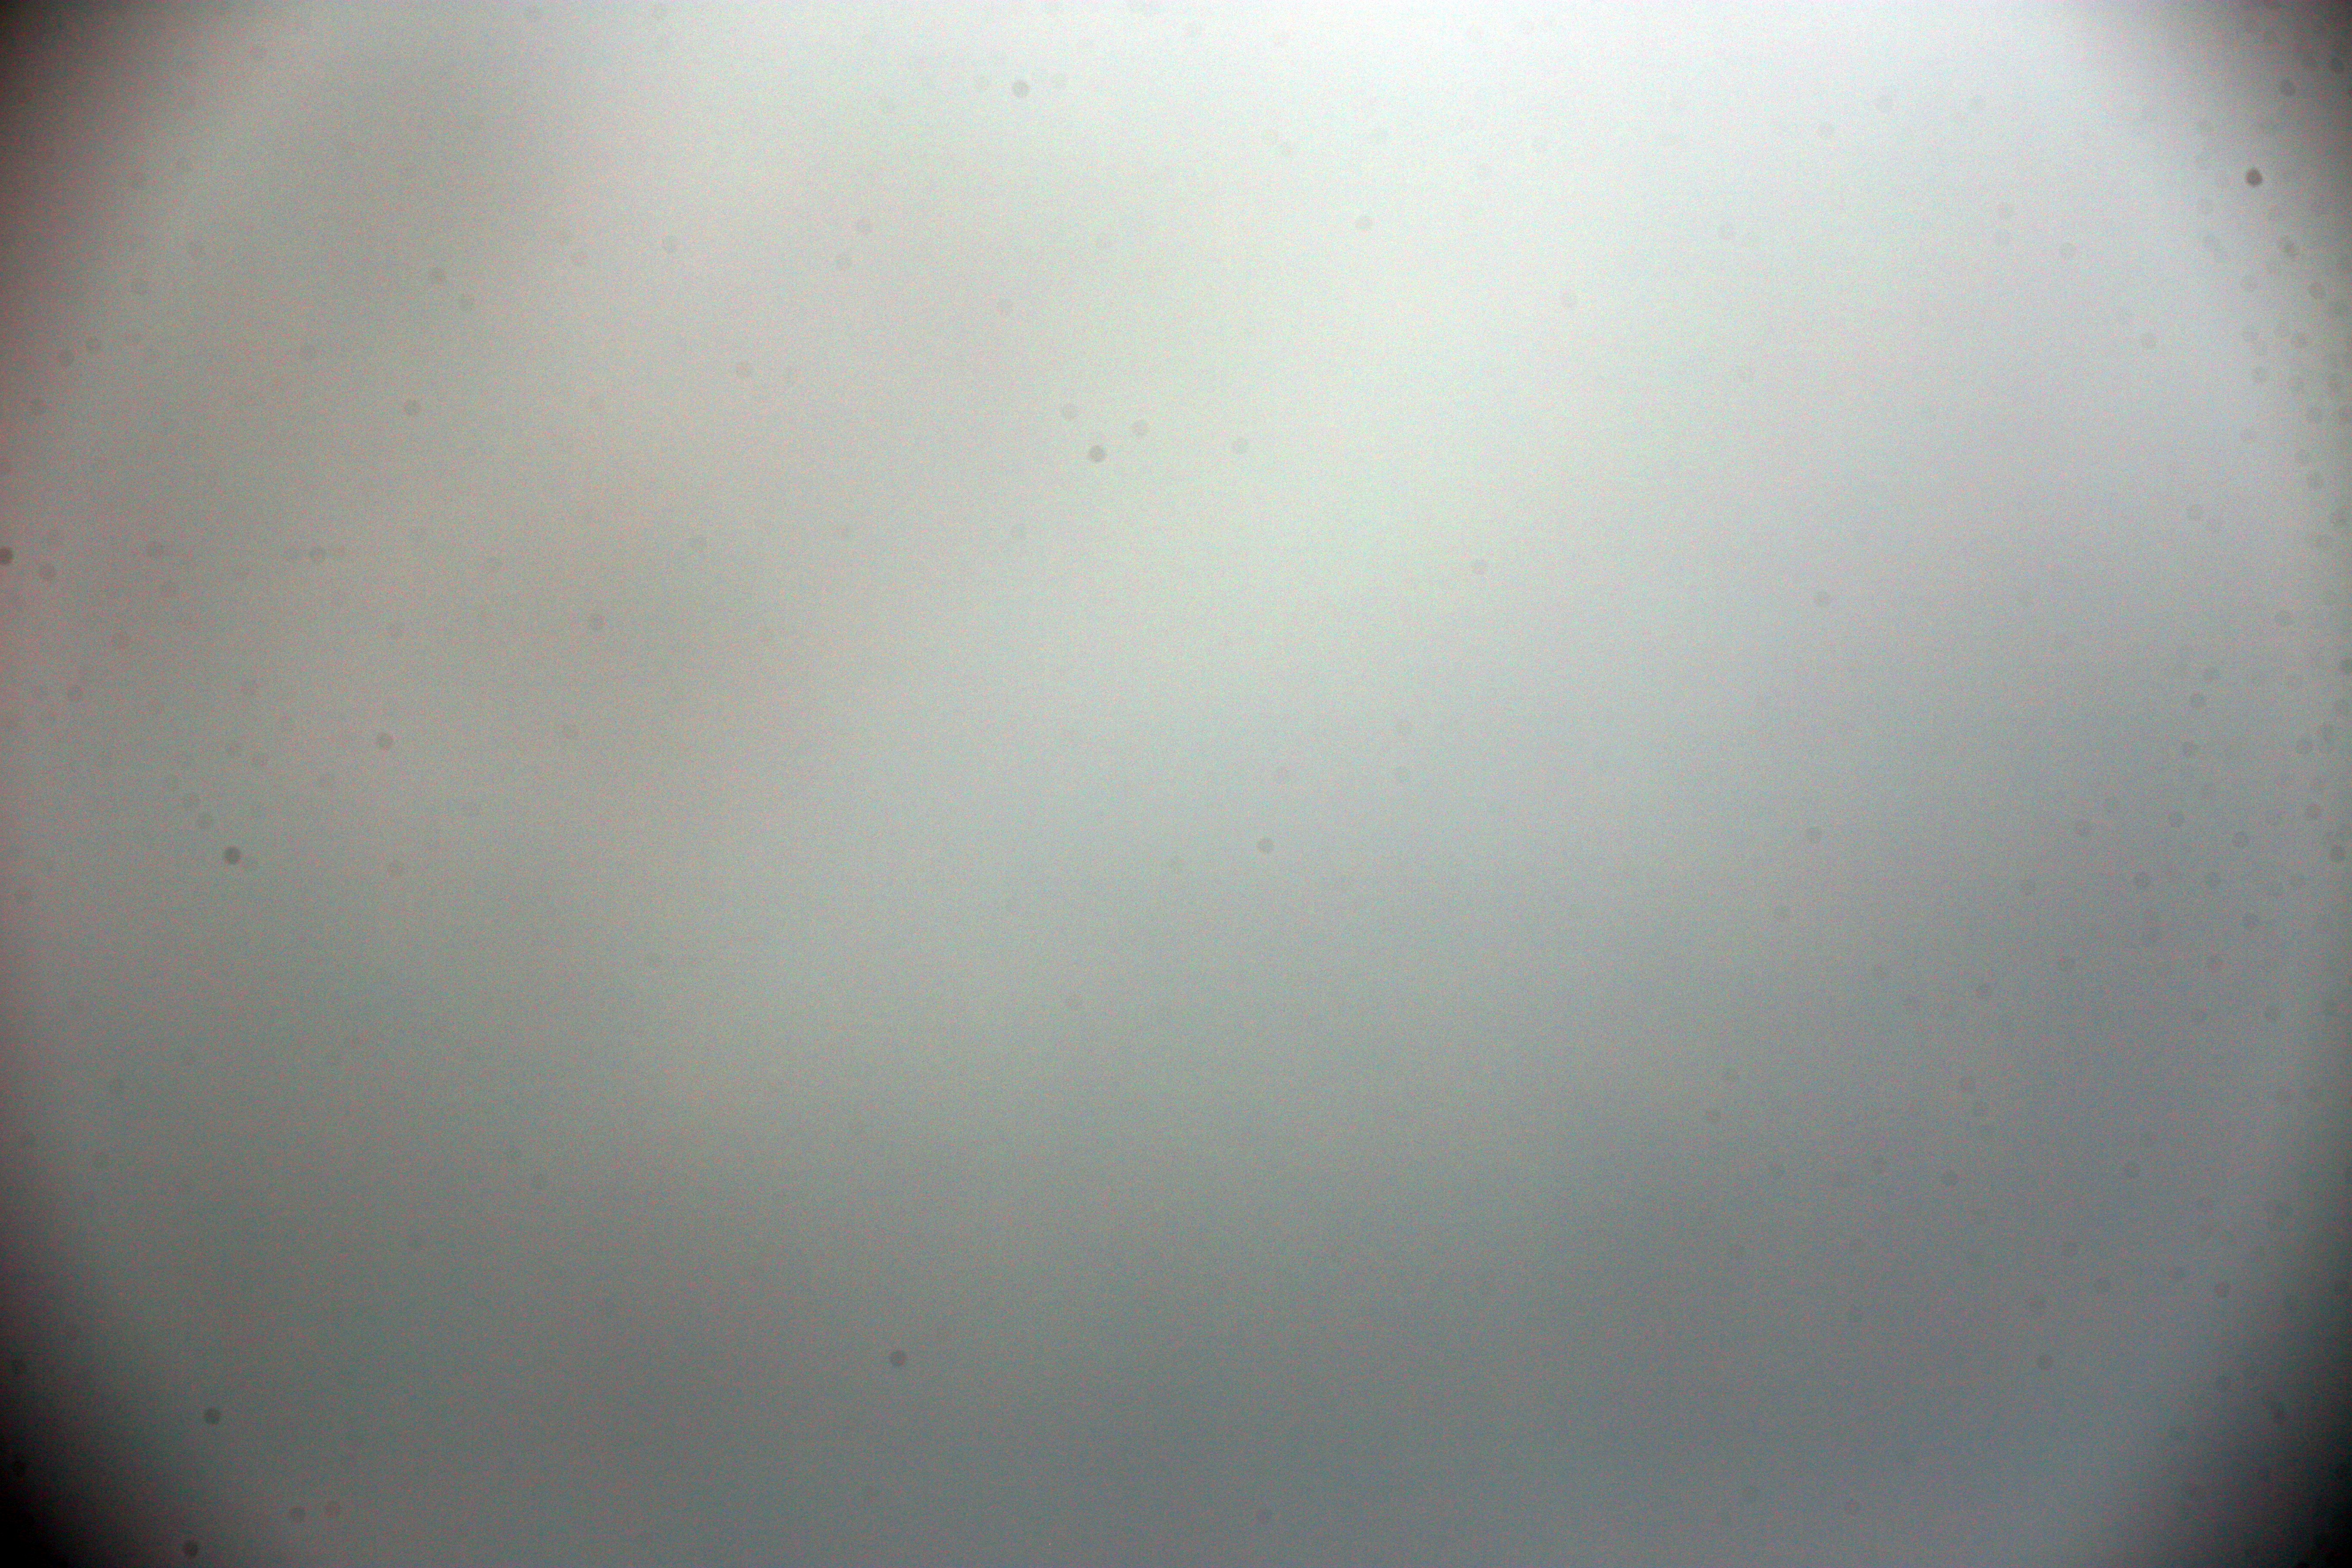 (click on the image to get it in full resolution)
Not very bad even when stretched but enough to look very bad on astrophotos. maybe a half year since I cleaned it last time. 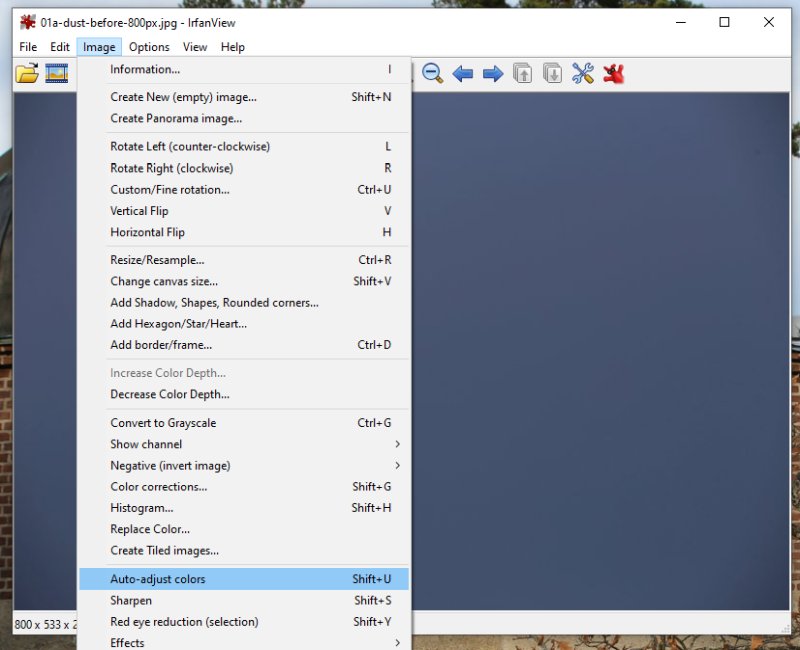
If you want to investigate your own sensor you can use IrfanView as I do, one button click to get a stretched image. If you don't already have the IrfanView installed you can download it from here:
Cleaning of the sensor:Use the camera's built in sensor cleaning and open the shutter, have the battery fully charged, very important. 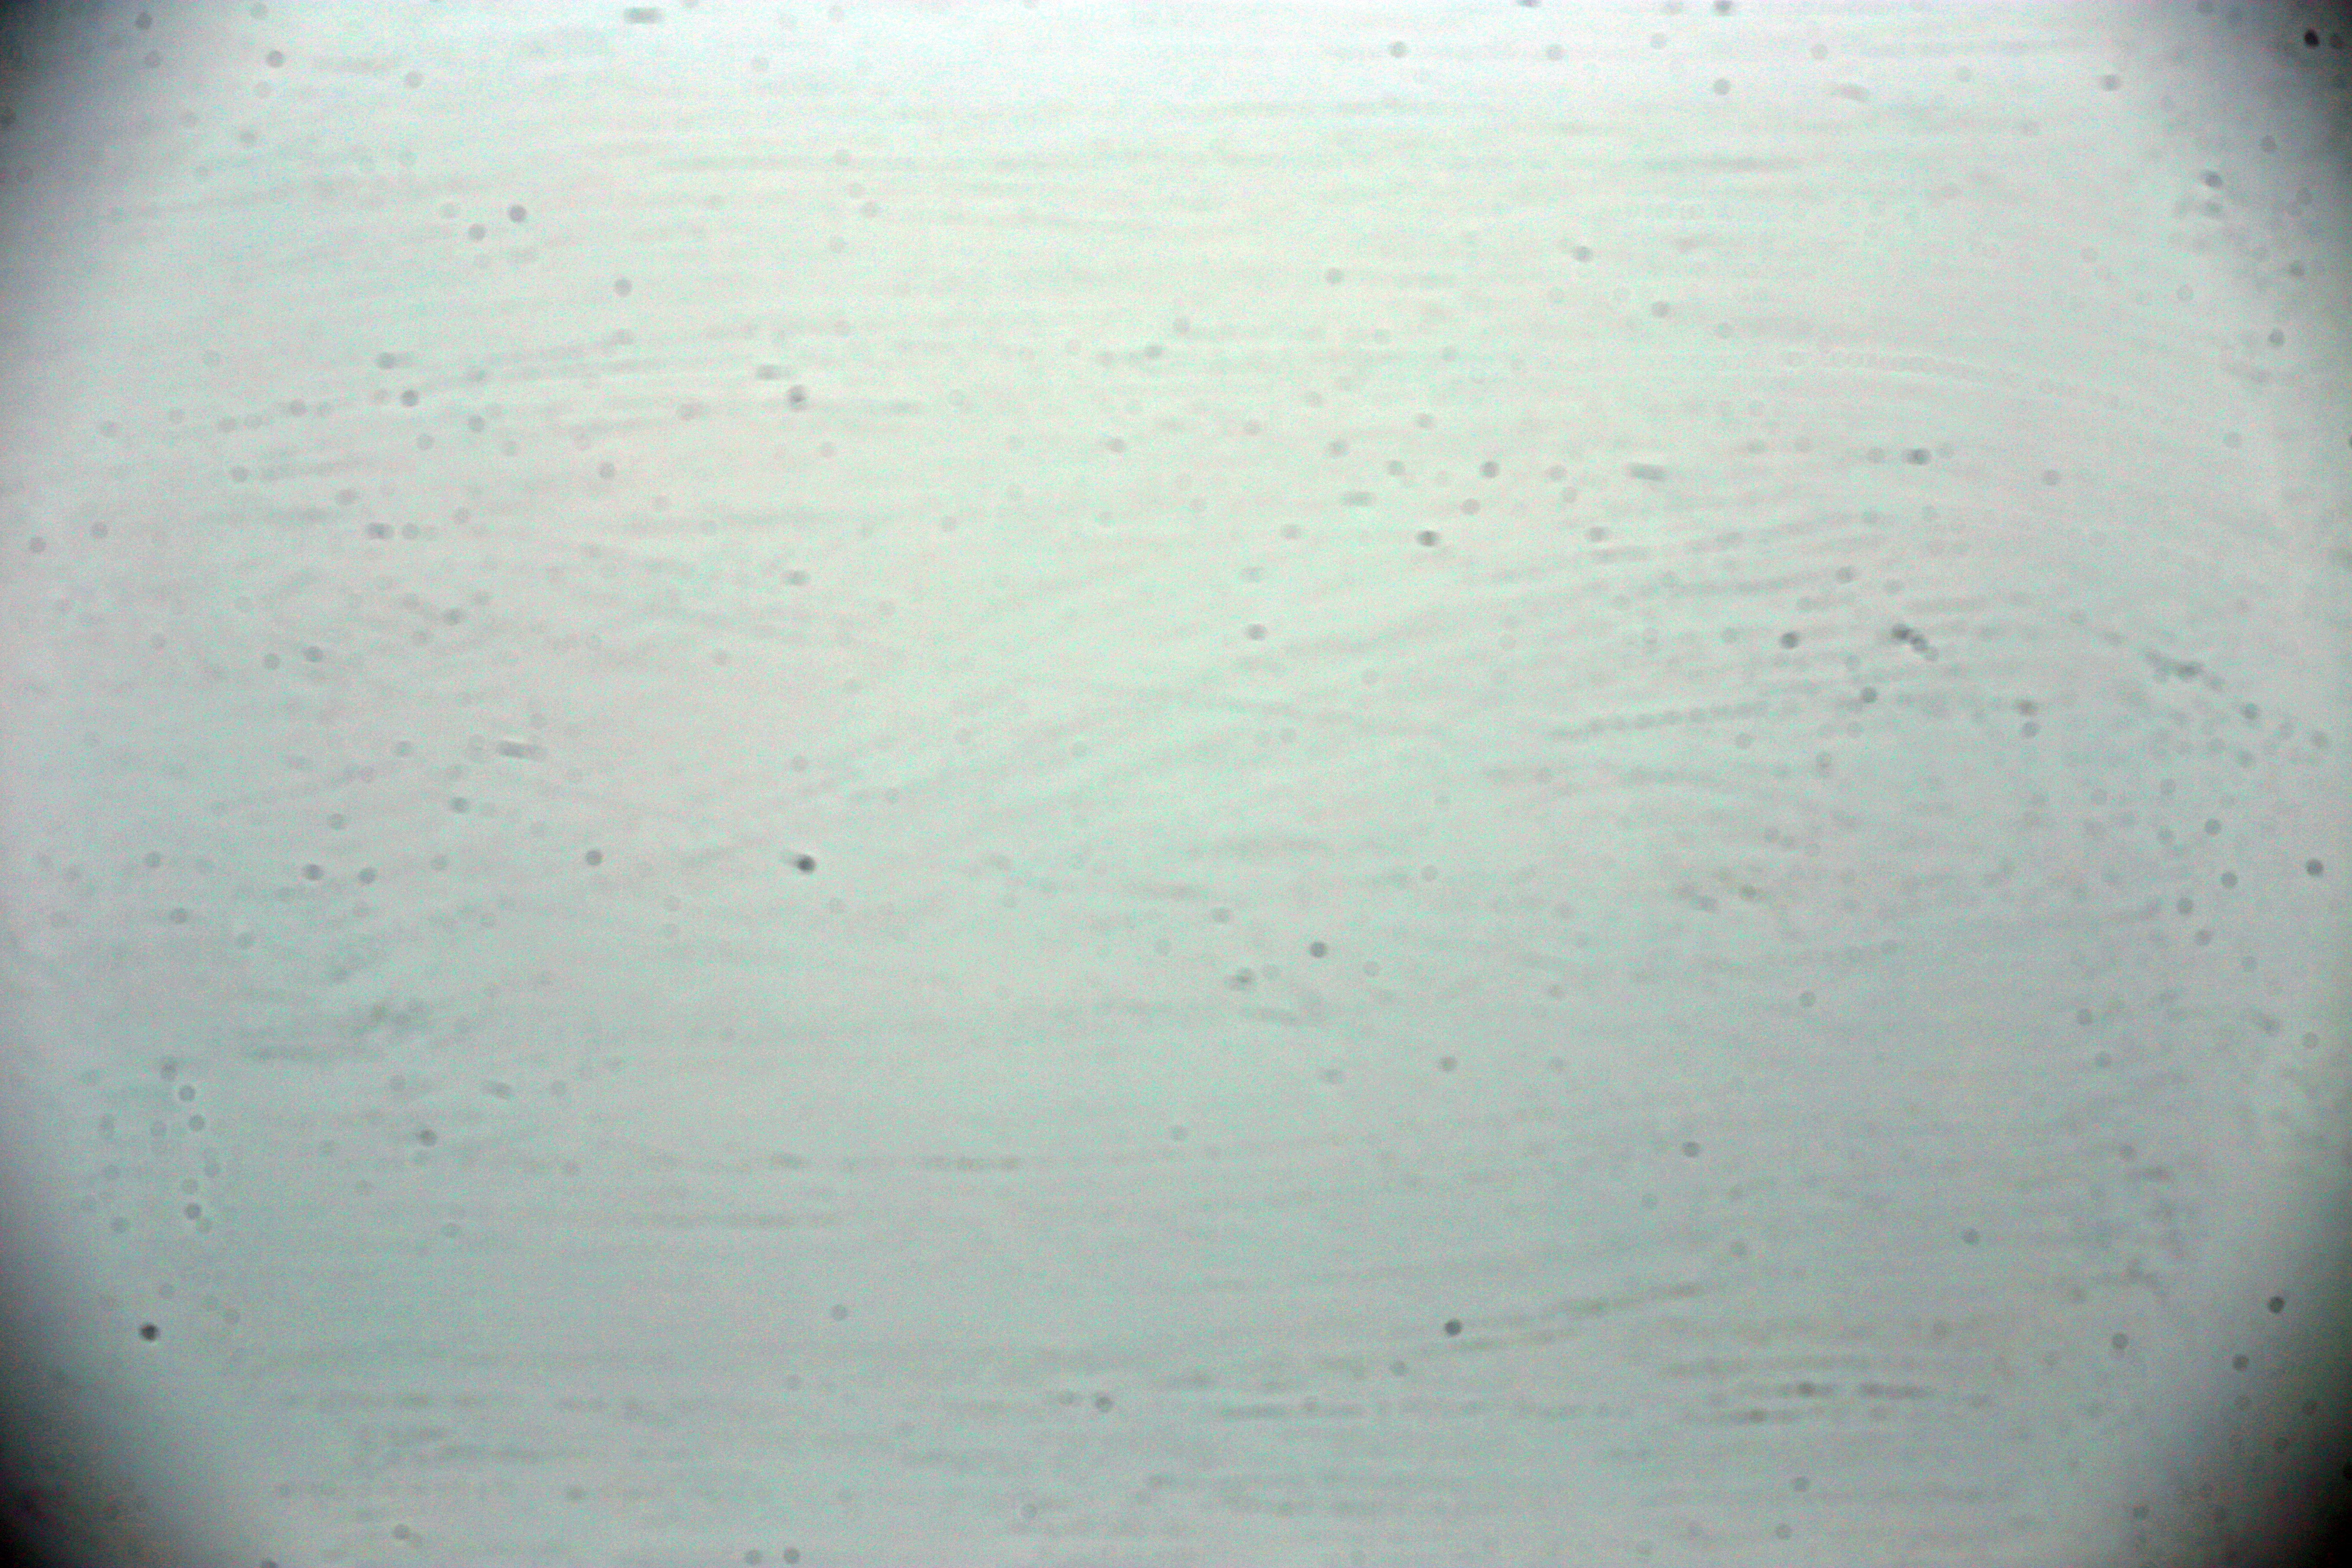 (click on the image to get it in full resolution)
I started to clean it with the Baader's Optical Wonder, what a disaster ! What went wrong ? Reading on the can, it says that it's for optical surfaces, even mirrors. But it also says it leaves a protective film. Is it that protective film I can see here ? But this solvent must be 10 years old, I think that is what caused this. I used the spatula type 1 when doing this, it needed three swipes in each direction to do this. Always use the blower before and after. I redo the sensor cleaning once more with the Optical Wonder, but got the same bad result. 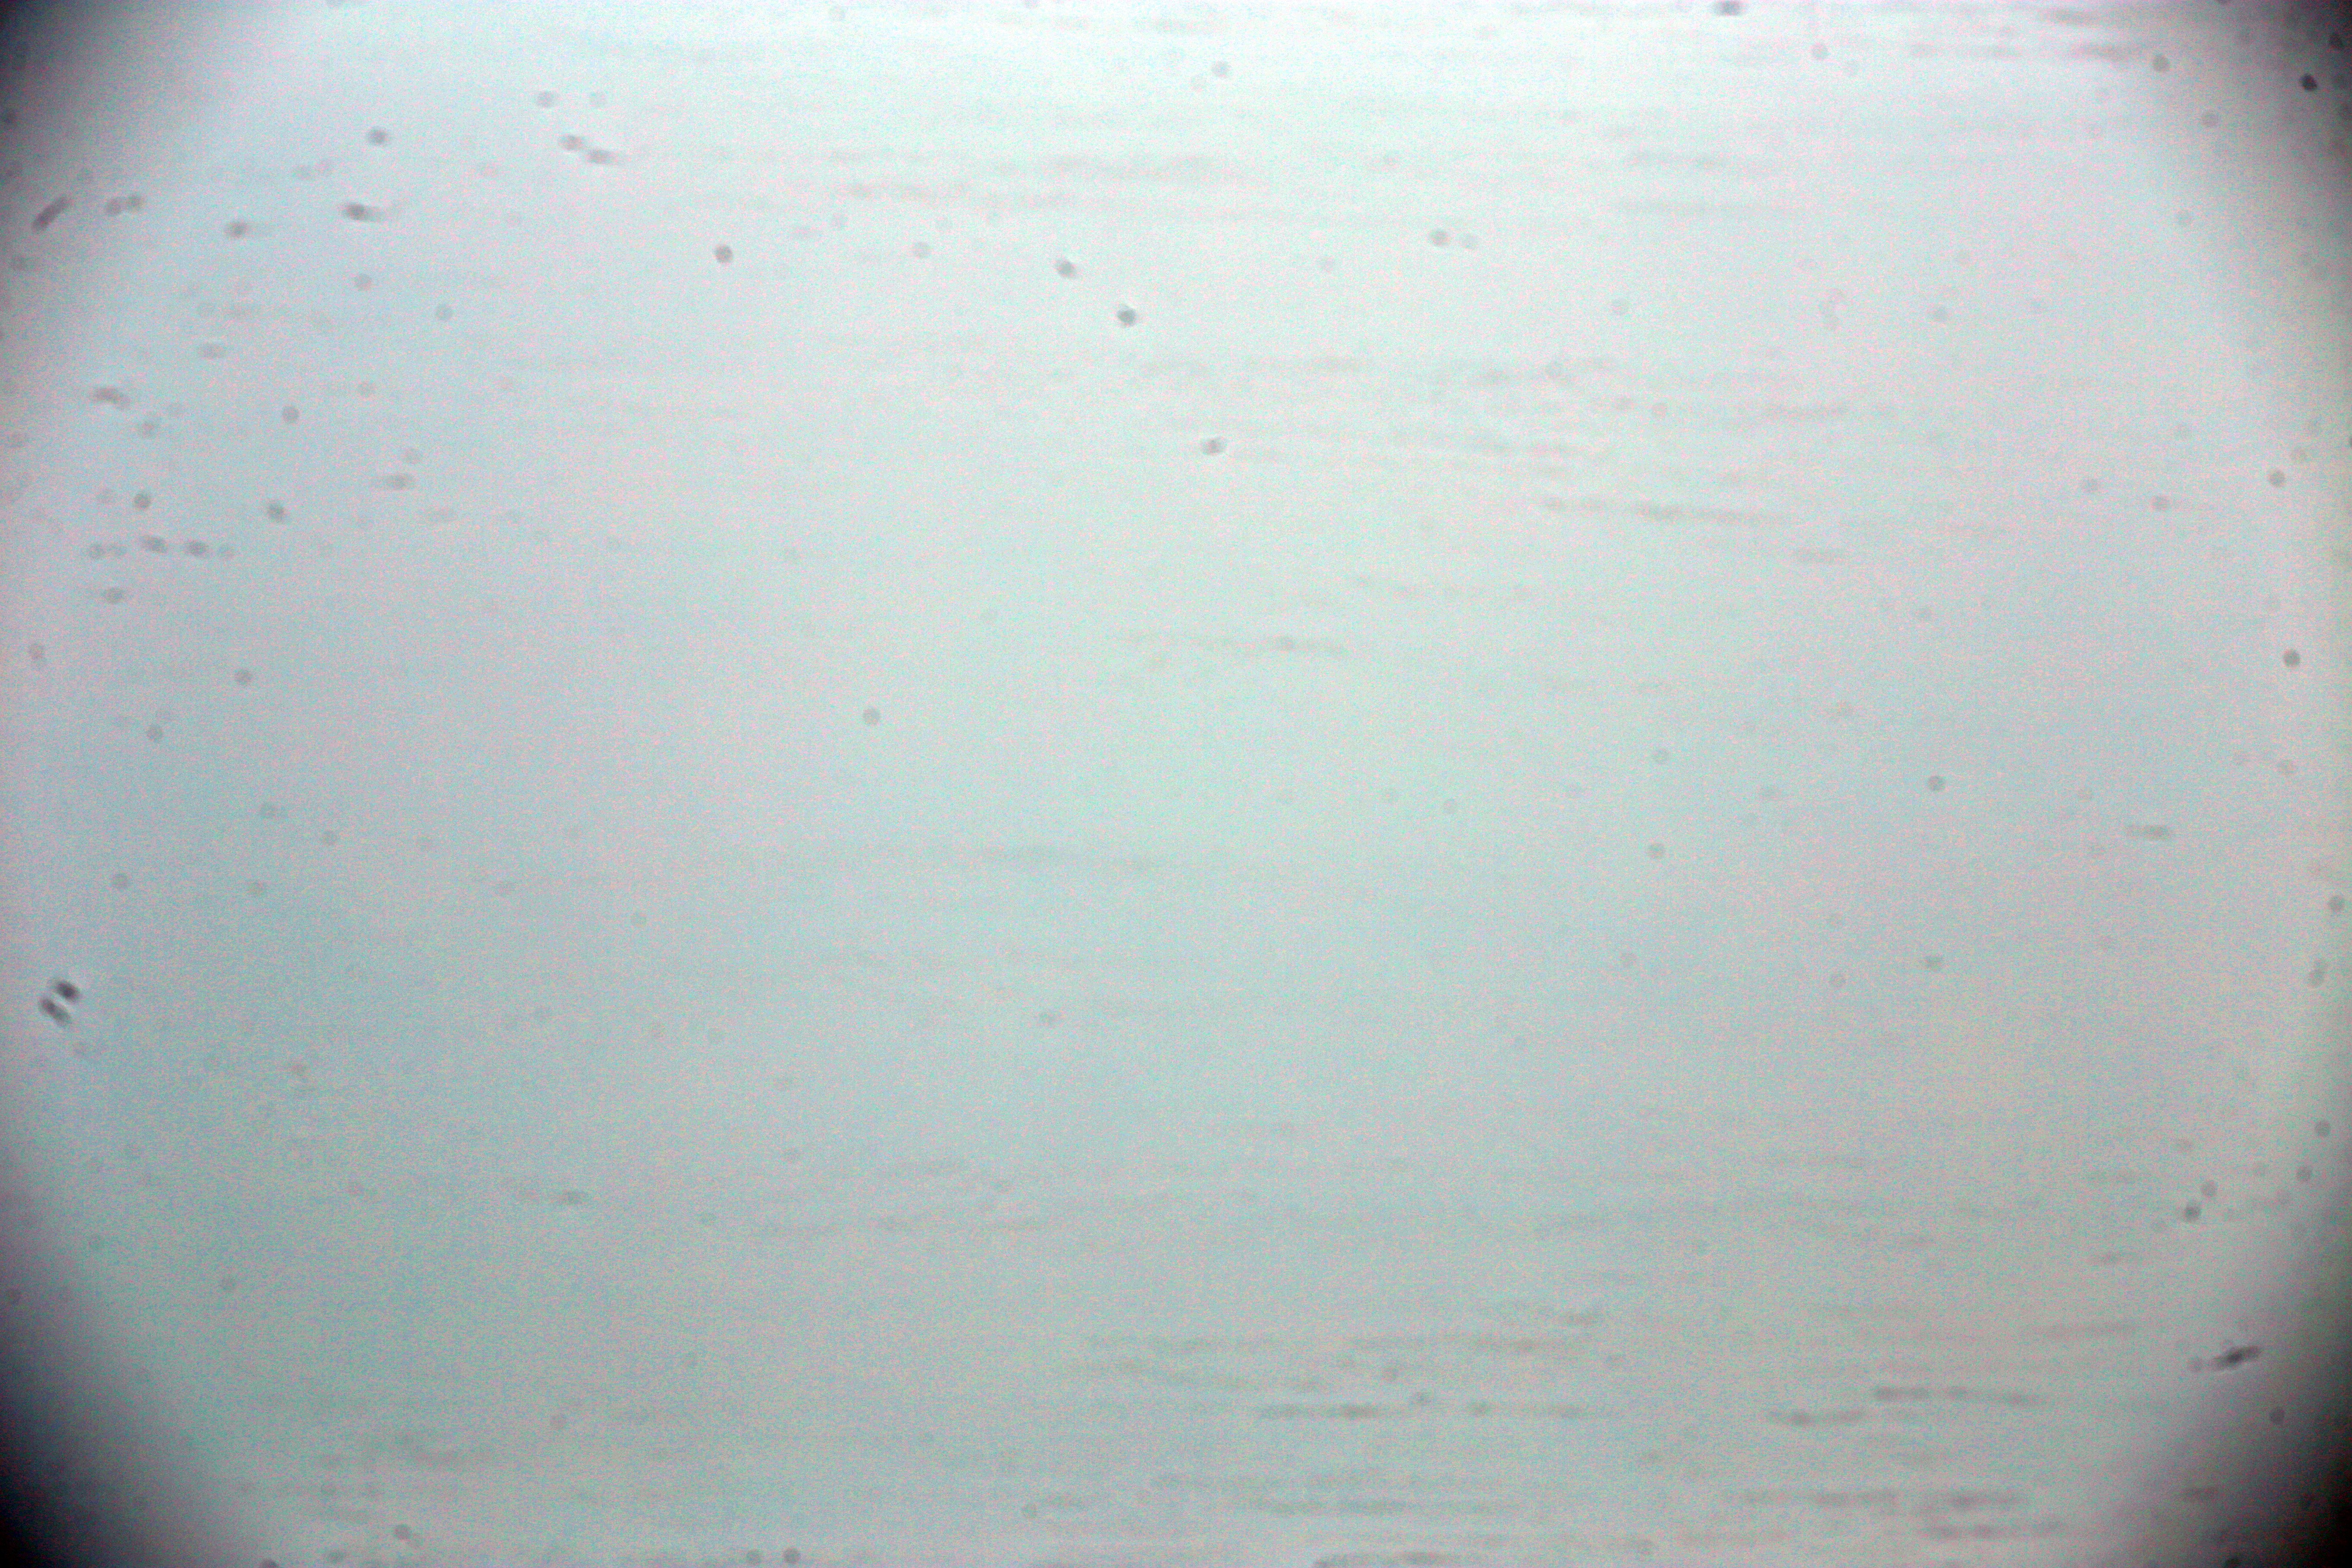 (click on the image to get it in full resolution)
Now I move over to Isopropyl solvent and cleaned the sensor once more. Now I get a better result but still a lot of dry stains and dust to remove. 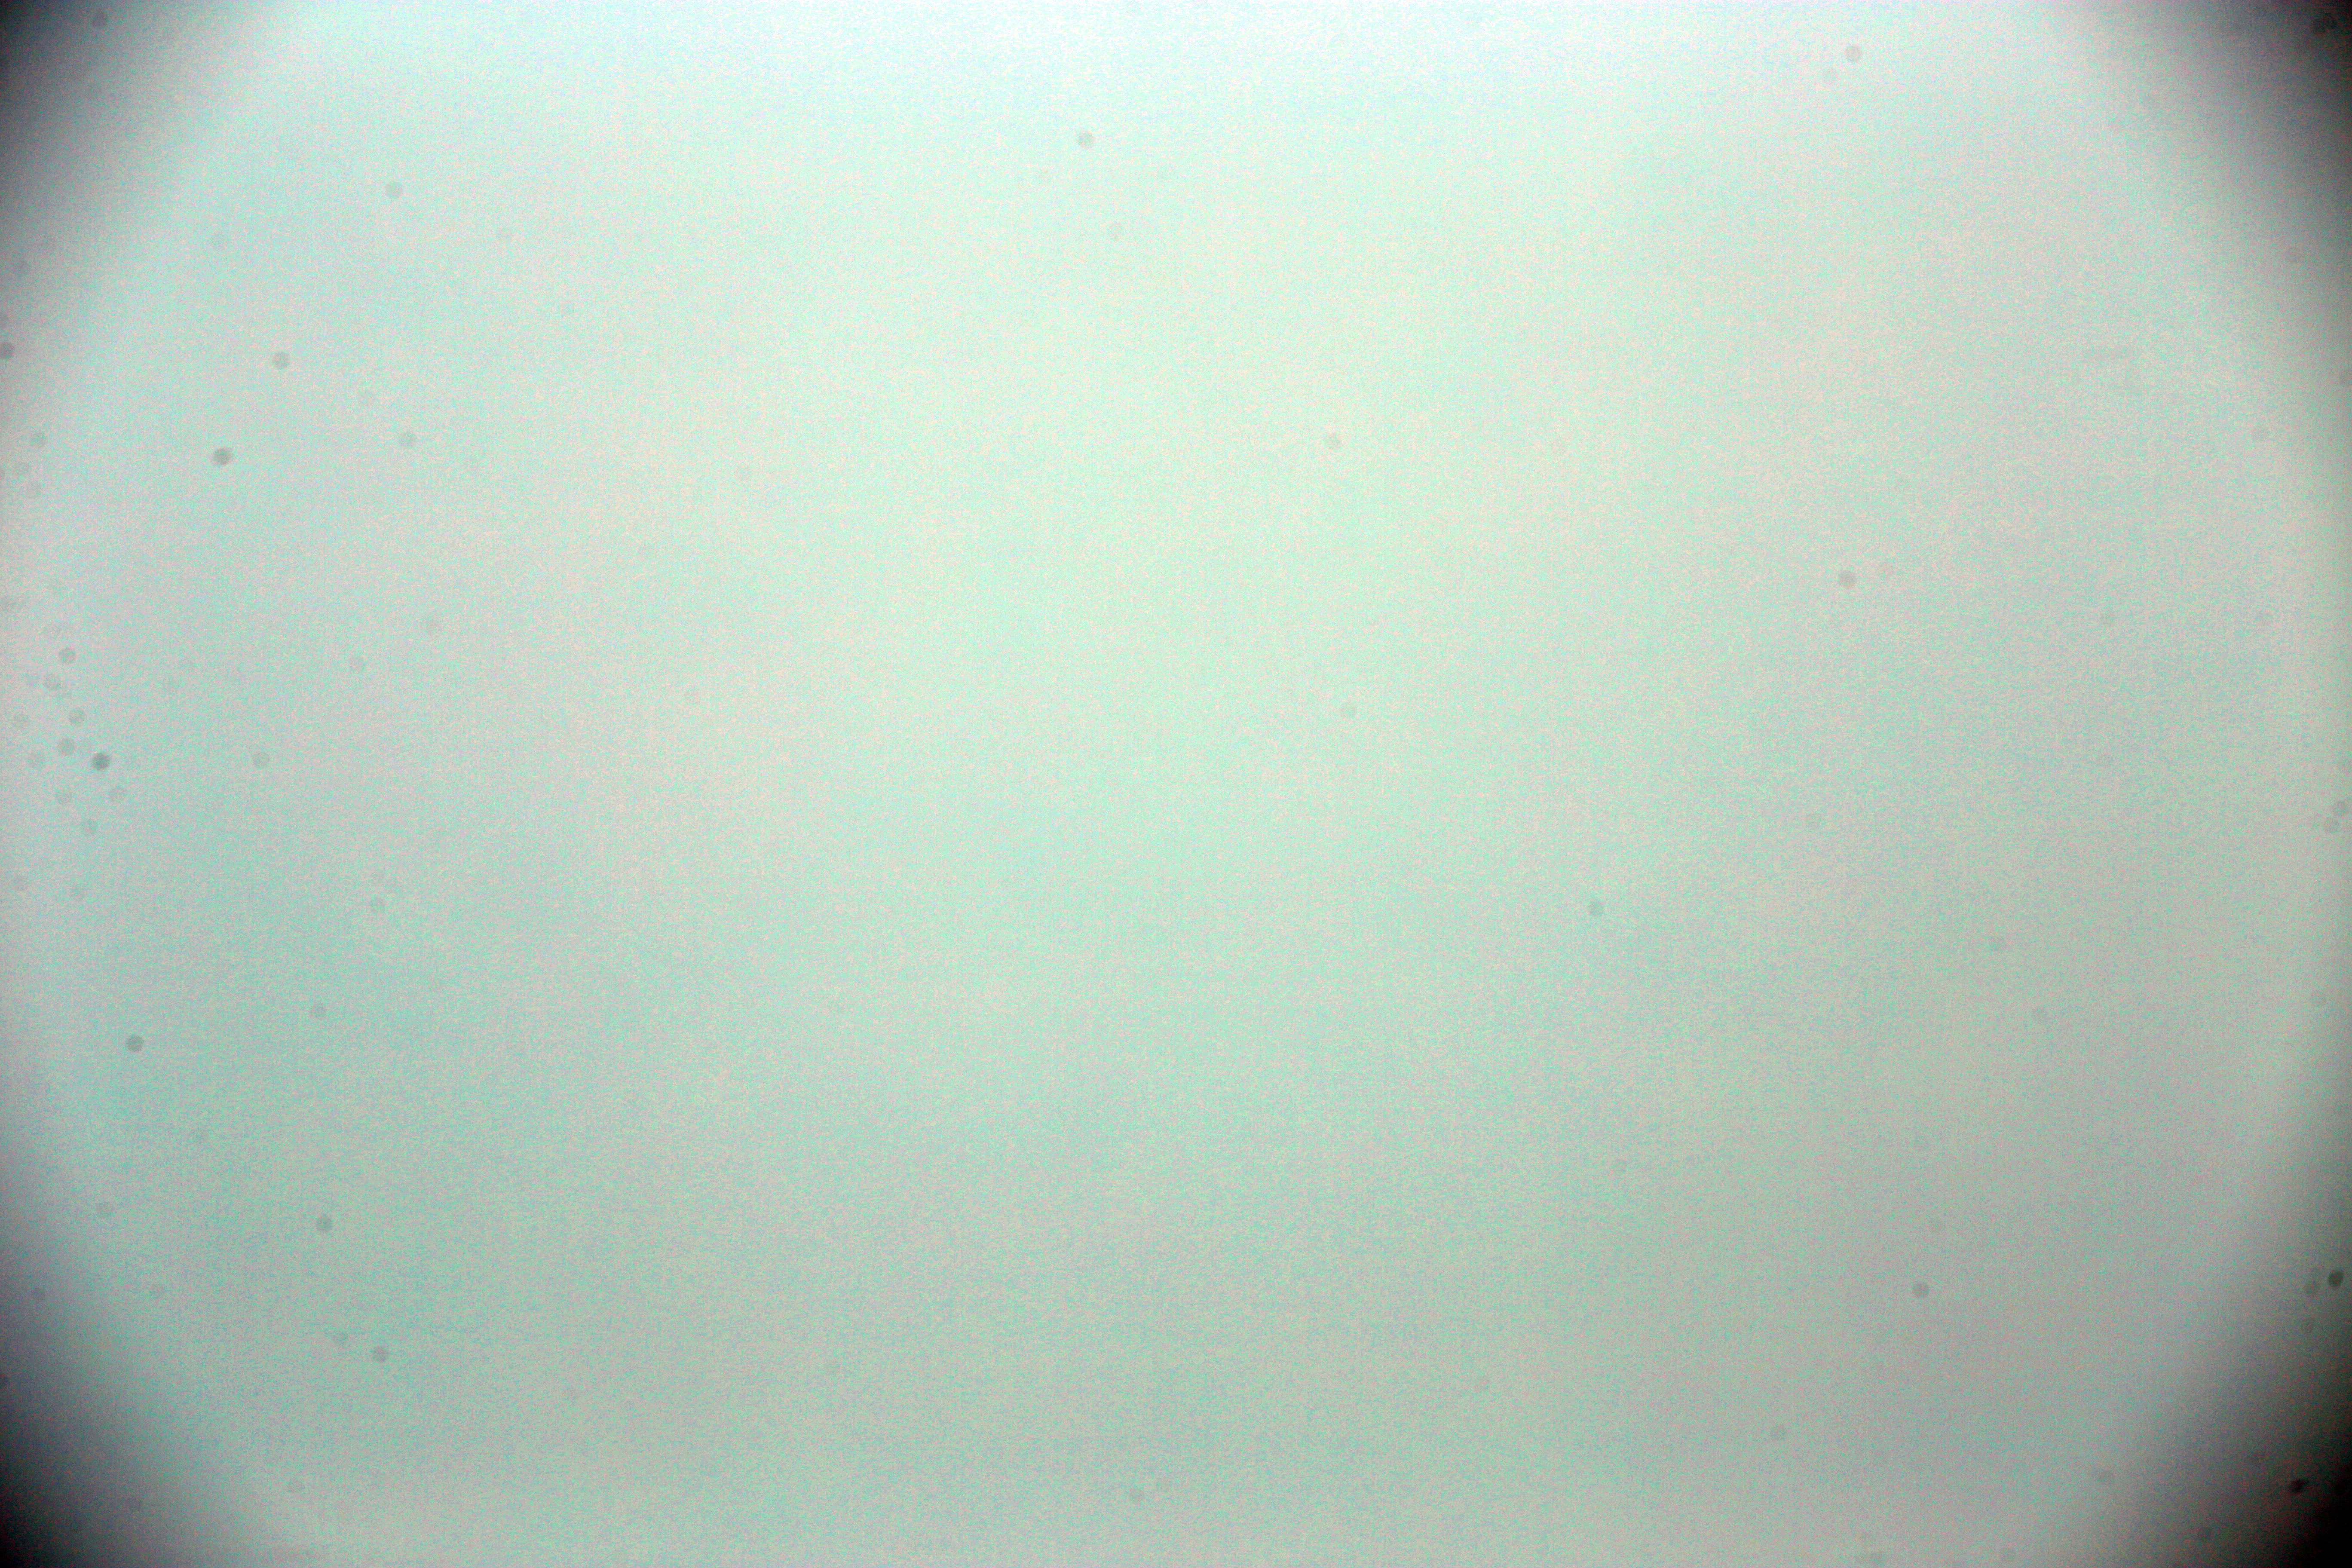 (click on the image to get it in full resolution)
After I had cleaned the sensor four times with the Isopropyl it started to look really good. 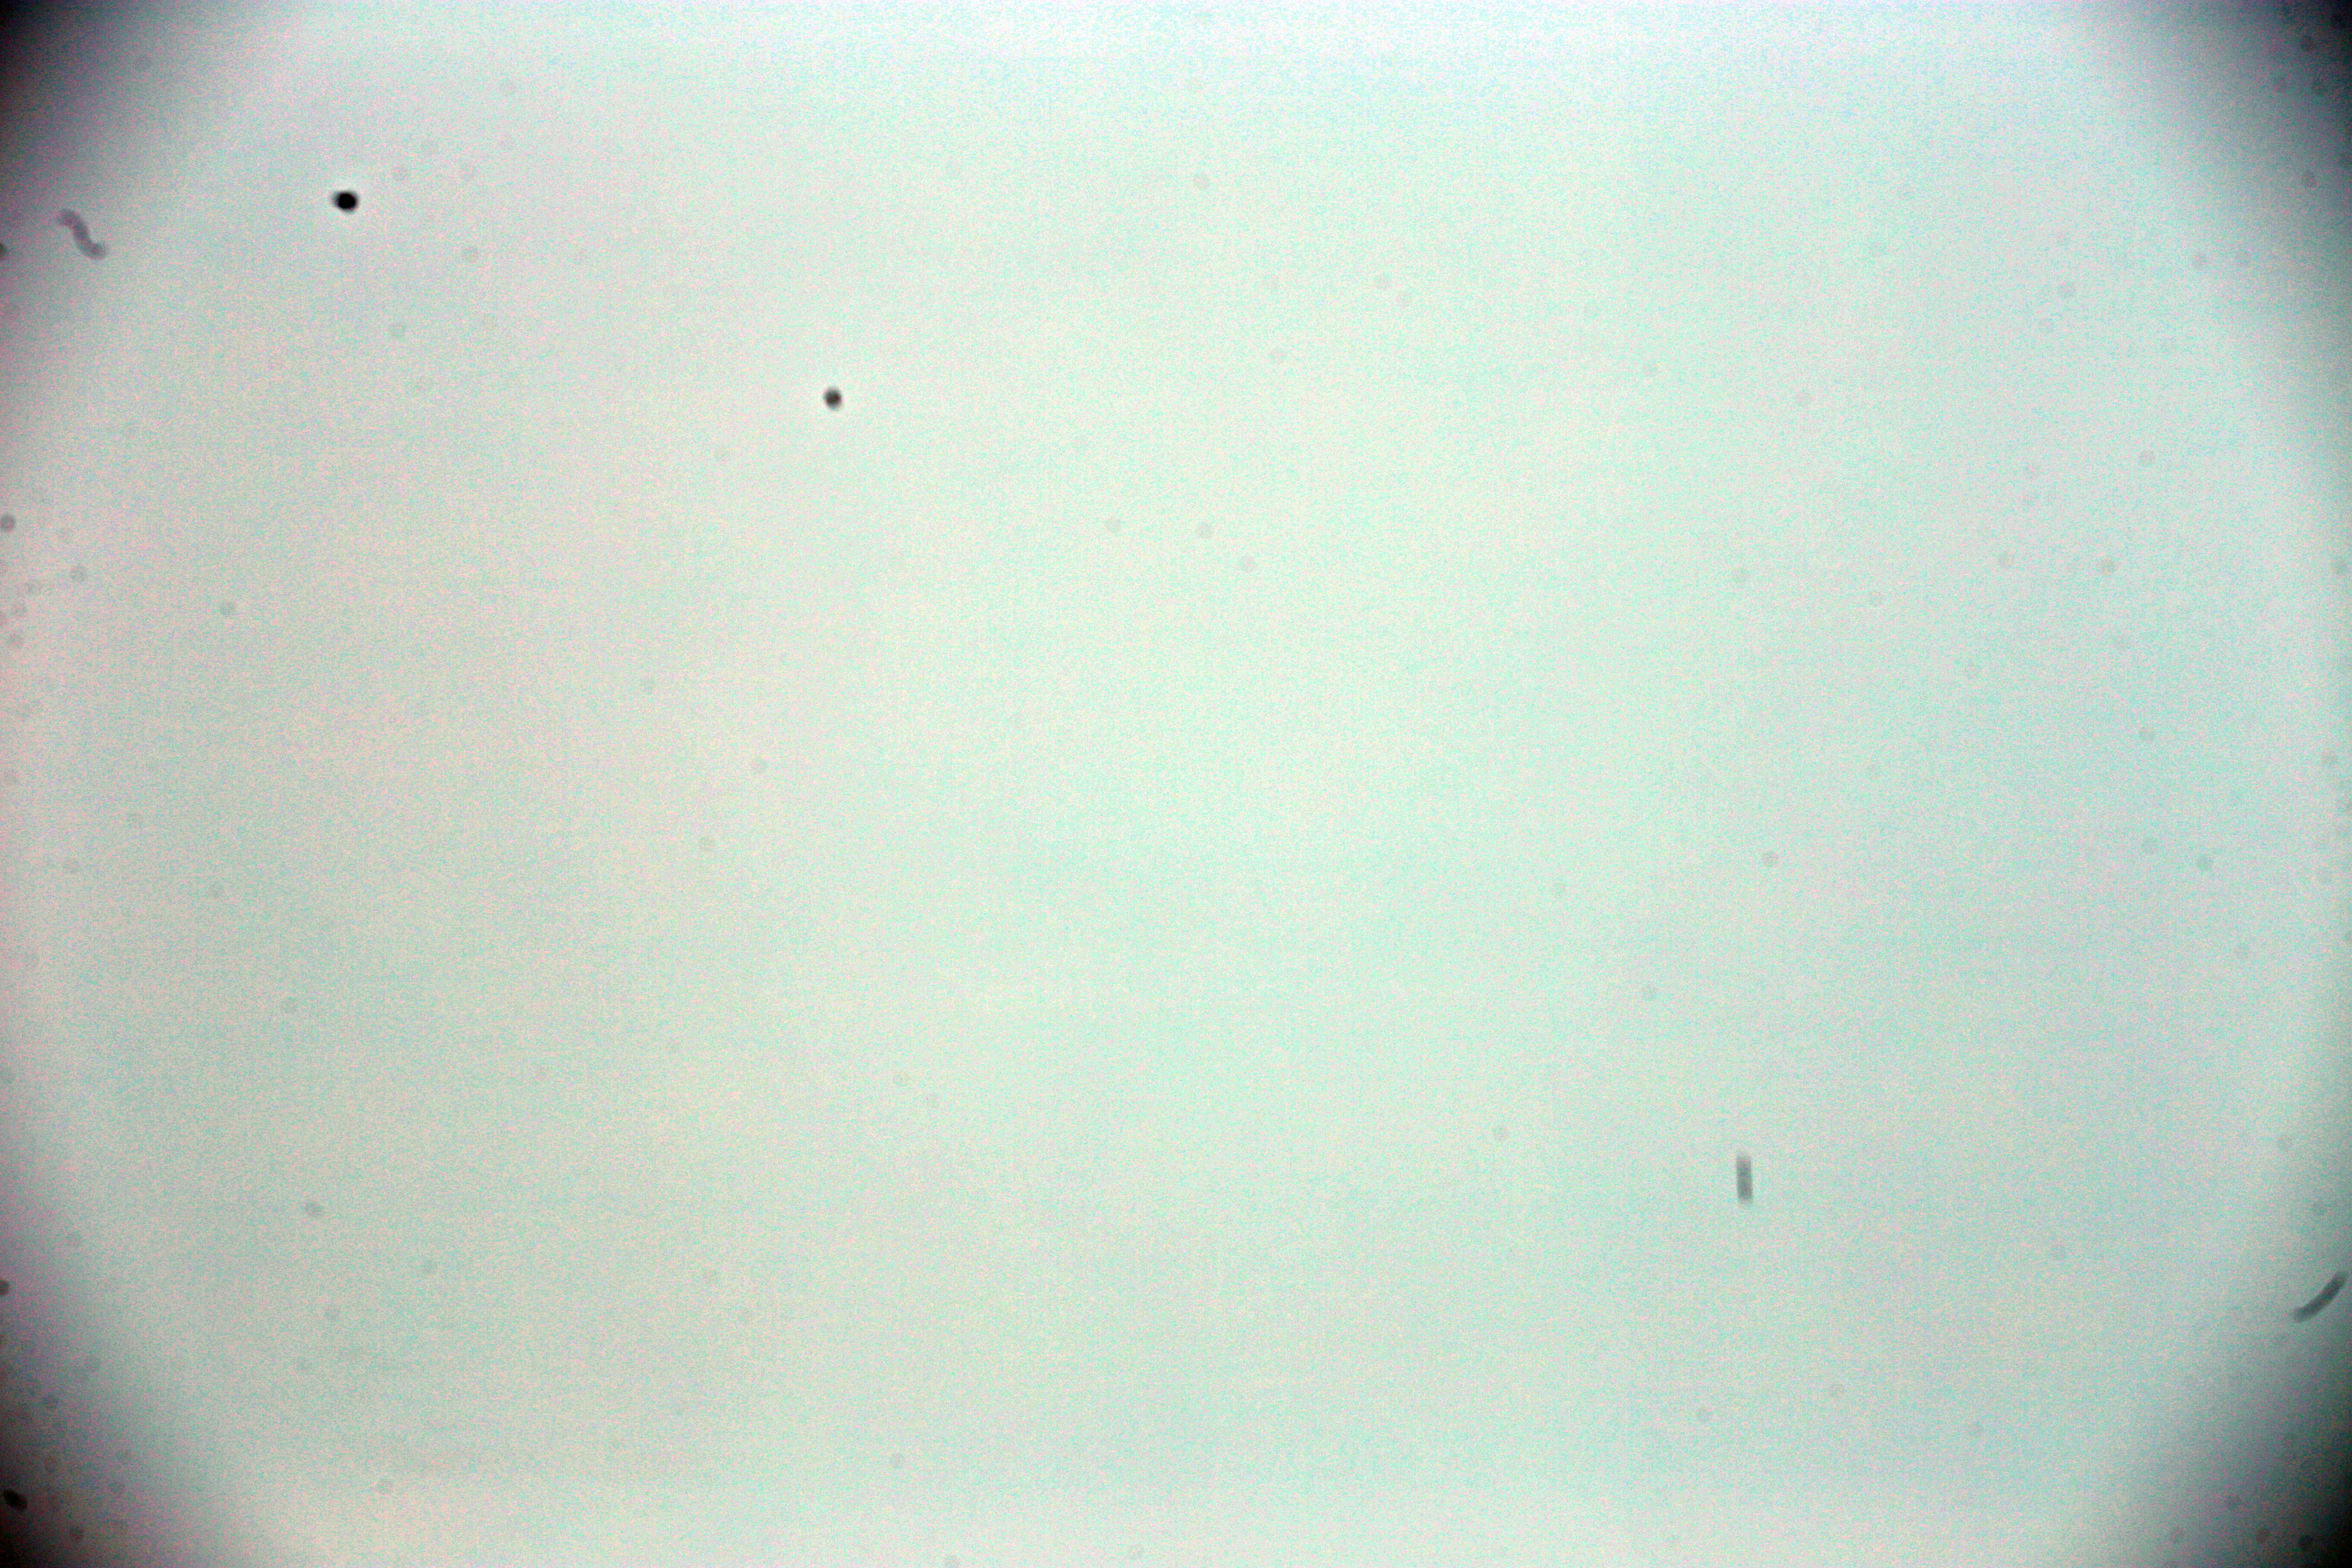 (click on the image to get it in full resolution)
Four more cleanings, but now I used the spatula type 2 which I found worked better. These dark dots is dust, most of the other are dry stains. Dust is easy to remove with the blower but the dry stains is very difficult, remove some and get some new ones. It's important to not reuse the spatulas, only use them ones and then throw them away ! 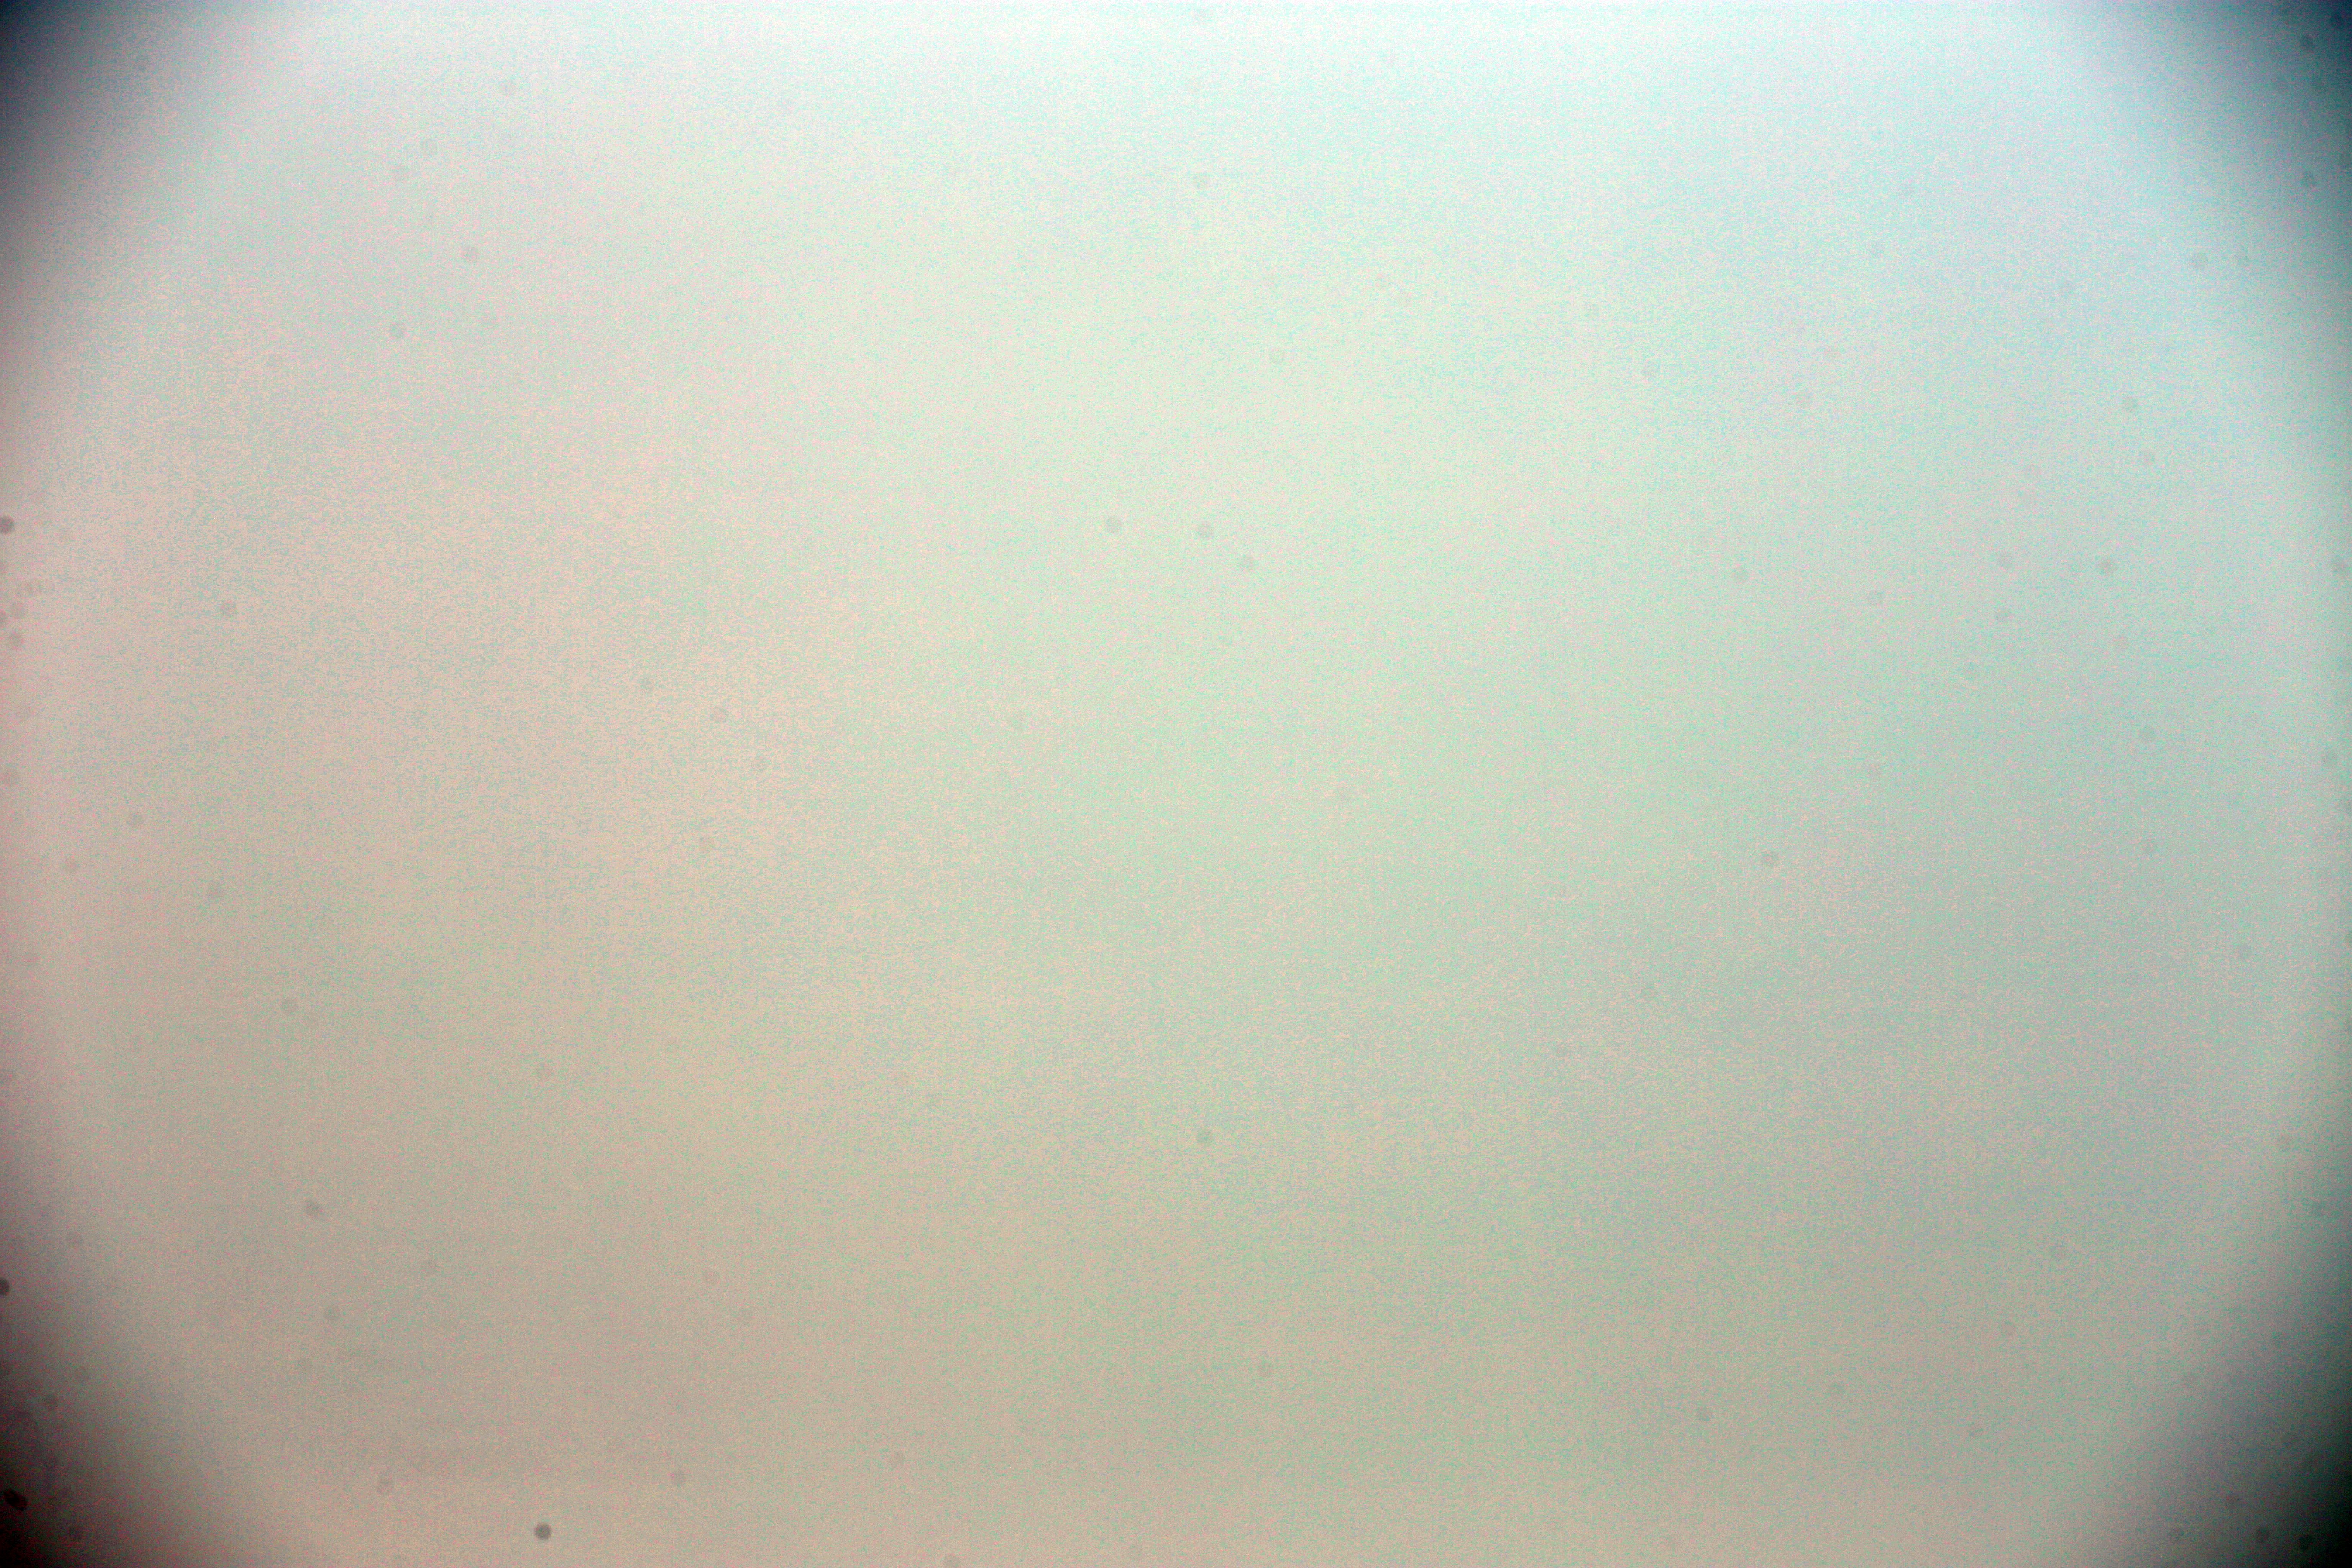 (click on the image to get it in full resolution)
Almost there, now I stop using solvent. I breathe on the sensor so condensation form on it, a method I have found very useful. After that I swipes the sensor with the spatula and afterwards blow away the dust. I repeated this nine more times. A more dust free environment had made it a lot easier. 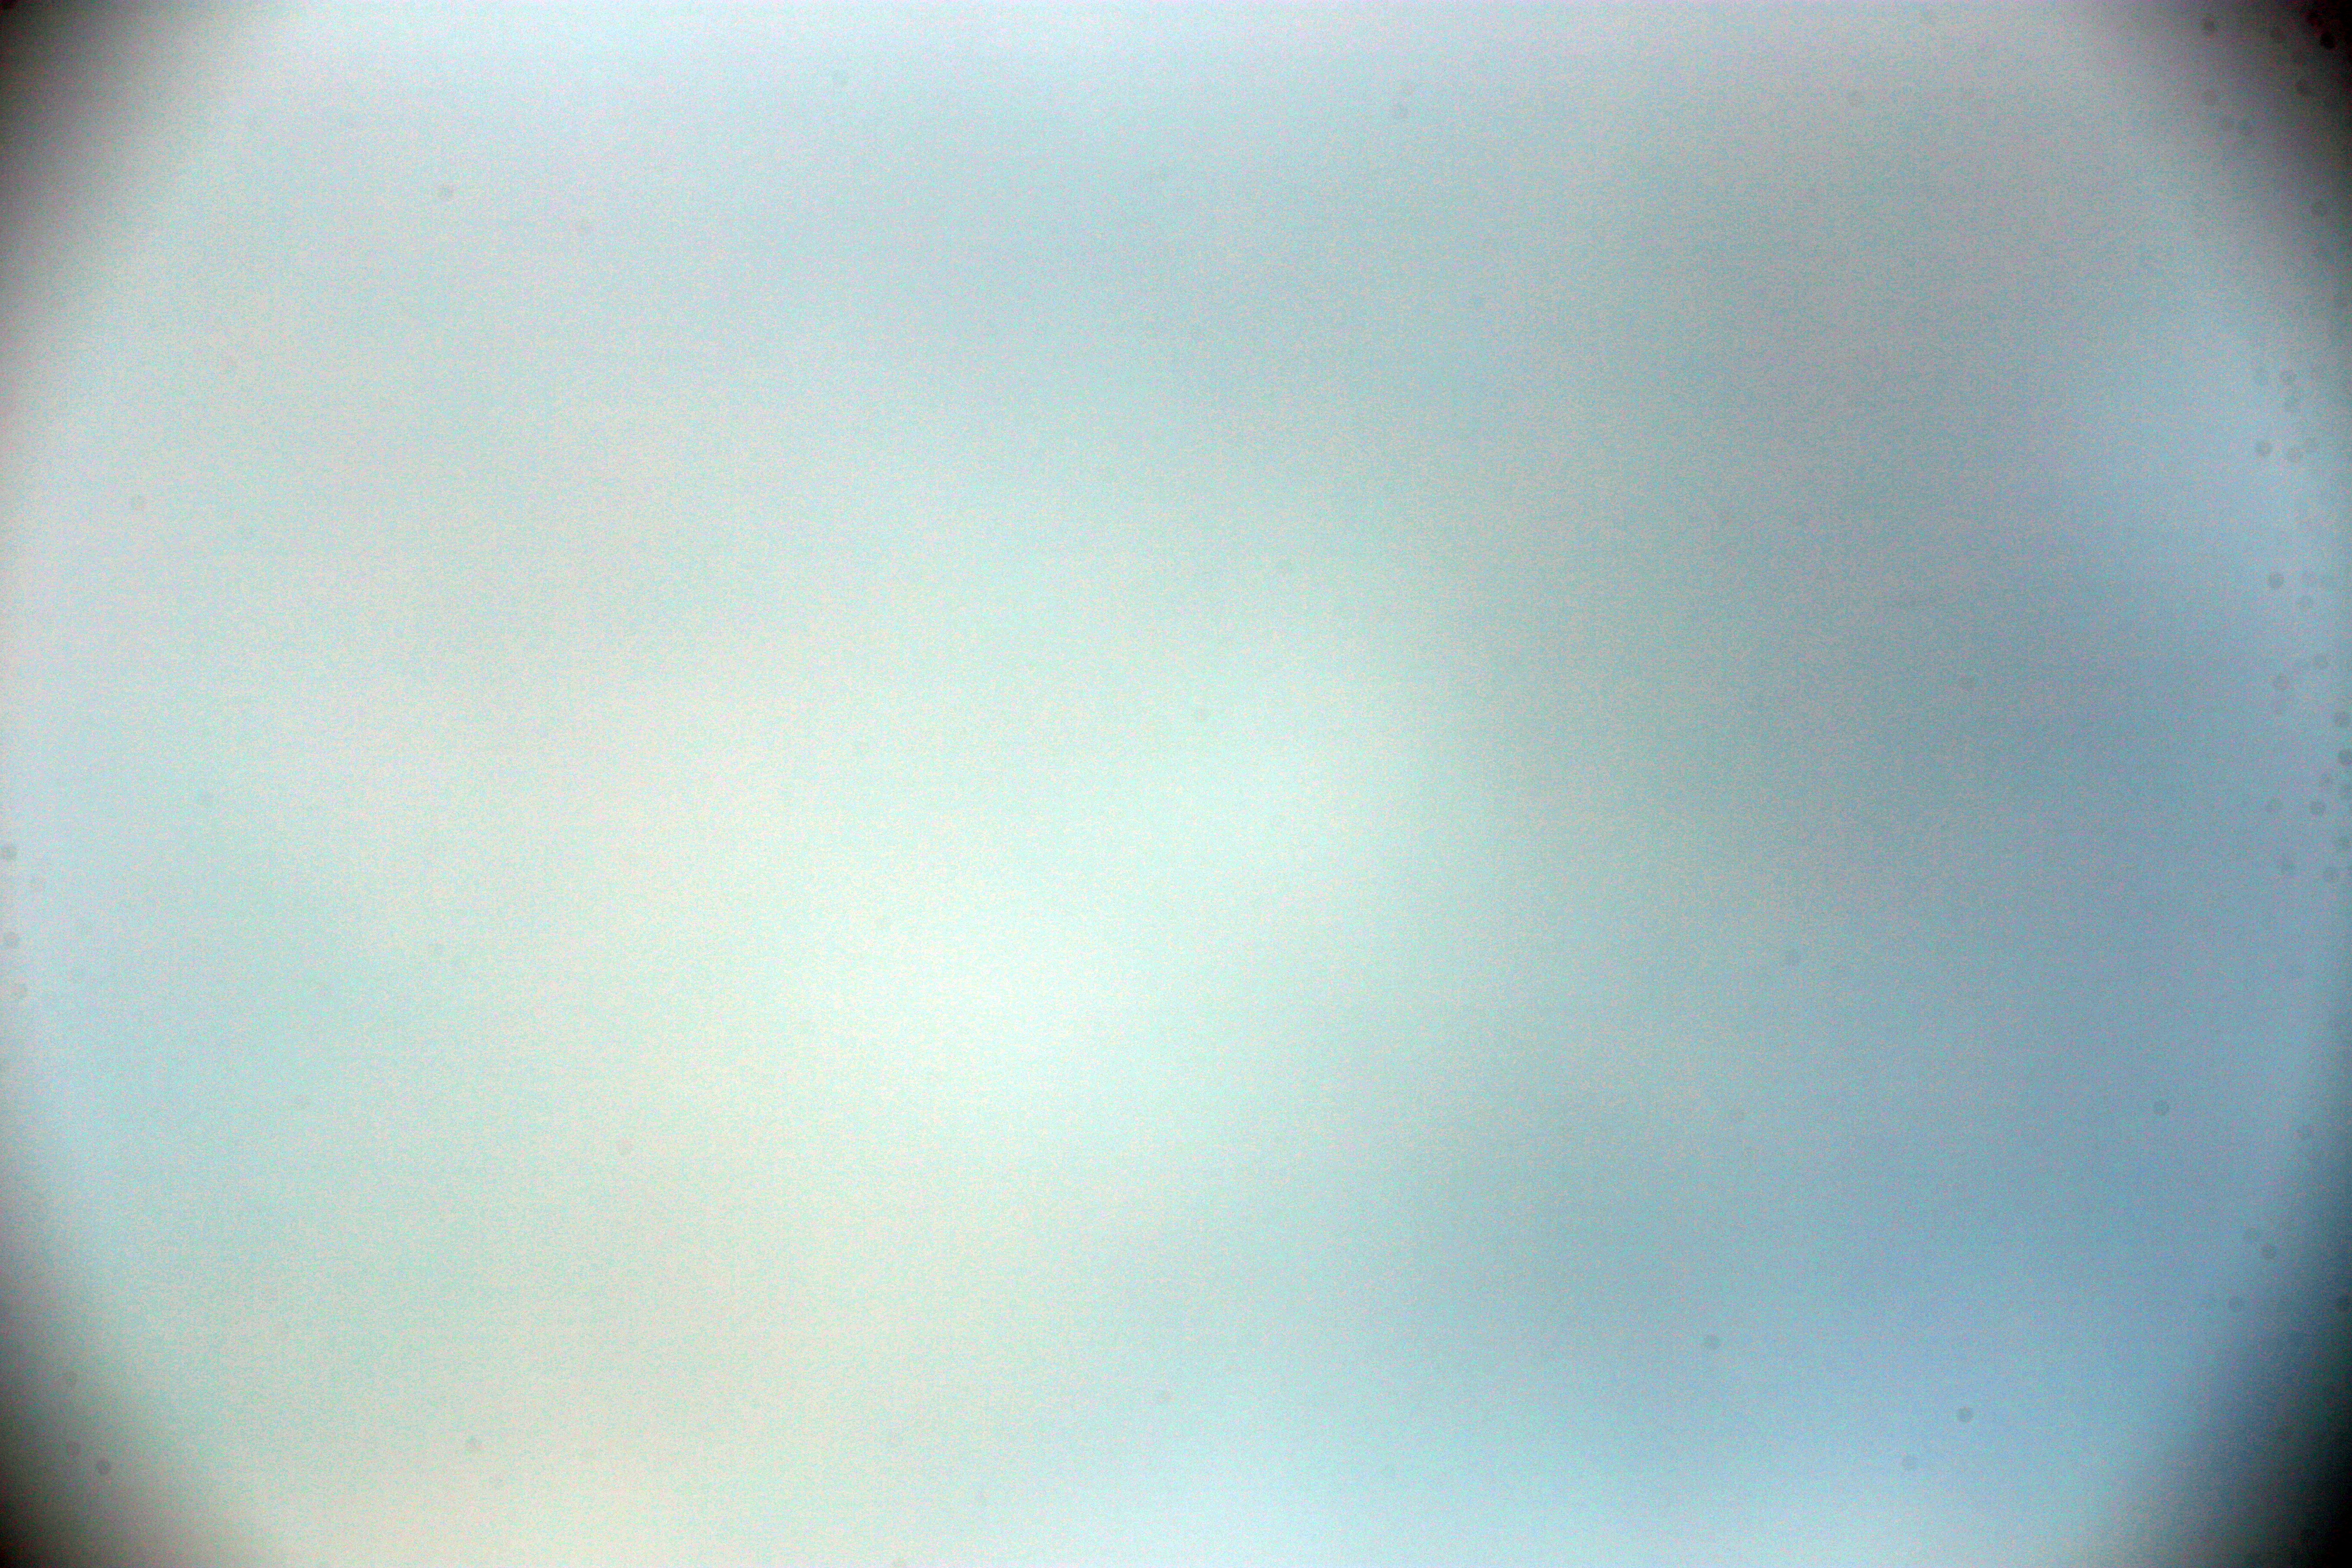 (click on the image to get it in full resolution)
At last, after a total of 20 cleanings of the sensor I got this, not perfect but the closest I came. Especially the corners are difficult to clean, a DSLR camera's sensor is very deep in the camera shaft. But the edges are normally cropped away because of other things, so not so important. Normally I had to redo the cleaning four or five times. The Optical Wonder caused a lot of extra problem, I should have throw away that old solvent long time ago. Most difficult is the dry stains I get on the sensor after applied the solvent. Next time I shall test with the Methanol solvent they talking about in the links above. And as I told about in the beginning, don't do this, better to leave it to a professional. I have warned you now !
|
|