|
Advertisement / Annons: |
Chrysler Crossfire
|

|
2, New LED light:Earlier when I searched for these license plate lights I could only find used ones. Now when I search for new ones I found there are replacement parts, even with LEDs. Google on "License plate light Chrysler Crossfire" or "Number plate light Chrysler Crossfire" and you will find them. A pair cost about 20 Euros. 
A couple of days after I ordered the new license plate lights it arrived. It came in a little nice present box. This model fit many Mercedes models too. But be careful there are a lot of different designs of these, read carefully that you order the correct ones for your car. On my Crossfire there are no warning signal if a bulbs break. If you have that function in your car, with LED lights like these the current is much lower and the sense system can be fouled and light up the bulb error light on the panel. It can be fixed with a parallel resistor. Some models have it built in, maybe this have it too but I don't know. 
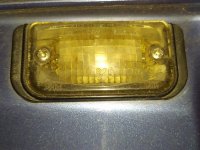
What a different look, it was in the last minute I got these new lights, the old are beyond repair. The dimension is not exact the same but I hope they will fit. The new LED light is sealed because a LED will last many years, maybe 20 years. No struggle to replace bulbs or any worry for water leakage into the bulb house. 
When I looked at them from another direction I noticed that there where a big difference in the design. The old original are tilted and the new not. I felt, this was a major drawback, how could I fix this. It could cause trouble because the trunk lid is very tilted on a Crossfire. Maybe I have to cut out an edge and glue it together again. I must go down to the garage direct and test, otherwise I can't sleep tonight. 
First I test the wire connector and it fitted perfect. As you see the hole isn't rectangular but the light is rectangular, more problem or ? 
I hold it close to the hole and I see there is space enough to insert the light holder. 
In the other direction it was a bit trickier. But after I move it a bit the hooks on the backside slide in, I didn't push it all the way to the bottom. If I do that I can't remove it after. 
Wow, it's in place without I had to do any modification ! All the brown stuff are leftover from my intense rust protection I did a couple of years ago. 
Turned the light on to see if it shines, oh yes, the old light looks like an old candle light in compare to the new. 
Before I do a permanent installation I spray some anti oxidation on the electric connectors. 
Connect them and turn the light on to do one more check. One thing that's not so good, after I push them all the way in they will stay there and it will be very difficult to get them out again. The hooks that hold them in place can only be reached from behind and it's very narrow space behind there. 
When I pressed the light house in place it didn't go all the way in. It's some plastic edge that protrude. Strange, yesterday I felt that it wasn't that problem. 
The lower arrow point to the edge that has to be removed. It's very easy to do, but I must check once more, maybe I installed them upside down. They will still sit in place and I let it be so for the moment. I can now remove them easy if I have to do some more work on them. The upper arrow point on the hook that hold it in place. It can only be reached from behind. Maybe I shall glue the light house in place and remove the hook, then I have the chance to remove them in one piece. 
I tried to have the light upside down. It fitted a bit better but still the edge has to be cut at the end, just a few mm.
|
|