|
Advertisement / Annons: |
Chrysler Crossfire
|
|
3, First Toe-in measurementNow it's exciting, I can do my first Toe-in measurement of my car's Toe-in angles. Measure the front wheels Toe-in: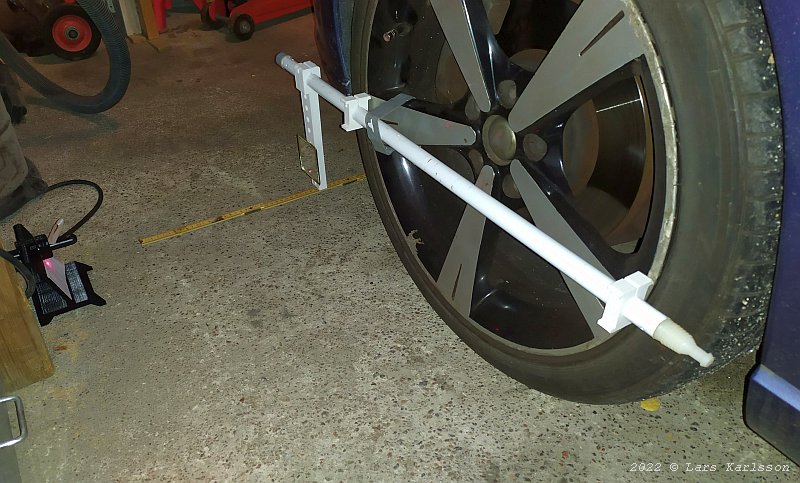
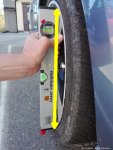
Here I have attached my Toe-in instrument to the front wheel on the left side. The laser is to the left, the black device. It's placed 2.1 meter from the mirror when it's mounted on the right wheel. 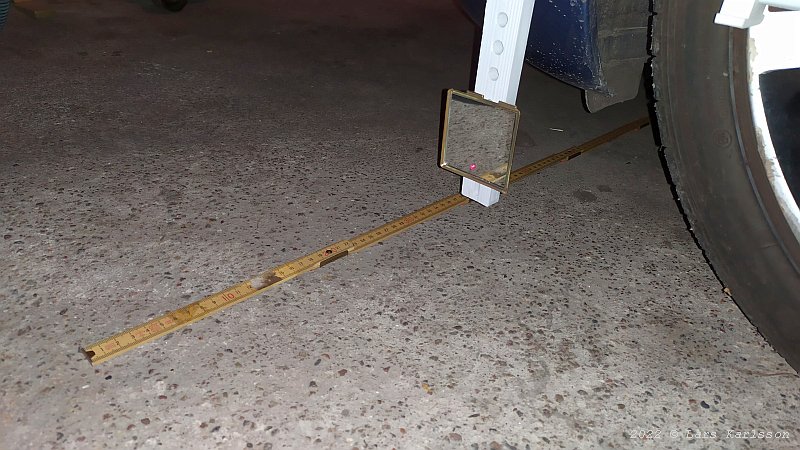
I adjust the height of the mirror to let the laser beam hit the mirror surface. It must sit low enough to go free under the car too. 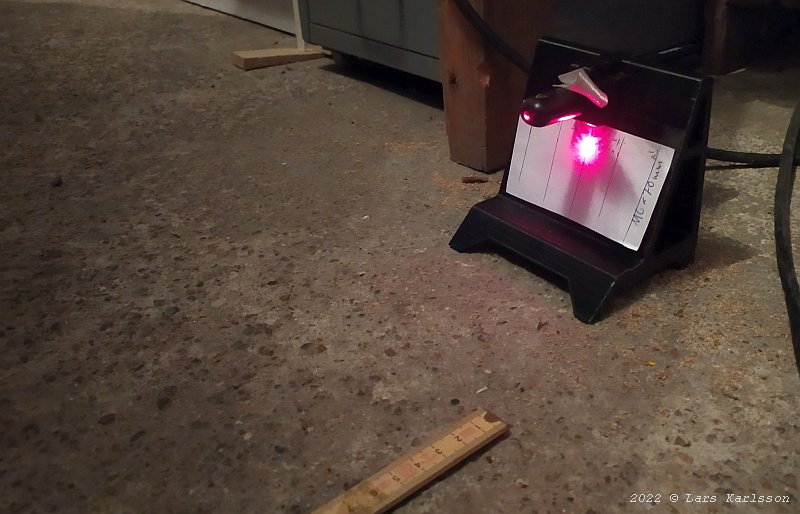
When still the mirror attached to the left wheel. I adjust the angle of the laser so the the reflected laser beam hits the center of the paper scale (wrong scale plotted in this example). After this I must not touch the laser. 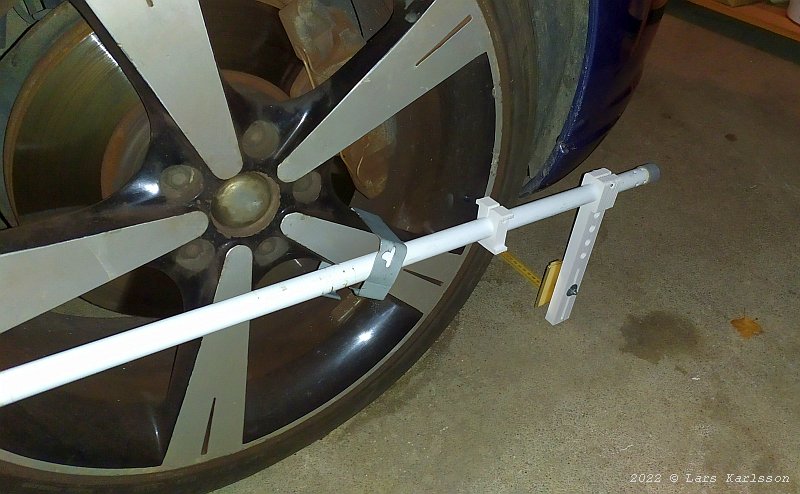
I move the mirror to the right wheel and adjust the mirror up and down until it hit the scale on the laser bracket. 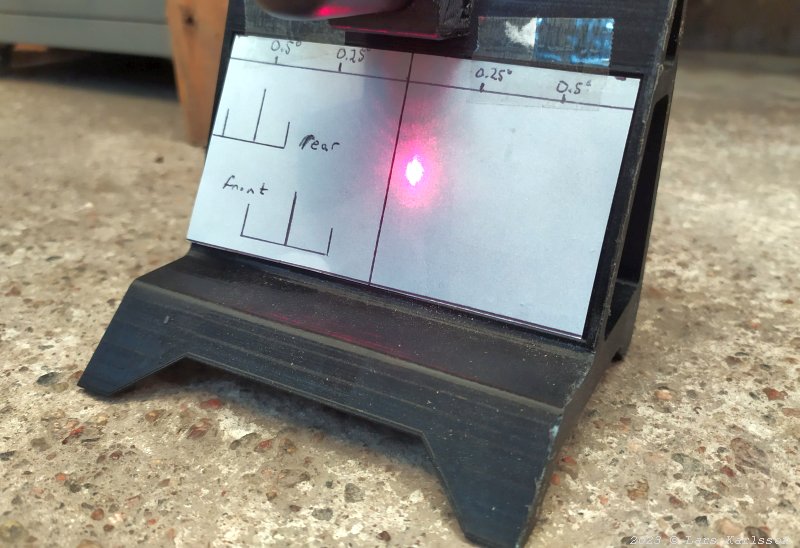
Go back and read on the scale. I get a very strange result, I have Toe-out, not Toe-in. Toe-out normally only front wheel drive car has. This can explain why I have a tendency of vibrations in the front of the car at higher speeds. With this correct scale I got it to be -0.1 degrees (Toe-out), out of specification. Something I must adjust. I think this is caused by the front lower rubber bushings is too soft after 17 wears. I do the adjustment of the Toe-in after I have replaced these bushings. It can be a bit tricky to understand the Toe-in limits. Sometimes they are in degrees or arc minutes or mm. Sometimes for one side and sometimes total Toe-in (both side together). 0.5o is the same as 30' (arc minutes) and when it's in mm it depends on the wheel's size.
I got the limits from here:
JLtechno.com
or this:
Zinref . Measure the rear wheels Toe-in: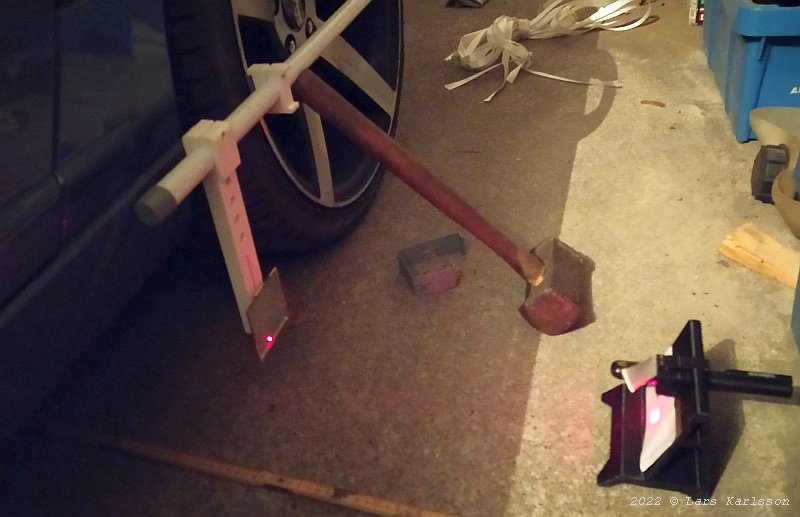
I move over the Toe-in instrument to the rear of the car. Do the same calibration of the laser to let the reflected laser beam hit the center of the scale. The measurement I did before I replaced the rear lower rubber bushings gave a bit high Toe-in, 0.7o. 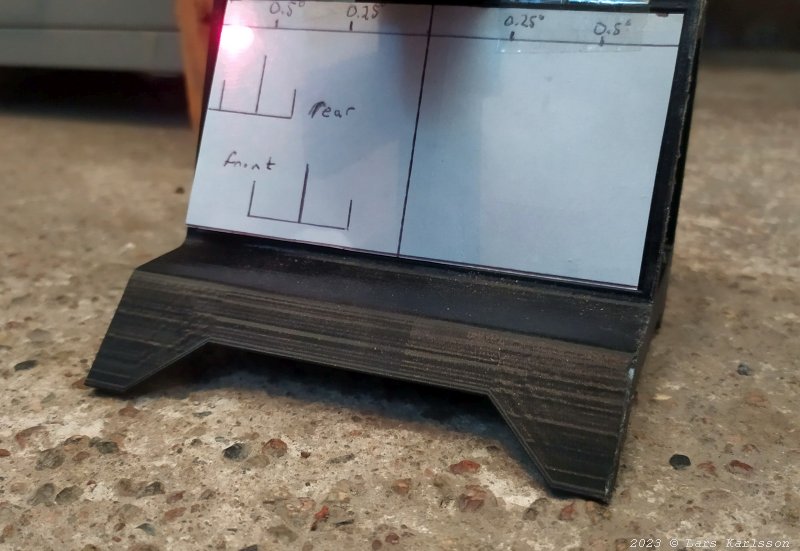
New measure after I replaced the rubber bushings. This correspond to an Toe-in angle of: 0.6 degree, inside the limits. The left and right Toe-in must also be symmetric to the center line of the car.
I got the limits from here:
JLtechno.com
or this:
Zinref .
|
|