|
Advertisement / Annons: |
Tutorial:
|
Content:
Note: |
0.3, Set levels of rgb image:The information in a 16 and especially 32 bit image have a huge range, much more than the monitor or a printed copy can deliver. But this huge range is important because when we process the image we expand the contrast locale and that get demands to have very very small steps in the level to look good. Example: when you increase the weak signal in a nebula. The image range is the input levels and what's deliver out to the monitor or a jpg image file is the output. Maybe Gimp can work with more than the normal 8 bit rgb as output. The levels are expressed in a 0 to 100 scale for both input and output levels. Levels:
Note: 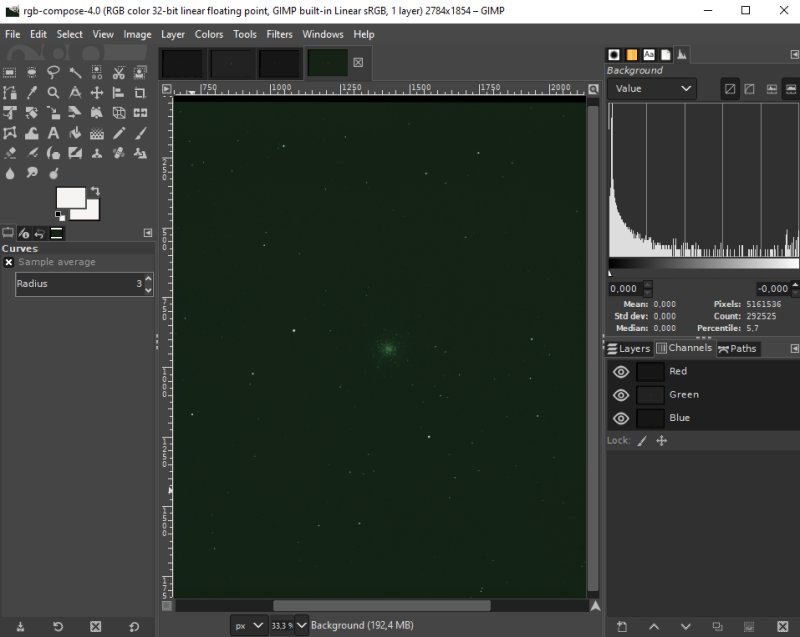
Now the image is in rgb mode and you see the three red, green and blue layers to the right. Now we shall set the input levels of the three color channels. It was this step that was very difficult for me to do when I used the Tiff 32 bit format. Now with Fits format the levels are almost correct already from the beginning. A rough pre calibration:To make life easier it's good to do a pre color adjustment. For this to work you must not have done anything to the gain in previous pre processing and it must till be in linear mode. You must know something about the sensitively of each color channel. If you have a Canon EOS camera you can try this figures used in: IRIS
But even better to use figures from an earlier calibration with Siril or other software. Here what I got from Siril's Photo metric calibration: 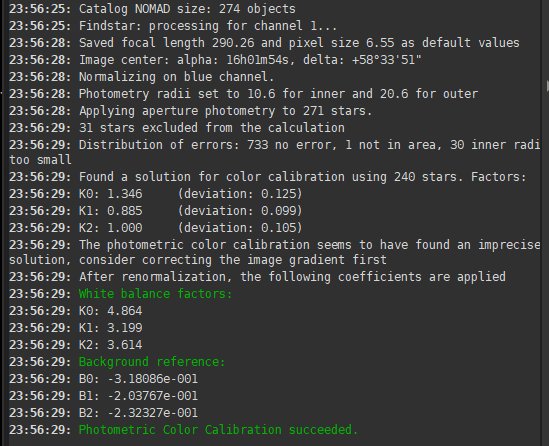
Siril use the blue channel as reference (for a Canon EOS 6D).
From this we can calculate how to adjust the color channels in Gimp. The scale in Gimp is 1 to 100. The green channel are almost the most sensitive channel and the channel that saturate first. The weakest channel is the red we can see from the calibration. As earlier mentioned we can't increase the level above 100 in Gimp but we can lower the other two.
With this figures we can adjust the gain in Gimp. This can be done in Levels, see below. Only use the right arrow for each color. When the green and blue channel is corrected. Click OK button. Open Level once again, if the background levels differ, correct it with the left arrow. It's easier to see if the histogram to the right is in RGB mode and logarithmic. With this rough adjustment of color gain is done it's time to do the fine adjustment. Adjust the level for each color channel: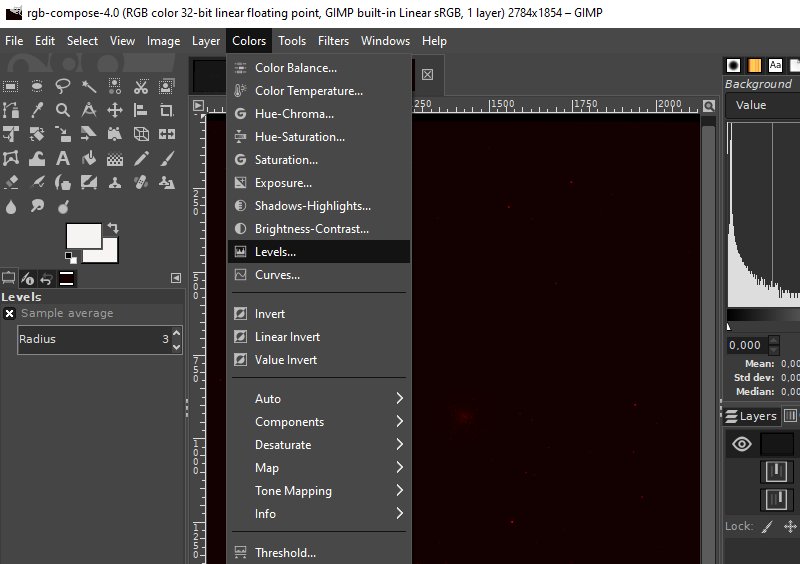
Adjusting the red input level. The red layer has been activated to the right, it's activated when the bar is black. If it's not activated you can not do any change to it. Also the 'eye' is enabled which means it is visible on the screen. Choose levels from Colors menu. Red level menu: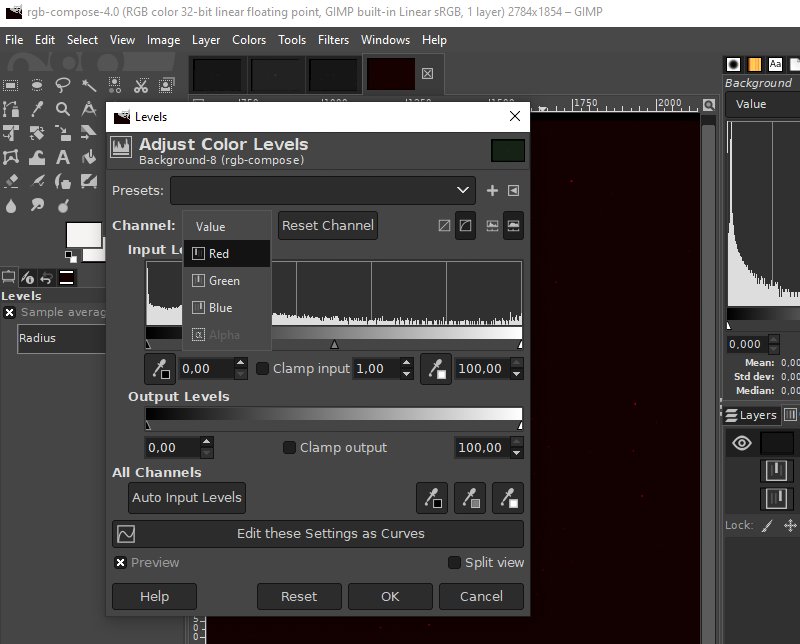
Select the red channel from the input level menu. Set the red input Level: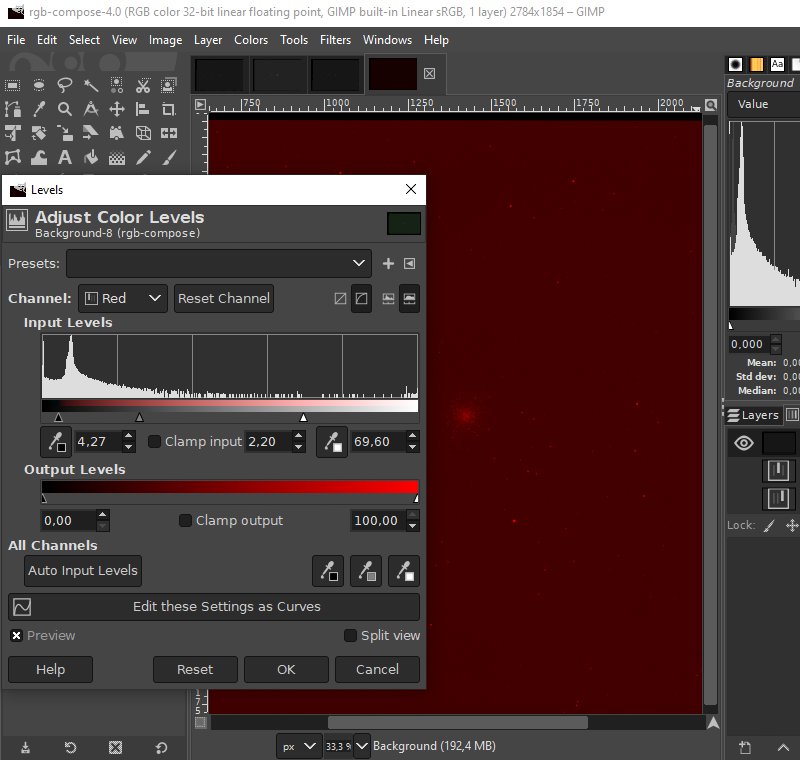
There are three small triangles, min, middle and max signal. Note how I set the left one, the min signal just to the left of the big bump in the histogram. The 'bump' correspond to the background in an astro image. Below that is no real signal, sometimes I cut these low levels already in the pre process with AstroImageJ. The max signal to the right I have chosen to be where the signal is just below oversaturated (later I have found it better to leave it at the most right position). After this only real signal is included in the input levels. The middle level is set to 2.2, this is the gamma and 2.2 is the standard for monitors and sRGB signals. It increase the low levels more than the higher levels. Maybe not perfect with exactly 2.2 in this case with astrophotos, but a good starting point. You see two 'bumbs' to the right in the histogram because I didn't crop out the usable area. At the edges there always bad data because of the stacking process. It's better to do this crop before adjusting the levels. Adjust level of green and blue channel: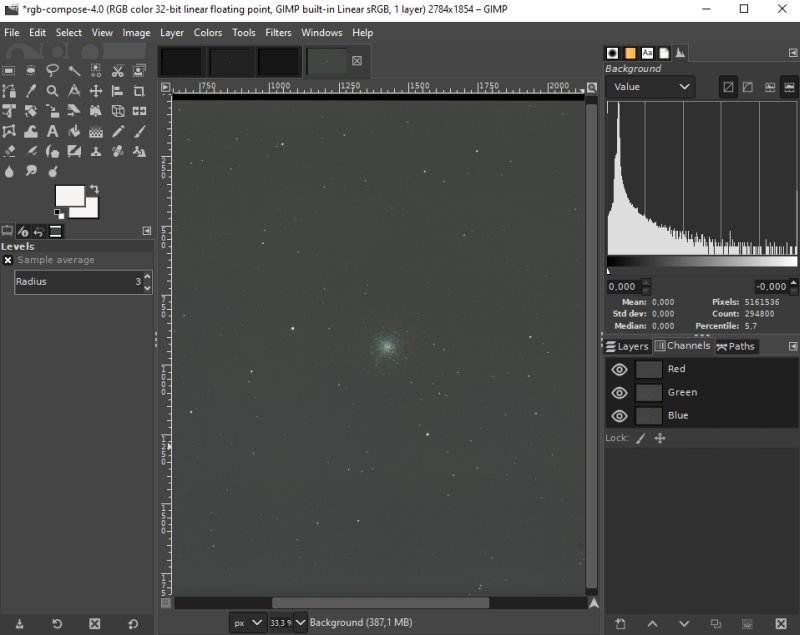
Redo this input levels adjustment for the green and blue color also. If the three images was well balanced before it should look something like this. All layers are now activated and set to be visible. Do the level adjust one or more times, now when the rgb color are leveled you can adjust them with 'Value' instead which take all three colors at the same time. Have all three layers visible, the 'eye' to the right. Move the left triangle closer to the 'bump' but leave some headroom. The middle triangle that control the gamma, slide it closer to the bump. Do this in small steps and click 'OK' and start it once more until you feel it looks good. You can also do it in the reverse order, start with 'Values' and later fine adjust with separate colors. Adjusting the output level: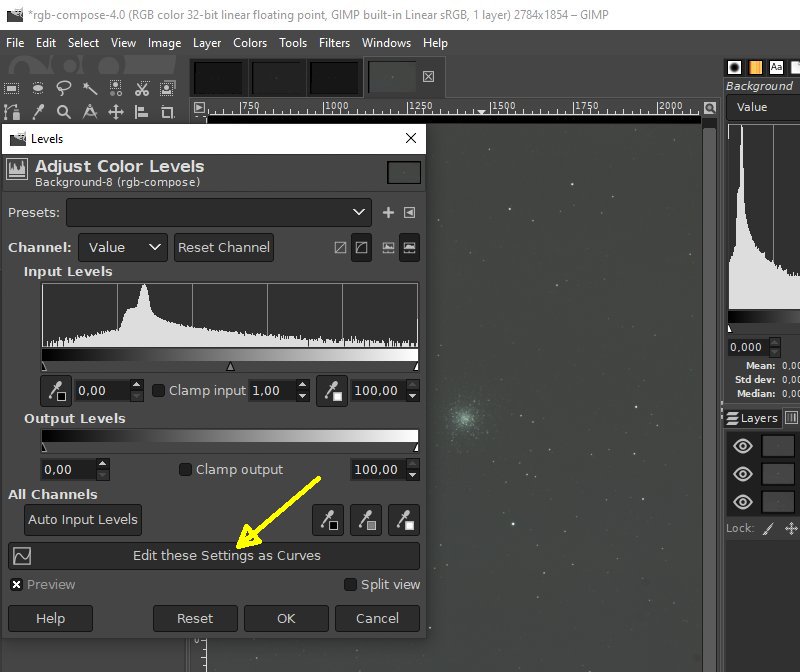
Open the level setting once more. Now we shall adjust the output levels. In most cases it's to prefer to use the Curves. Click on that bar at bottom. Adjusting the curves: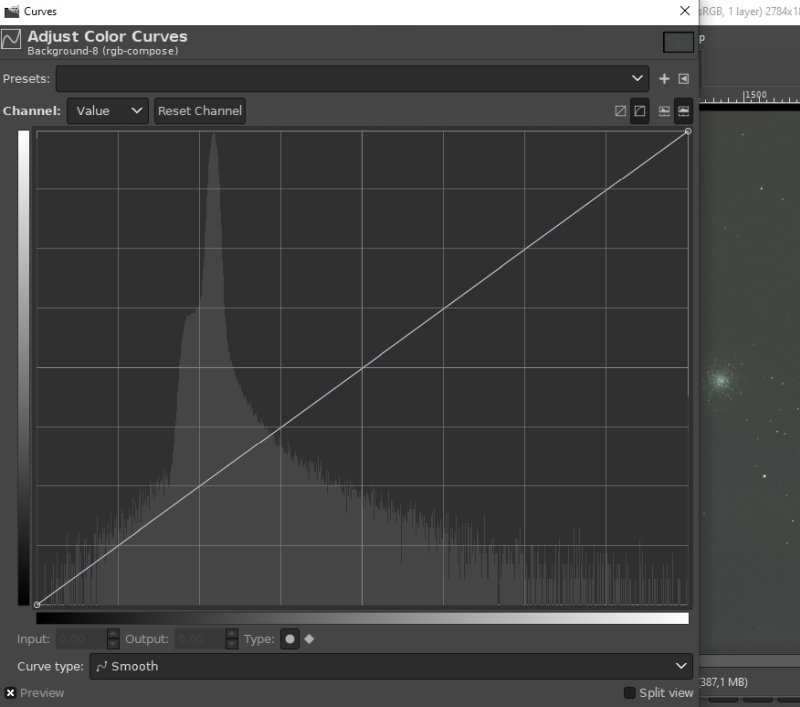
We see in the image that the back ground is very light, that's because I set the min input level a bit left of the bump in the histogram. If it differ much you can go back and fine adjust the input level (move the min handle more to the right). Now when it's expanded it's more clearly seen. Grab the left lower point of the white line. This white line include all three colors, have them activated in the layers too. Now it's more like a ordinary photo editing, coarse adjust it with the Value setting, after that fine adjust the colors relative each other from red, green and blue Curve adjustment.
Note: 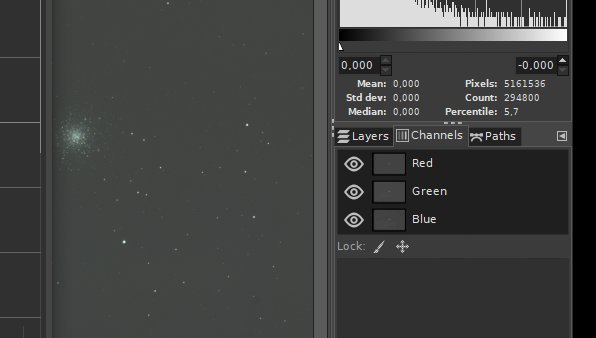
When color balance, have all three layers activated and the 'eye' enabled. Set the black level: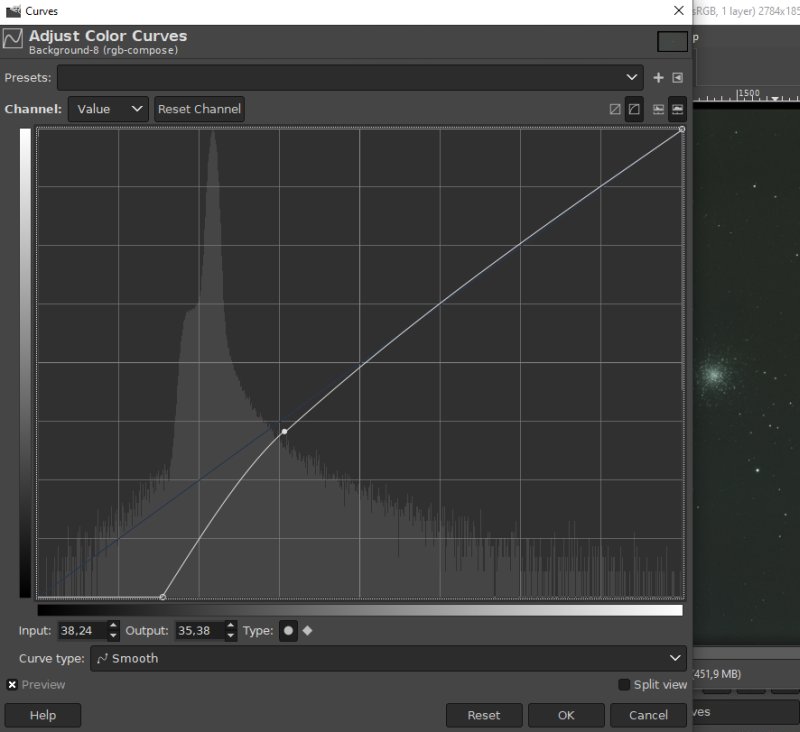
Something like this as a first attempt, if you need more control points, in most cases an S-curve is better. Just click on the line and more will be added. You see the Globular Cluster M13 at right which was my sample image. Save and Export the image: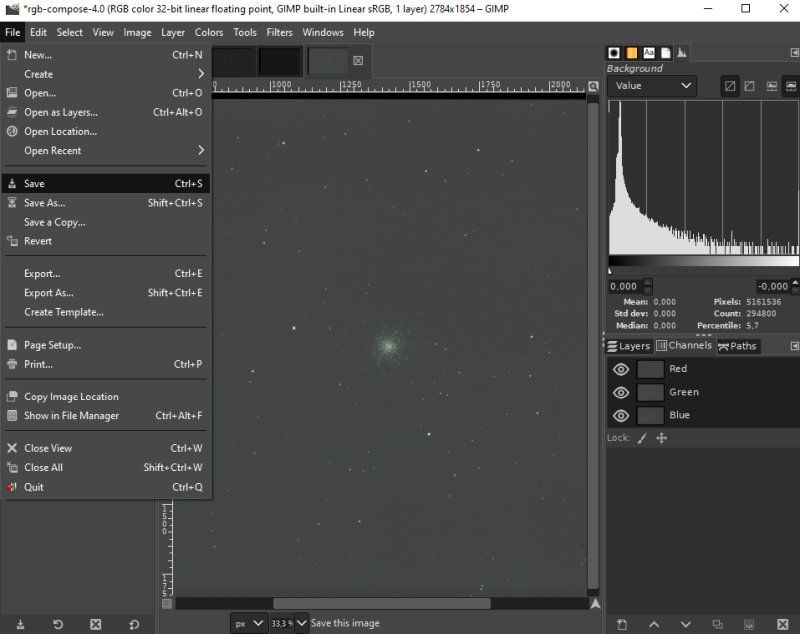
Save the image in Gimp's own XCF format, you can open it later with all information left to continue. Also export a jpg file or what format you prefer. Messier 13 sample image: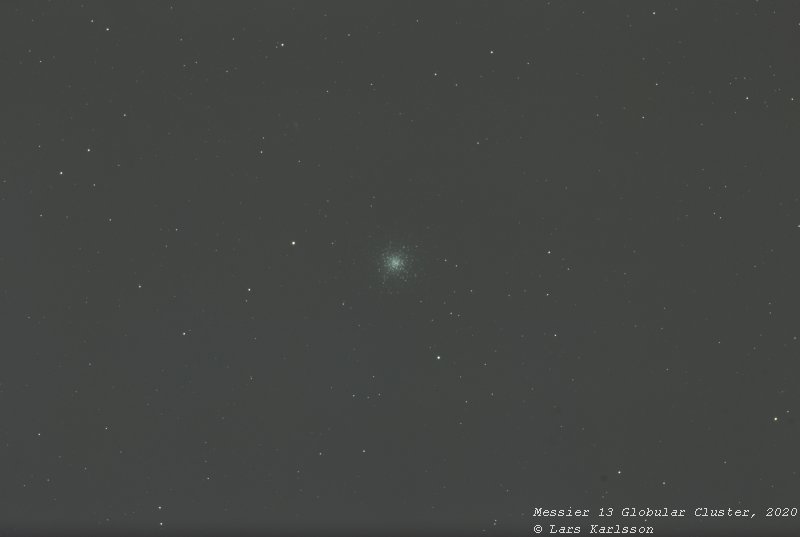
A first very easy example how to use Gimp. Of course you can do a lot more with the advanced functions. Still to learn for me how to use its capabilities. Color calibration, a better alternative: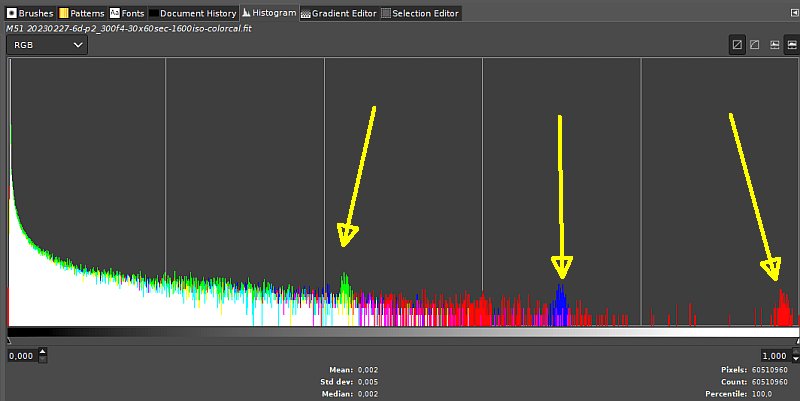
Nowadays I use Siril for the pre processing. It has a tool that can do a color calibration with data from star's color spectra. Then I get much better precision and I will use that method from now. The above histogram is from Gimp in rgb mode, it's still in linear. Look how the distribution differ between the colors. Before the calibration the green peeks to the right, after calibration it's the red. If the sensor had a better dynamic they have been more equal, now the green saturate before the others because it's more sensitive. Bright stars and core of galaxies can get its center color shifted. There is no green signal at higher level and the bright spot turns purple because the lack of green high level signals. It's not only Siril that can color calibrate an image with stars as a reference. The latest Siril beta 1.2 can even calculate and correct saturated stars, it use the signal off center of the star where it haven't saturated. It will be exiting to test. Fitswork I used earlier had a similar function and I try to do something like that in Matlab. Have a good luck with your image processing, maybe I come back later with some examples when I learned how to use it. |
|
|