Astrofriend's homepage

www.astrofriend.eu
Share: Twitter Reddit Facebook Gmail Gmail Email
Search Astrofriend's homepage:

Valid CSS!

All pages shall now have been validated

Info Cookies (Kakor) / GDPR

Navigation

Advertisement /
Annons:

Twitter @AstrofriendLars

Follow Astrofriend

Project News

Advertisement / Annons:

Tutorial:
Make a synthetic flat calibration image


Content:

  1. Introduction of making a synthetic flat image
  2. Find parameters with help of old flat image and Excel
  3. Find parameters when there is no old flat image
  4. Find parameters semi automatically with AIJ macro 'Find flat cal points'
  5. Setup Flatfield plugin and how to use it

Note:
I take no responsibility or liability for what are written here, you use the information at your own risk!


4, Find parameters semi automatically with AIJ macro 'Find flat cal points':

If you try my Excel sheet to find the calibration points you for sure find time consuming and complicated. To make it easier I have made a macro to AstroImageJ that find the points from an old raw file of flat or maybe an image with high background pollution. The latter work if there are no bright objects in center or at the points where the values come from.


Find a polynomial semiautomatic with the macro 'Find flat cal points':

AstroImageJ macro 'Find flat cal points'

Run the macro 'Find flat cal points' from the Plugin menu.


Macro setup menu:

AstroImageJ macro 'Find flat cal points'

A window shall popup like this. The function needs some information which we have to setup.

This is only a macro and a bit primitive, but much better than to do it manually.


Setup what input format of file:

AstroImageJ macro 'Find flat cal points'

The image that shall be opened can be an old flatframe or an image with high light pollution. It could be a raw file, I think it will open most old cameras' raw files. This macro use DCRaw, it's not developed anymore sorry to say. It could also open Tiff files.


Overscan area or not:

AstroImageJ macro 'Find flat cal points'

Some cameras has an overscan area that can be included. I use it for my Canon camera when I need to take the bias values from the overscan area. You must have the same settings as the files you want to flat calibrate.


Subtract the bias:

AstroImageJ macro 'Find flat cal points'

To be more general I just subtract a constant. My 14-bit Canon EOS has a bias of 2048, my older Canon with 12-bit has a bias of 128.


deBayer or deMosaice:

AstroImageJ macro 'Find flat cal points'

I normally do a deMosaice of my color images. Then I get four images with 1/4 of the size. For me this is the method to handle a color cameras' raw files.

Many people use the interpolation method with deBayering which gives an image with false data. Takes four time as much space (when color separated) but not any extra information.


Normalize:

AstroImageJ macro 'Find flat cal points'

The normal method is to normalize a flat image. If you working with integers, i.e. 16-bit files, it's not possible. A flat image has its highest value in center and the center is normalized to 1 if it's enabled.


Degree of polynomial:

AstroImageJ macro 'Find flat cal points'

If your optics is of high quality with high f-number it's normally enough with a 6:th degree polynomial. My experience of optics of f/4 or lower is that it takes advantage of a 8:th degree polynomial. If you see a dip in center, increase the degree. Explain later.

When everything is correct, click 'OK' and the macro is executed.


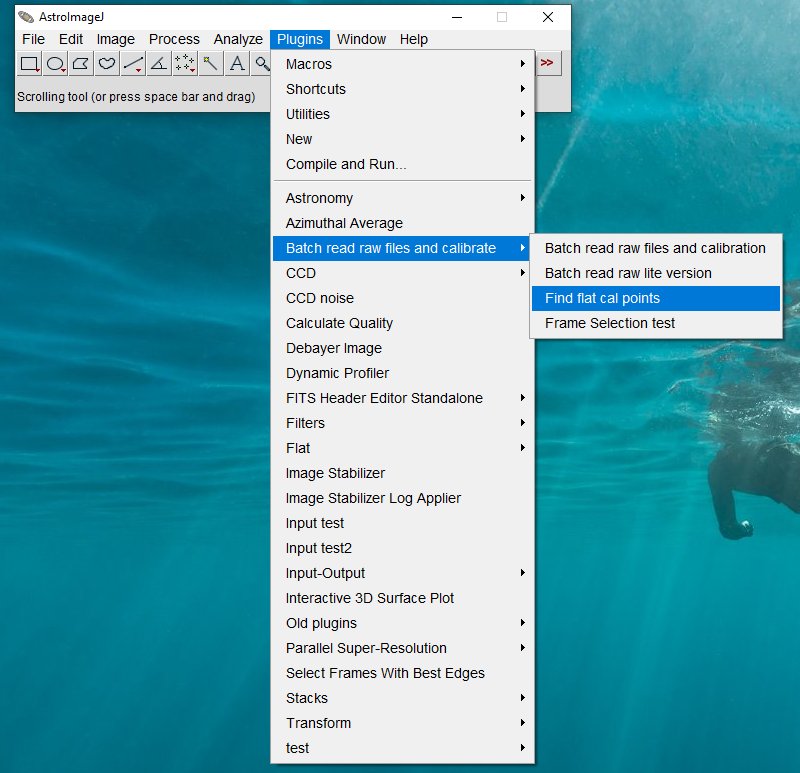
Open the flat image that shall be used as reference:

AstroImageJ macro 'Find flat cal points'

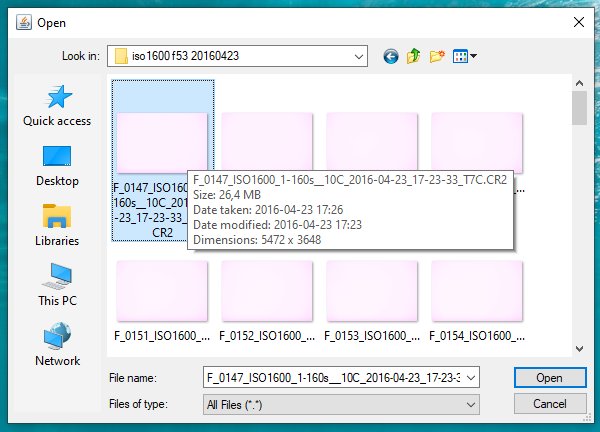
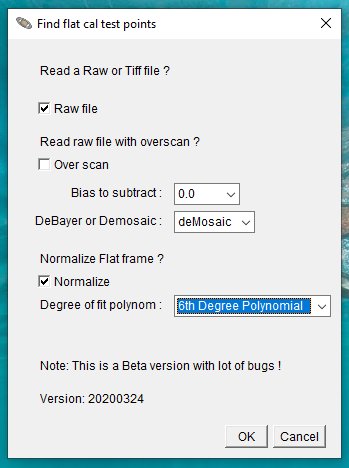
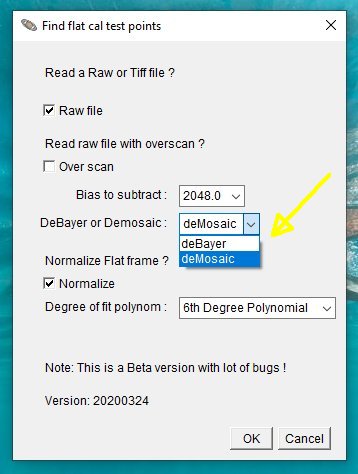
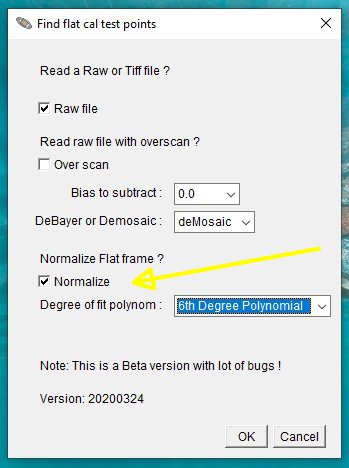
When the macro is executed it ask which Raw or Tiff file you want to open. Open the file that you want to use as a reference.


Find the calibration points:

When open the file a lot of new windows pops up.

AstroImageJ macro 'Find flat cal points'

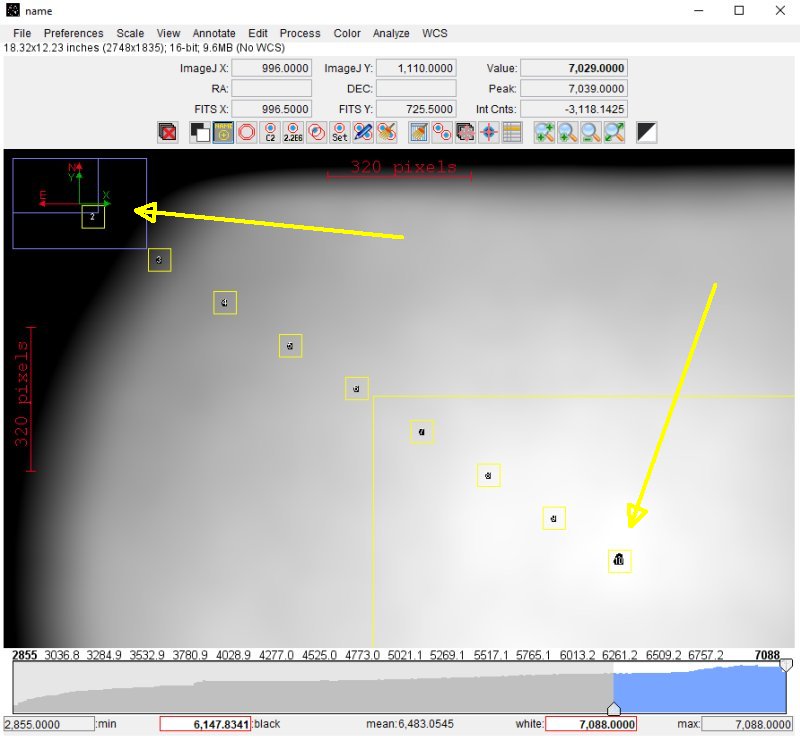
It calculate automatically which coordinates to use as reference points. If you don't have a flat image and use an image which bright background from light pollution. You must have no bright object cover the ref points, at the moment it's not possible to move the points. The big rectangle in the center is for a later option to find the optical center.


ROI manager:

AstroImageJ macro 'Find flat cal points'

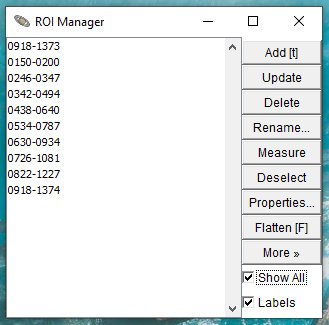
In the ROI (Region Of Interest) window you have the coordinates of the reference points.


Plotted graph:

AstroImageJ macro 'Find flat cal points'

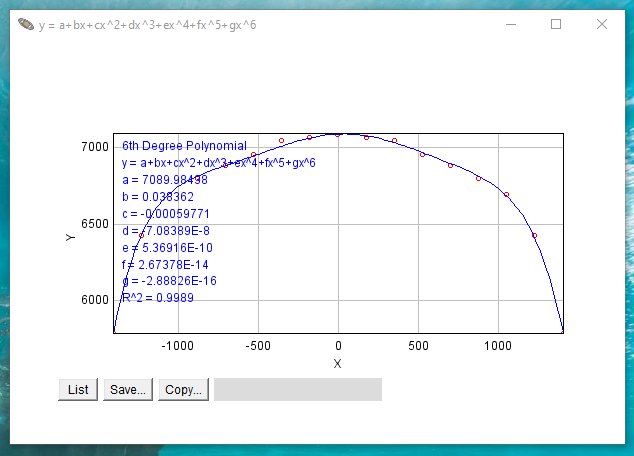
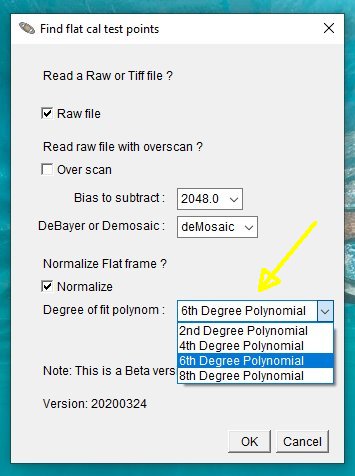
It display a window with the best fitted curve, also the equation and the parameters that is calculated shows up.

As you see at the peak in center the curve is not perfect aligned with the points. If it's a big difference, it could be caused of not correct optical center or a bright object in the measurement window. Correct the optical center or try another image. In difficult cases, use the Excel sheet and tweak the parameters until you get a better result. When finished, use these new parameters for input in the Flatfield plugin.


Log list with parameters:

AstroImageJ macro 'Find flat cal points'

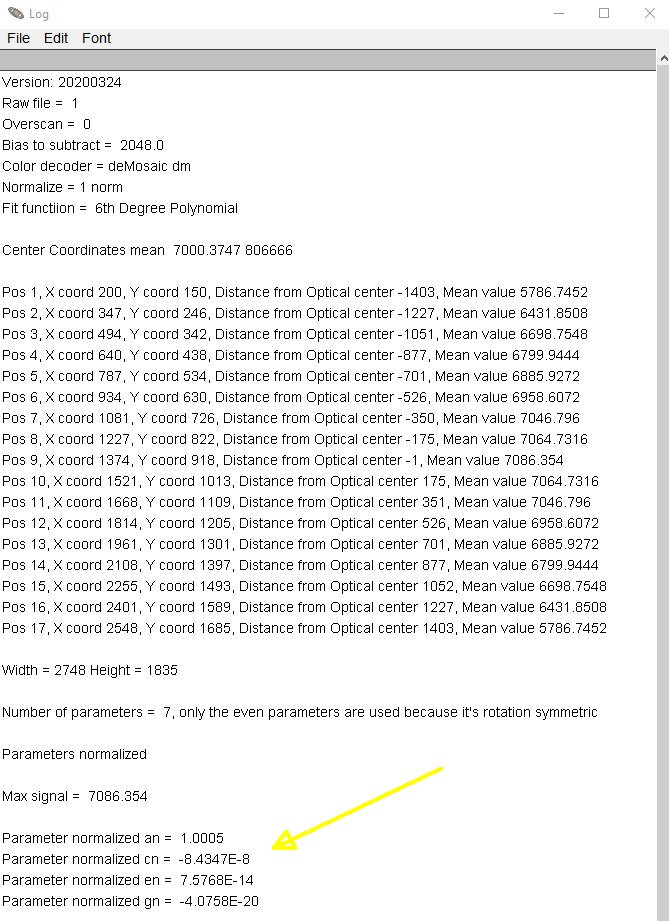
The log list with its calculated parameters. These four parameters will later be used in the Flatfield plugin.


Down load macro 'Find flat cal points':

The download page is moved to here: AstroImageJ download macro:

Instructions how to use AstroImageJ: Tutorial AstroImageJ Introduction.

Go Back to content

Go Back
To page V

Advertisement / Annons: