|
Advertisement / Annons: |
Tutorial:
|
Content:
Note: |
2, Find parameters with help of old flat image and Excel:The first alternative is to use an old flat frame, maybe not perfect or polluted with lot of dust blobs that's not on the sensor today. To my help I have put together an Excel sheet that I can calculate the parameters I need later when I make the synthetic flat frame with the plugin Flatfield. Find a polynomial that simulate vignetting, a flat frame: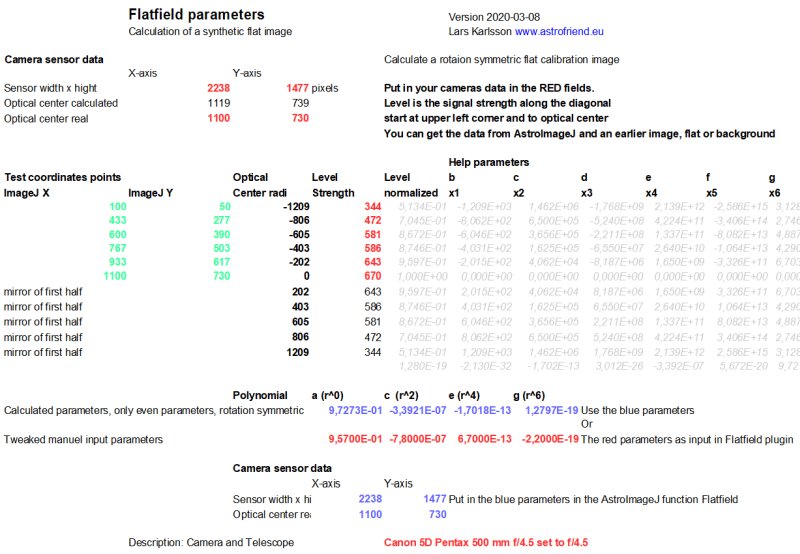
I have prepared this by setup an Excel sheet that calculate the parameters for a polynomial that simulate a rotation symmetric vignetting. The polynomial is of sixth degree.
Because it's rotation symmetric the b*x1, d*x3 and e*x5 are not used. The function that calculate a flat frame use the radius which is: r = rot ( x2 + y2 )
To get something to start with it is good to have an old flat frame even if it is of bad quality. In an example on next page I will show how to use the background to get some values to use when setting up the polynomial. The camera data with the size in pixels of the sensor has to be put in the Excel sheet. The X and Y position of the optical center has to be find. It's needed some levels along the radius-axis, from the corner to the optical center. The X and Y-positions to use for these test points are calculated in the Excel sheet above (ImageJ X, ImageJ Y, columns colored green). All fields is market red are were you have to put in some data. The blue fields are were you get data to the Flatfield-plugin that make the synthetic master flat. Find optical center:
I use AstroImageJ and open one not so good masterflat. Prepare the image by bias subtract (which it should already be if it's a masterflat), it must be a mono chromatic image. If you have color image, select one of the colors by separation, normally the green channel is of best quality. First try to find the optical center, it's not very difficult. Open an old master flat image. It open as a grey scale, here I have changed the Lockup color table to get it colored, see below how to do that. 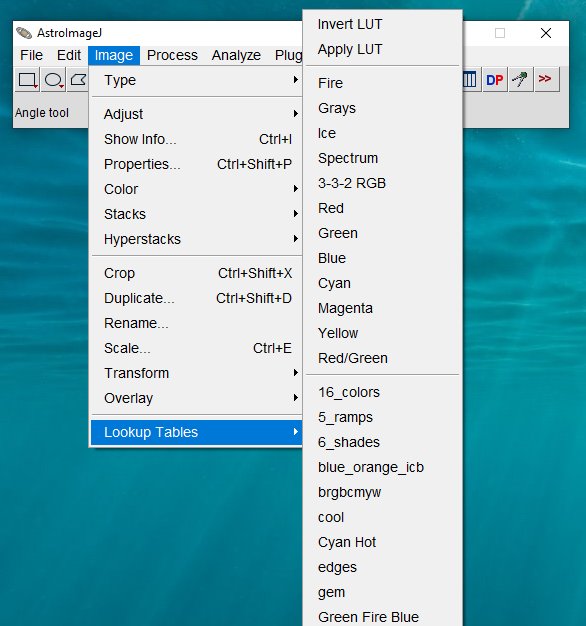
Change the lockup table in AIJ to someone that increase the contrast and let you see the center better. Adjust the contrast of the image with the scrollbars at bottom of the image, zoom in. 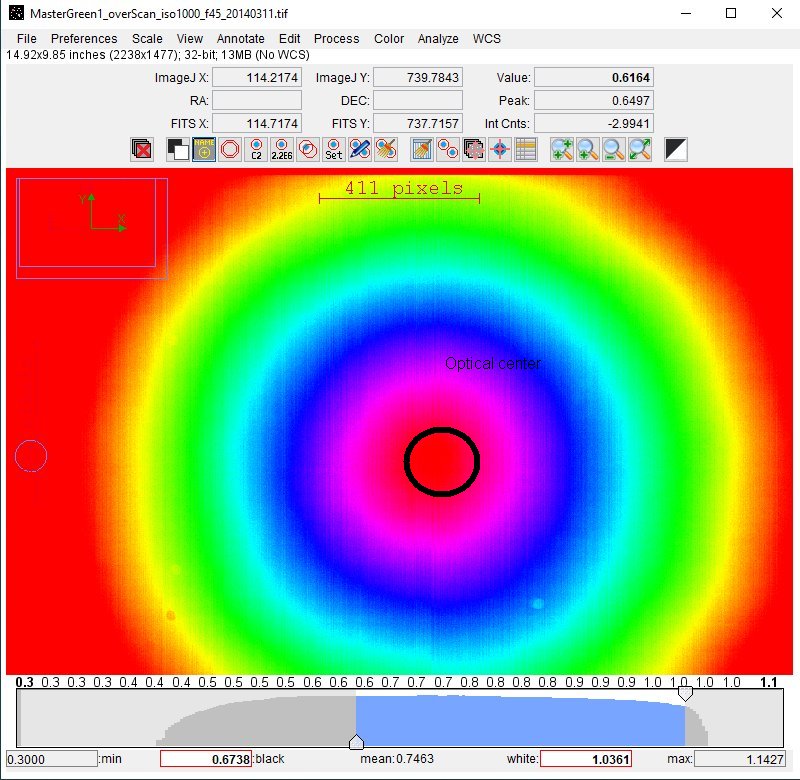
Move the cursor to the center where the level (Value, top right) is strongest, move the cursor around the center to get some average level. Take the coordinates of ImageJ X, ImageJ Y (above left) and put it in the Excel sheet at camera data and 'optical center real'. You also get the size of the image at top left, in this case 2238x1477, put in this figures in the Excel sheet. Now there shall be some pre calculated positions where to place the curser, the green values in the Excel sheet. Find the levels along X-axis: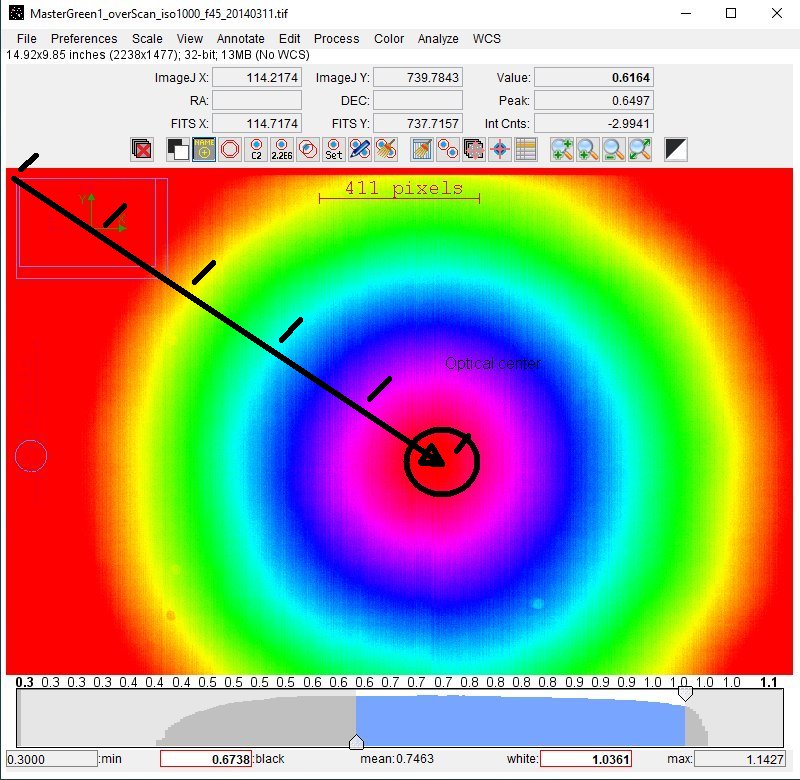
Move the cursor until ImageJ X and ImageJ Y correspond to the pre calculated table 'X and Y-columns' colored green in the Excel sheet. You only take the values on the left side, the values on the right side will just be a mirror because this vignetting simulation we calculate is rotation symmetric. It follows the line from upper left corner to where it cross the optical center. Take the Value at the pre calculated ImageJ X and ImageJ Y coordinates and put it in the Excel sheet. 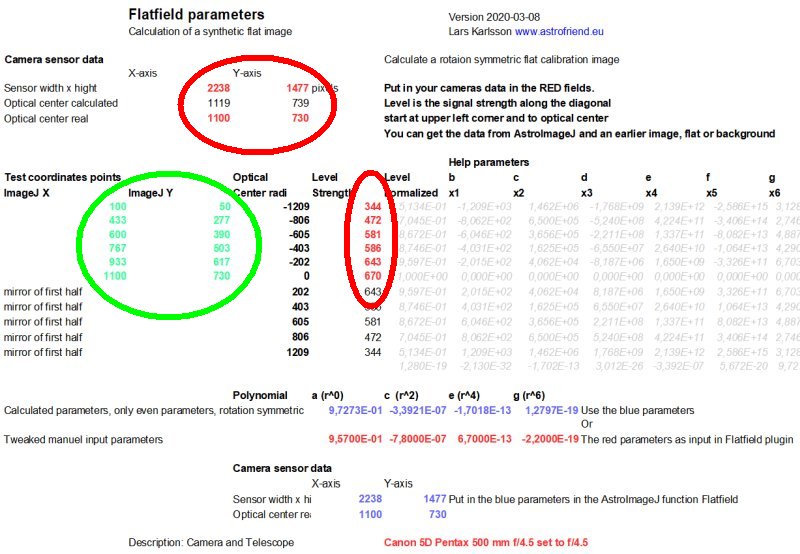
Overview:
Optical center:
Values along the diagonal: Calculate the parameters: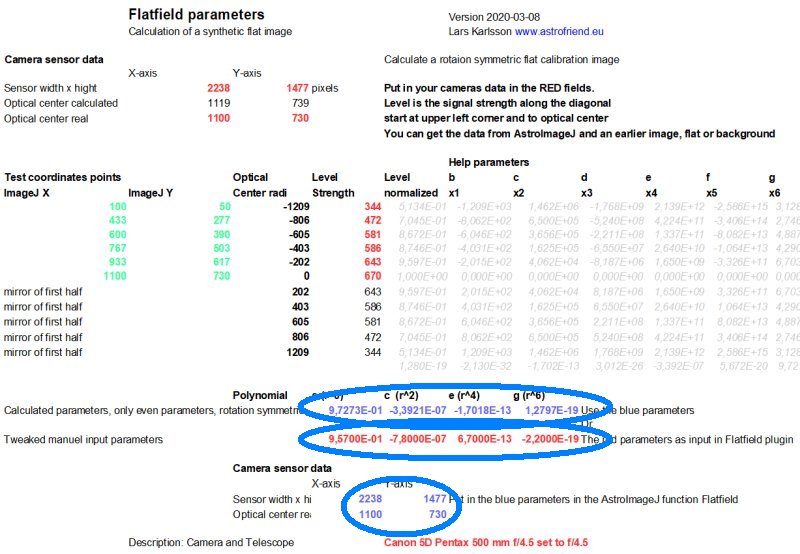
The constants for the polynomial will immediately be calculated. The upper row of blue values. The second red row is used to set these parameters manually if you want to fine adjust them. Both the calculated and your fitted curve will be drawn in the Excel sheet so you get an overview how it looks. Choose either the blue or red parameters and write them in the Flatfield function (plugin) in AstroImageJ. The problem for me with this master flat and why I don't use it directly, it is that I only have the aperture set to f/4.5, not f/5.6 or f/6.3. By testing with variation of the parameters I can find the correct curve fit for the other apertures. 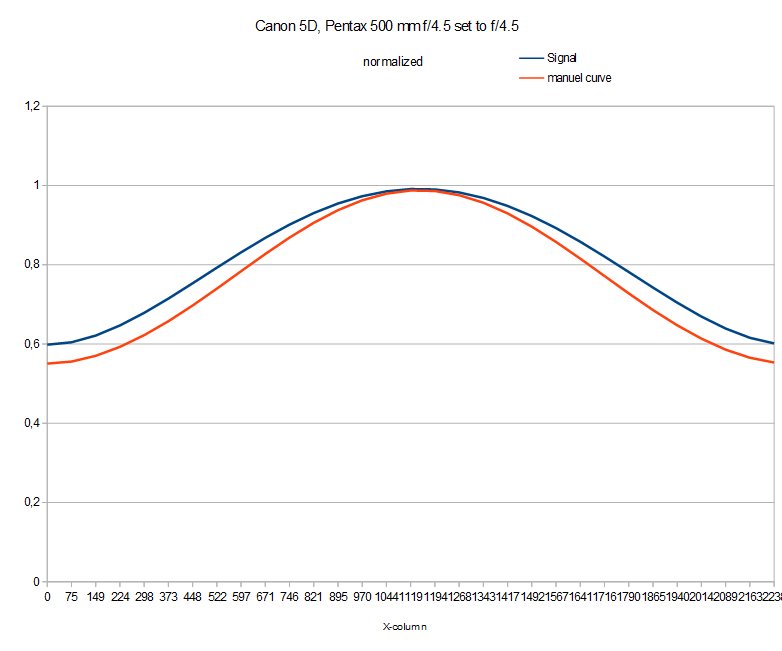
Scroll down in the Excel sheet and you find a plot of the simulated vignetting, diagonally from one cornet to the opposite corner. A flat image are normally normalized to have the value = 1 at center. Now we have the parameters we need to put in the Flat plugin to AstroImageJ. Setup 'Generate synthetic flat':I do a test to make a synthetic flat with help of the Flatfield plugin, explain later the details. 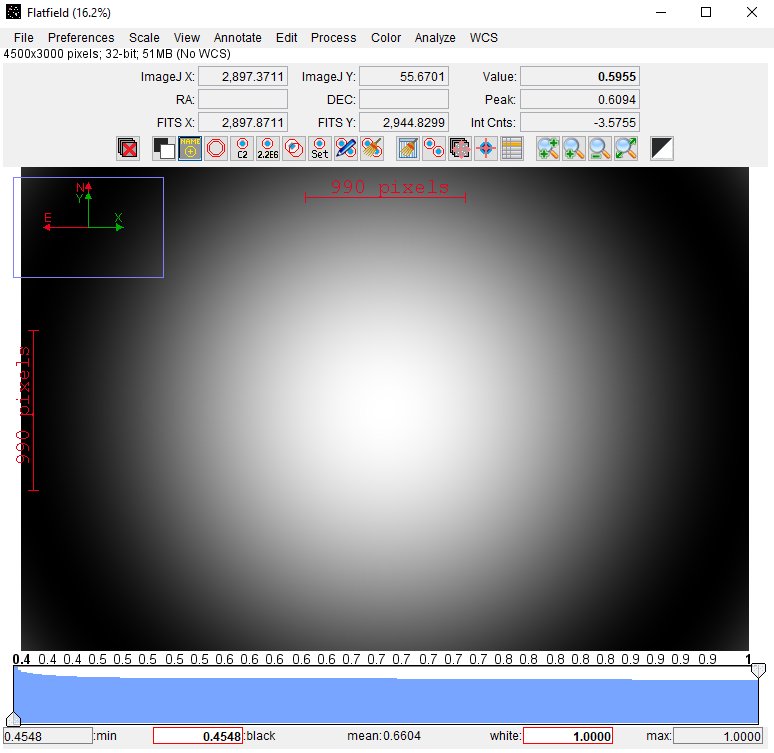
The new synthetic master flat. You can use it for all colors. Save it somewhere in your directories for master flats. This is just the beginning, it will come more later !
|
|