|
Advertisement / Annons: |
My astronomy project:
|
Content:
Note: |
3: Test of focus system out in the fieldTonight there was little holes in the clouds so I could do some testing of the focus motor and the software that control it. 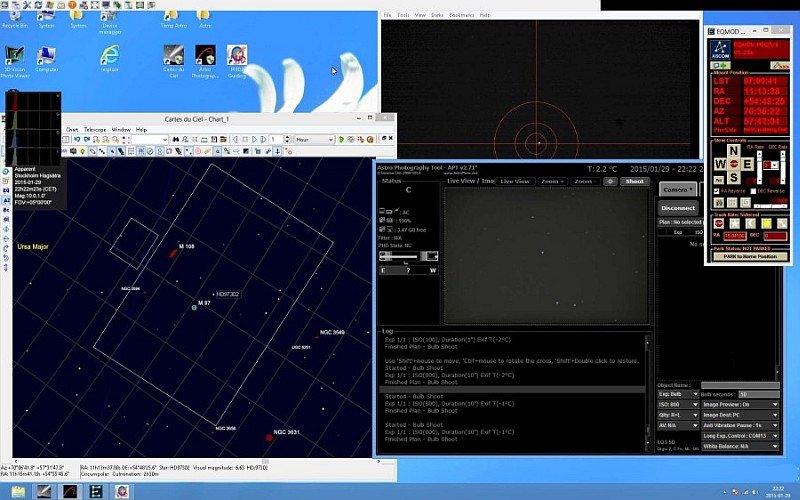
Here how it looks on screen two that I have connected to my laptop. It shows the astro server that I remote control, that's the computer in the battery box connected to the telescope. It easily becomes a little messy with all the applications you need to have control over. My big screen I bought helps and it has 1980x1200 in resolution, the monitors are cheap nowadays. Whatever monitor one buy it seem to never get big enough. One way you can do is too increase the resolution to a higher value than the screen has, then get pan around, I do not like it. In addition to this display, I have of course also the laptop screen.
All four programs are also connected through ASCOM interface. It allows drift align, dithering and auto-guidance in an intelligent way. That I will do in this test is to set the focus of the telescope to the main camera (DSLR). 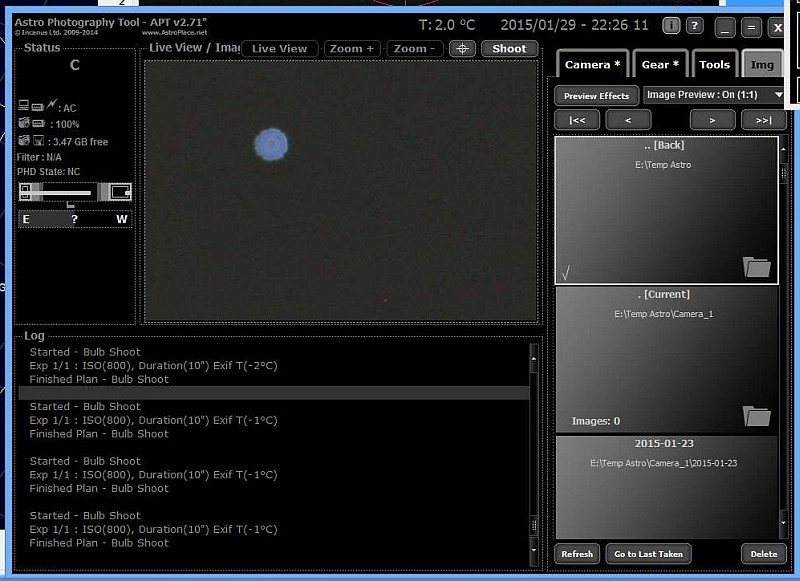
Before I turn off the focuser and the astro server I always check that the focus is in the the bottom position, that is position 0. Important before starting up is to check that the focus really is mechanically in bottom so calibration is not changed. As a starting point I want the focus to position 37,410 when I start up. I do so in the program APT and connect to the "USB Focus" by ASCOM. Because there are always some backlash in the focusing system it's good practice to focus only in one direction. Move out focus to 38000 and then change to focus inward in 100/10 steps, this is my setup, yours will have other figures. Centers the telescope on a rather dim star. Takes ISO800 exposures of 5 second (Canon EOS 5D and telescope f5.3) between each adjustment of focus. See below, apparently, quite a lot out of focus. The outdoor temperature is plus 1.9 Celsius degree, which can be read on the supplied thermometer to USB-Focus (at the top of the window). The camera temperature are about 3 degrees higher. It will take about one hour to stabilize when storing the telescope indoors. 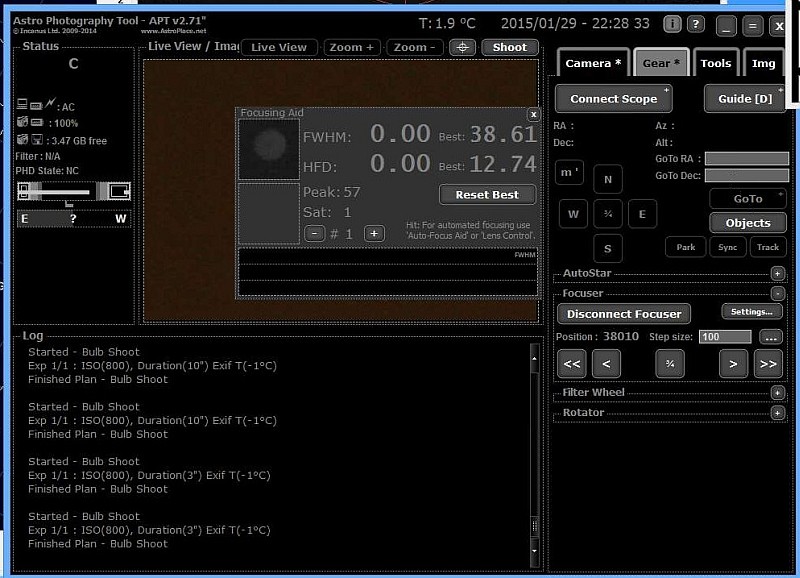
Opens up the focus tool in APT. A small box that I center around the star I want to focus on. Here you get information about the FWHM, Full-Width-Half-Max, measuring the star's width. The best FWHM value achieved stored and displayed on the right. Low value corresponds to a narrow star and well focused. Furthermore, you get a profile of the star, and a plotted a graph of the FWHM value for each exposure. Very handy, you can even add auto temperature compensation, so far I haven't come there yet in the field use. Although autofocus is available. In the first photo ended up focusing on FWHM = 38.61 pixels. 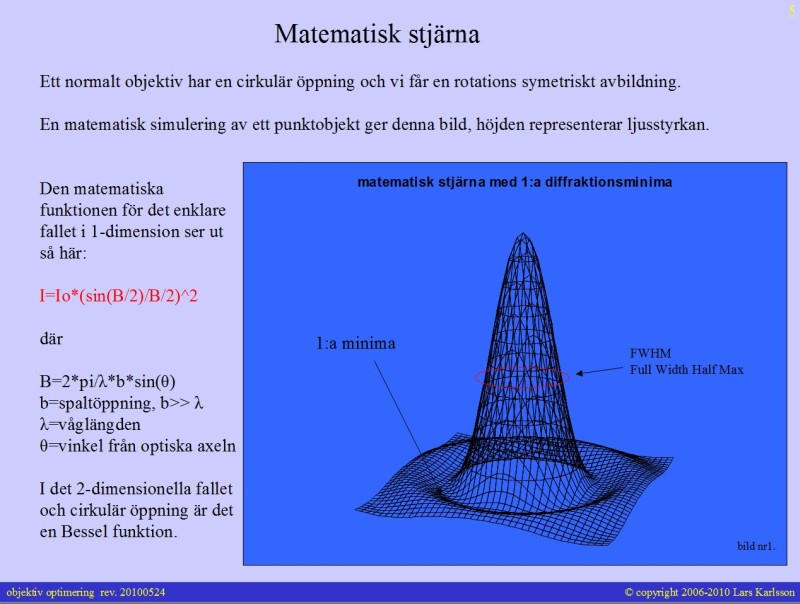
How you measure FWHM, Full-Width-Half-Max, sorry, only in Swedish but the illustration shows how it works. 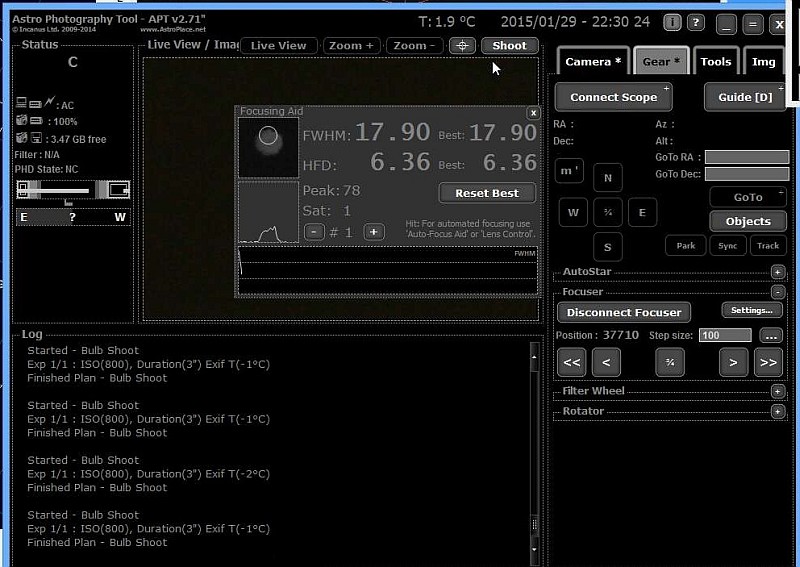
Here the focus has moved 300 steps inwards and the FWHM value improved to 17.90. 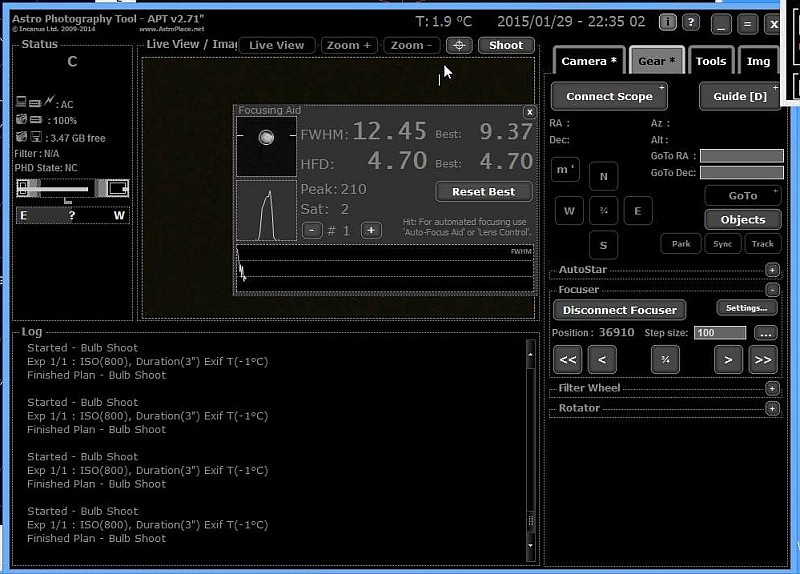
200 steps more to the inward direction and the FWHM value 12.45 is achieved. 
400 steps more inward and value of 6:46 is achieved. Observe what happens to the profile of the star, when you get better focus, concentrated more and more light on the central pixels. In the end they go into saturation, it interferes with the FWHM measurement, then you must reduce the iso setting or exposure time. The maximum value of the peak-scale here is 255. 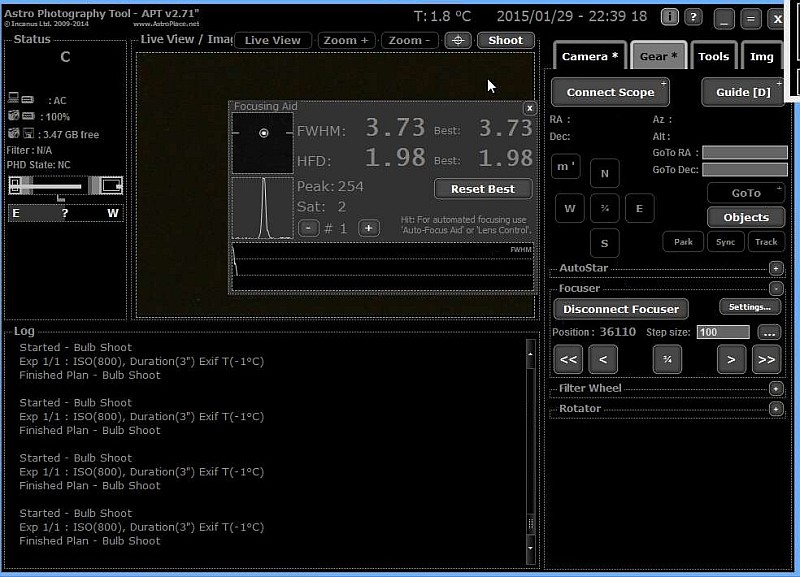
400 steps more inward and the value 3.73 is achieved. Further than this, I couldn't go because the clouds come in and distracting. FWHM measured in this program, in pixels, interpreted as the star halfway up in level is 3.73 pixels wide. Do you know the pixel scale, one can easily translate this to arc. seconds. My system is pretty under-sampled, 2.5arcsec / pixel, i.e. nearly FWHM 10 arc. seconds in this case, very bad, but I rarely come below 5 arc. seconds from my balcony. Pixel scale is a little rough to get better values. It must be solved in other ways. 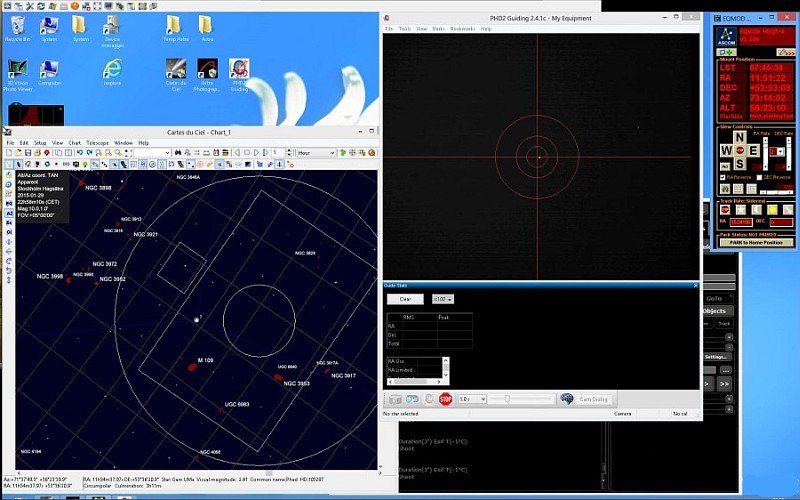
I used the last time to set focus to the guide camera. It should normally only needed to do this once if you do not change anything on the mechanical or optical setup. The first thing is to get the little small rectangle you see in the CdC program above to conform to the guide camera field, the rectangle is set in the CdC setup> Display. Once it's done, it's very easy to find guide stars, this one has a magnitude of 8 and gives good signal strength. When it is greatly out of focus the star profile gives the form of the tube that connects the prism with a guide camera. It would really have needed to be wider, rather than 6x9mm, perhaps 9X13mm had been good, but then you have not a thin off-axis adapter which in many cases is required to fit in place. I also moved out prism as far as possible in order that it will not cause vignetting on the large full frame sensor. We can not avoid the current mechanical use of adapters and other, even the camera body puts Limitations. If you have too small image circle of your flat field corrector the image becomes weak and out of focus as well too weak for the guide camera. 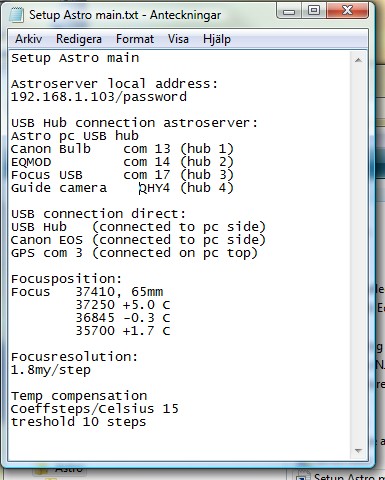
I have a small note up on the laptop monitor when I working on this. Especially the USB com port number is usually changed and difficult to keep track of. Here are the data required. I also build up a table of how the focus changes with temperature that can be used the day I want to add temperature compensation to focus motor. When it gets colder it shrinking the tube length and the focus must be moved outwards in order to compensate for this. Though the few measurements I have done so far seems to be in the opposite direction, will probably be changed when temperature variation becomes larger. Here you can see how big the movement are to each step of the stepper motor. The 400 step I moved when I tested the above is approximately 0.75 mm, in reality focus unit is very sensitive and has high resolution.
|
|||||||||||
|