|
Advertisement / Annons: |
My astronomy project:
|
Contents:
Note: |
2, A first practical test, TS130 APO and object M13:When prepare for this test I choose an image of a globular cluster, M13. Perfect with lot of point objects. Workflow:Normally when I pre calibrate, align, combine and some simpler editing of the images I have done like this. Old workflow:
Intermediate file format is Tiff 32-bit floating point. What I get is a image 1/4 of the cameras original size, that's because the sensor is a one shot color construction. But there are four of these images so no information is lost, one for each red and blue color, and two for the green channel. Standard image after demosaicing:Below is an image done according to the above workflow: 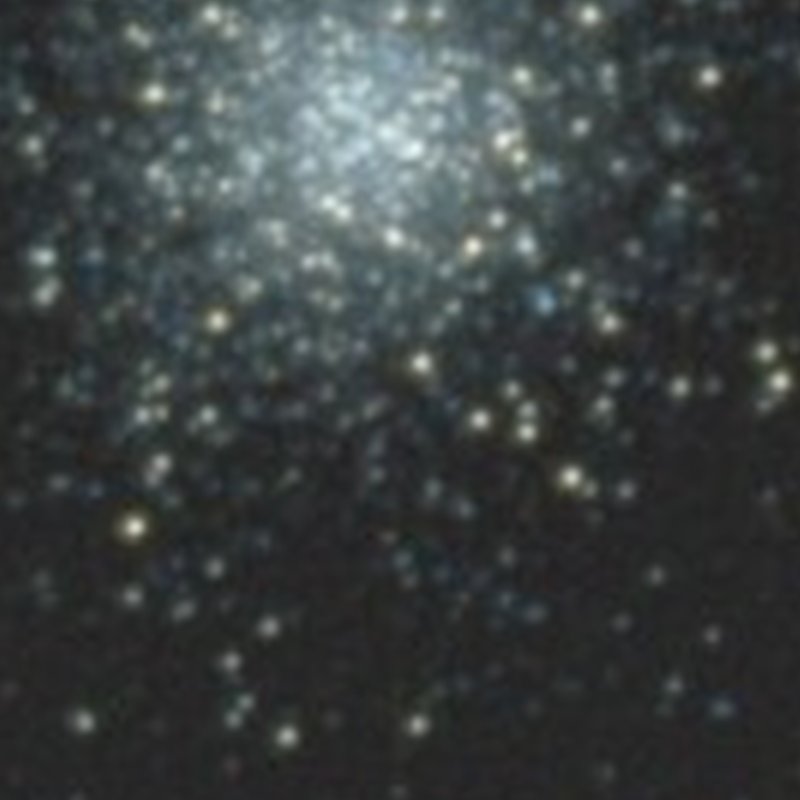
It's a 133x133 pixel crop from center and then a 6x interpolation to equal the 3x Drizzled image 2x interpolation below. I take my astrophotos from the balcony with lot of light pollution and a bad seeing. It's a stack of 90x60 seconds at ISO1600. 133 pixel with a pixel scale of 3" gives a 400" wide field, about one quarter of the Moon. 3x Drizzled image:To work with Drizzling technique I need a new workflow: Drizzling technique workflow:
Intermediate file format is Tiff and Fits 32-bit floating point. I had to change my AIJ macro to deliver Fits files at the end before DSS take over. Here is my AIJ macros, it's not updated yet to latest version, some work left: The 133x133 crop above is now a 400x400 pixel crop because of the 3x Drizzling I have applied and a 2x interpolation on top. It's exactly the same raw files. 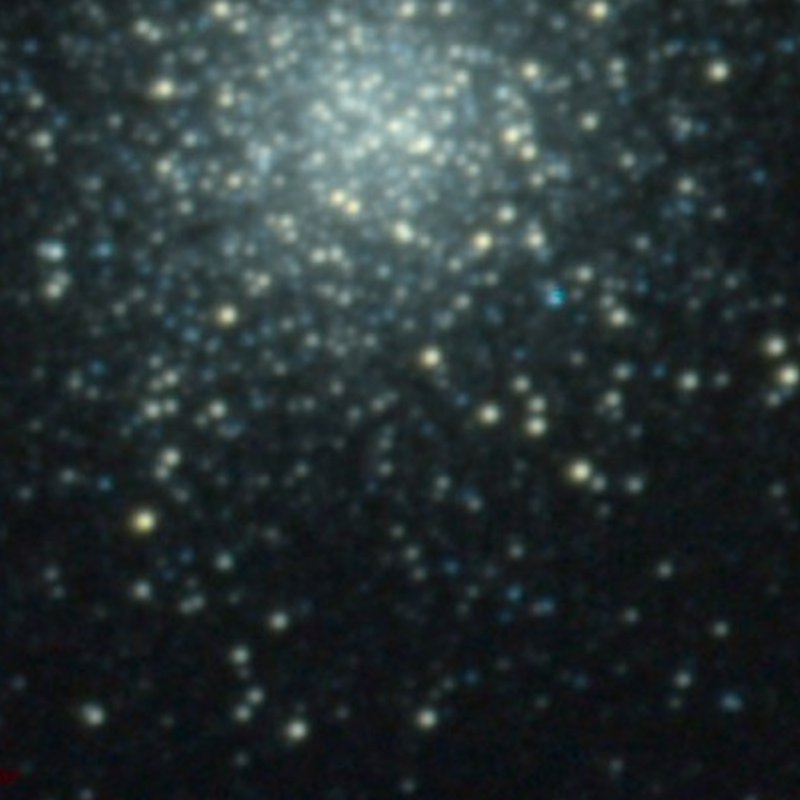
At first you maybe not see that big difference more than the stars are more circular. But when looking at stars that are close to each other and barely not separated above you find them much more separated in this Drizzled image. With the Drizzle technique I can have a big size sensor with not super small pixels and still when needed get half or third size of them with Drizzle technique. I started to think about this when I took my first digital image of the comet Hyakutake 1996. Now 24 years later I have got it to work all the way with 32-bit floating point precision, no rounding errors or clipping. With a 3x Drizzle my 1x20 (4x5) Mega pixel camera becomes a 3x 45 Mega pixel camera to zero cost. I had 90 images in the stack and I think it should not be less than that to get good result. My calibration technique is a bit special, replaced the bias and dark with constants and do that calibration in AstroImageJ. I save a lot of time and do not increase the random noise which the normal calibration images include. But of course with traditional bias and subtraction technique it all can be done direct in Deep Sky Stacker. My flats is replaced with a synthetic mathematic made flat image. It's difficult to take high quality flats, when I study them in detail I see patterns of rectangles that come by reflections of the camera house. What I miss is the pixel to pixel variations corrections. I handle that with Dithering when I take the photos, that is also a demand to get the Drizzle technique to work. When Dithering the telescope I use 10 to 20 pixels randomize move for each image. I didn't thought that my calibration could work with Drizzle because it sensitive to variations in levels. But looks good to me. Maybe there will be a big difference that day I take astrophotos with a dark sky. Software I use:You can read more about the software I use here:
I have tried the Astap software as a replacement for DSS, it's multi platform, but it crashes when I process my files, otherwise it looks very interesting. Big images to process needs a powerful computer, but not extreme. I have a Pentium I7 quad core with 16GB RAM, SSD and Windows10 64. Now I need a lot of practice how to use Gimp.
|
|