|
Advertisement / Annons: |
Tutorial:
|
Content: |
7: What happens in the stages when we calibrate?How do we use those calibrations images to calibrate our image and get it to be a perfect representation of the object? Here it describes how we use the different calibration images, those we made earlier and what happens in the different stages. To help to illustrate what happens when we calibrate our image I only use one line across the sensor, i.e. a cut across the image with the optic center in the middle. Real image of a white board, bias+dark+flat component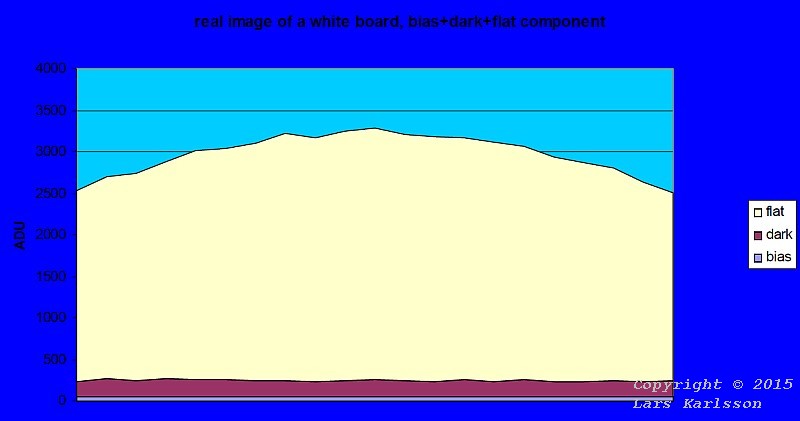
The picture above illustrate the picture we took in the beginning of a perfectly illuminated white board. All errors are there. The unwanted portions of dark and bias are marked in different colors as well as image brightness decreases towards the edges. Bias and dark subtracted from real image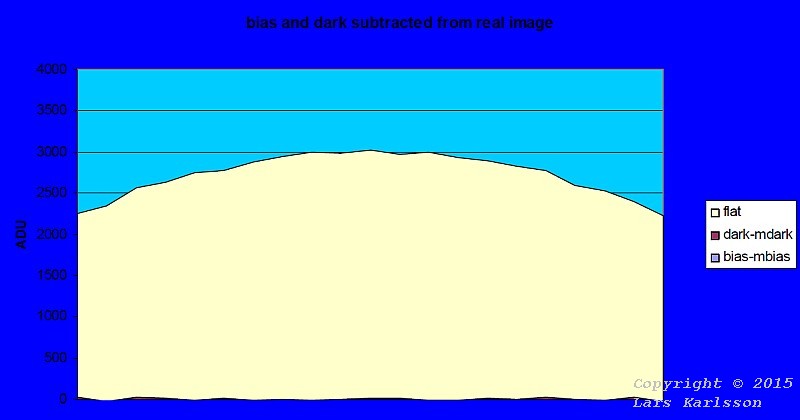
Here is our picture subtracted with a master dark frame and a master bias frame. Note that the bottom is uneven, this symbolizes a noise that we can not get away from. Note: Now our signal could contain negative values, our our image editing software must handle this! The noise is random and thus we can't subtract it away, it will not disappear, actually we added more random noise to it from our calibration images as was told earlier! image / master flat frame * constant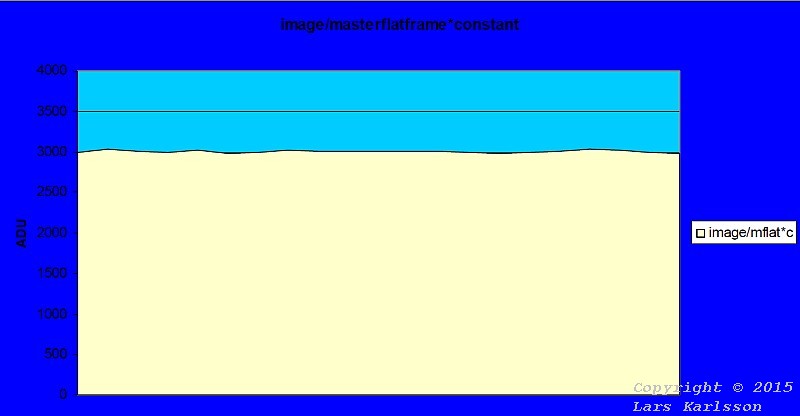
The last step is to divide our image with the master flat frame and multiply by a constant, in this case selected so that we normalize for the level of 3000, that was the signal we had at center in the beginning, but you can normalize it to whatever level as long your editing software can handle it. Note that a master flat frame has been subtracted with dark frames taken with a different exposure time than the dark frames was subtracted from the image before.
|
|