3: The ideal image
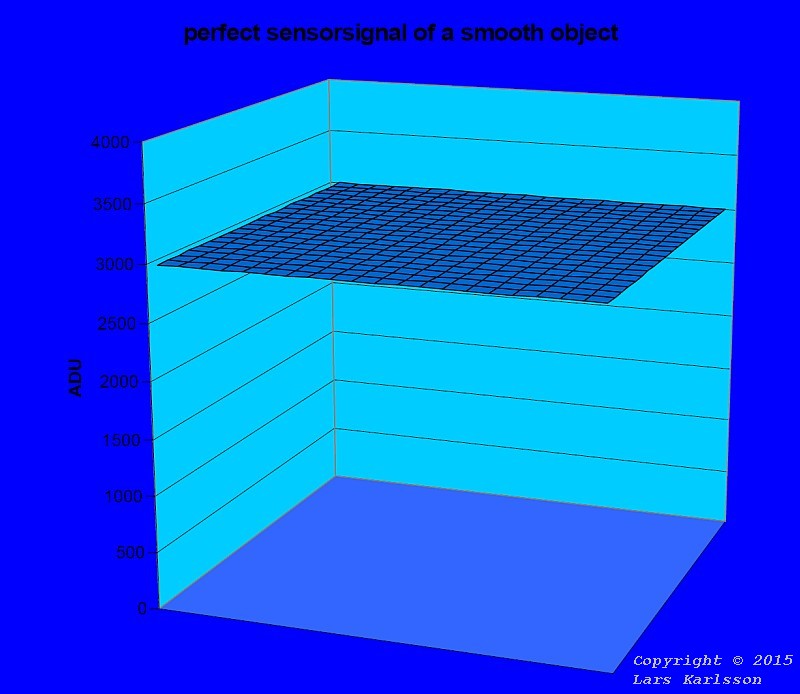
This image represents the signal strength from various sensors (pixels) from a perfect camera.
The grid is built up of columns and rows. In the case of the Canon 350D, 3456 columns and 2304 rows.
If the photographed object is a white board evenly illuminated, all pixels shall have the same signal strength, as shown.
The height from the ground is the signal strength.
Here exposed to 75% of total the dynamics are exploited, 3000 of 4096 ADU (Analog Digital Unit).
Now, unfortunately, not reality itself,
optics makes the light diminishes towards the the edges of the sensor, pixels do not have exactly the same sensitivity,
we get noise in the system and there are usually dirt (dust) on the sensor and optics.
A good camera has low noise, the noise from the light itself can we not do something about.
If we capture N photons this signal will have a noise of root of N (N = number of photons).
The level of the signal/noise=snr, (number detected photons = N) divided by square root of N. N / (root (N))=root(N),
that's the signal noise relation of the light itself.
One sees that the dynamic increases (signal/noise=snr) if we capture many photons.
How will typical signal (picture) taken on this white board look?
|