|
Advertisement / Annons: |
3D CAD drawing:
|
Contents:
Note: |
2, CAD draw a bracket for the front end of lens:Information:The front end of the lens is more complicated to make a bracket for. It must have some over hang to fit the dovetail. There are a lot of things to plan for: it must be in balance, it must be space for the heater band, it must be stable and strong enough, the pulley must line up with the focus motor, etc Pentax 645 300 mm bracket at front end: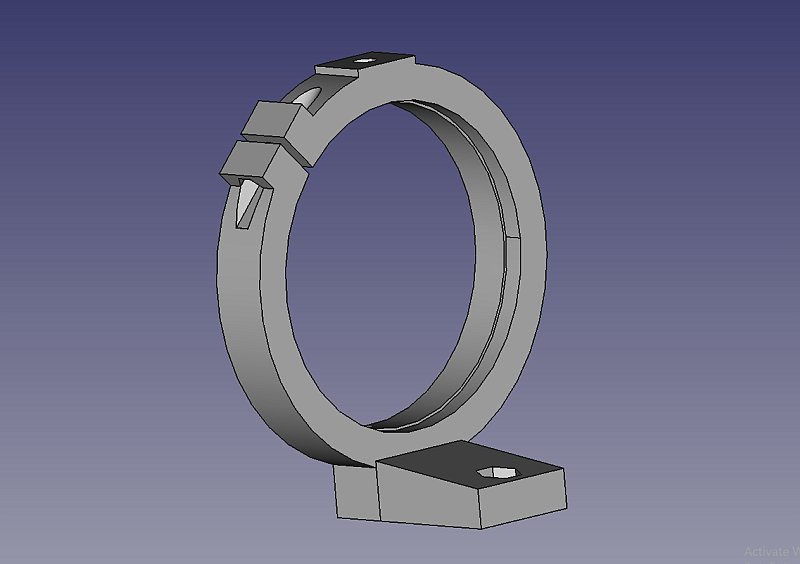
When I started with the design of the front tube ring I thought that it could be useful to have an extra platform on the top for some equipment. I moved the slit 45 degrees aside. At the front of the lens it must also be space for the dew heater band. I set the slicer to 2 mm walls, 50 % fill factor, no support. 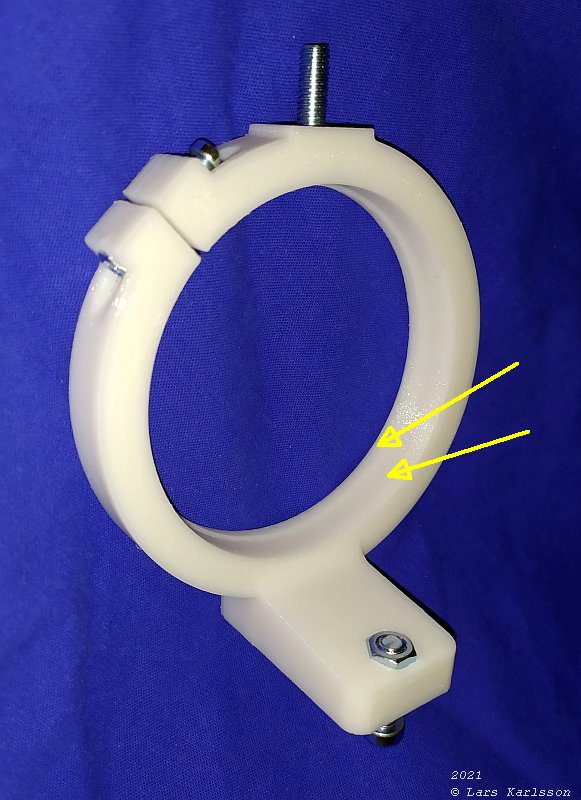
After it have been 3D-printed, I tested to press in the nuts and to my surprise everything sat at correct places and of correct size, not too common. To use all available space I let the inner hole be a two step size to let the ring go over the edge. The two barrels diameters are 80.5 mm and 82 mm. 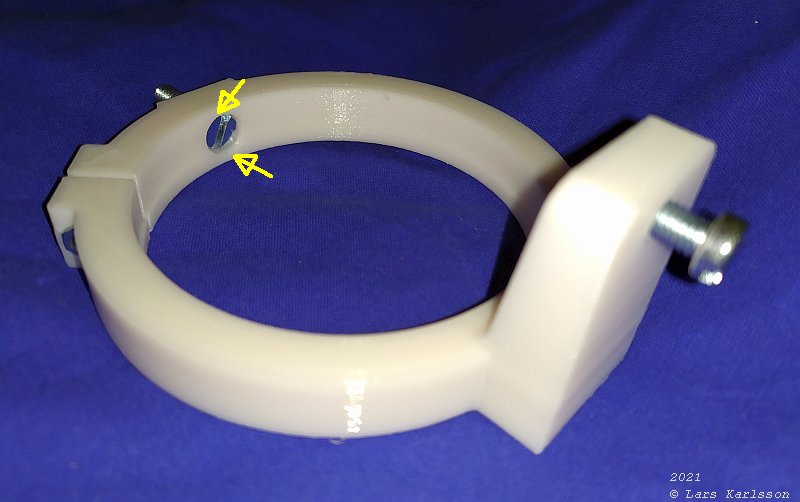
The top screw, now a M6, but will be replaced later with a 1/4" screw. Afterwards I see that I did a mistake to take up the big hole for the screw's head, it weakens the construction too much. 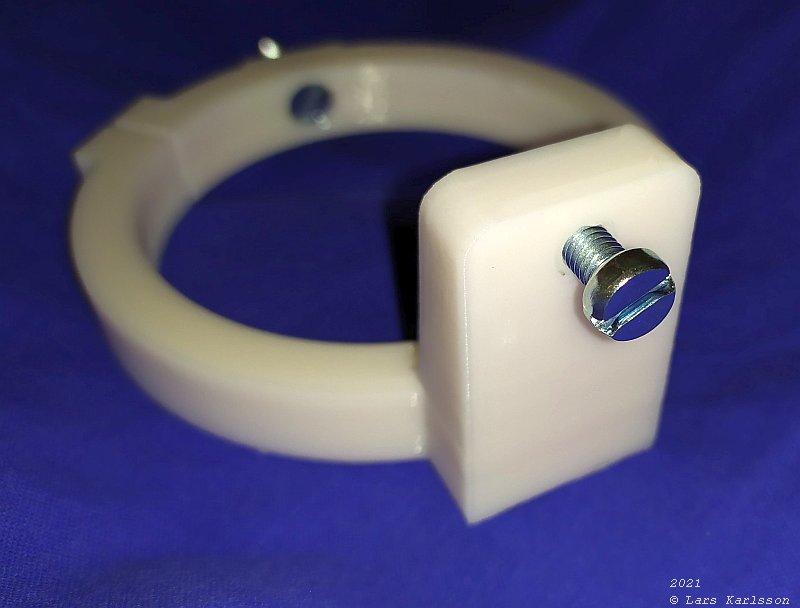
Bottom screw, a M6, this end connect to the dovetail. The screw is offset by 35 mm to fit the dovetail. 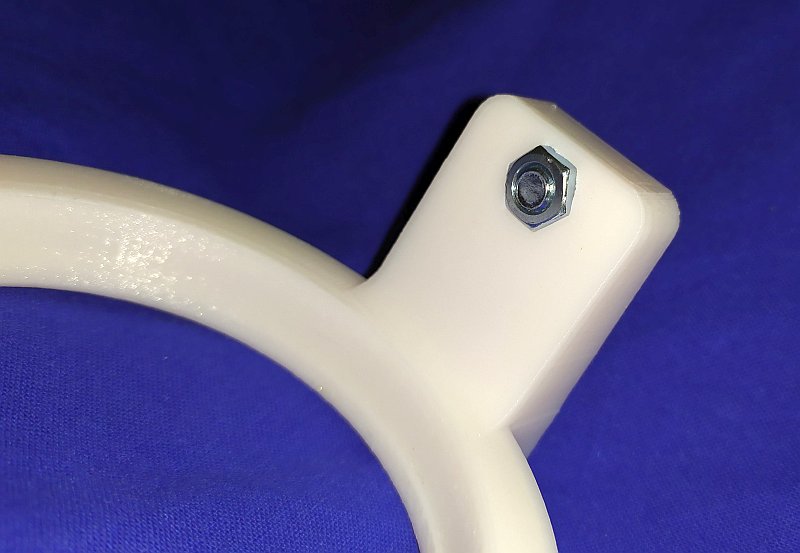
Even this screw has a nut pressed in, I always try to use this technique in my new designs. 
At front of the lens, space for the dew heater band. Up to 32 mm wide with direct contact with the aluminum barrel of the lens. 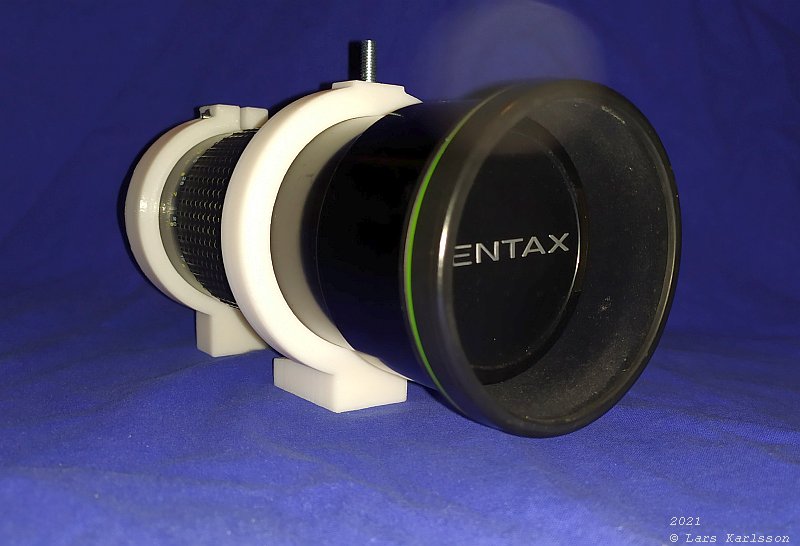
The lens is now it's very front heavy, later when the camera is attached it will be almost in balance. 
At the place where the scale focus ring is where the pulley will be placed. It will be a similar construction that I used to the Canon lens with 180 teeth. If I make a new back end ring I design it with the slit 45 degree aside as the front ring have. 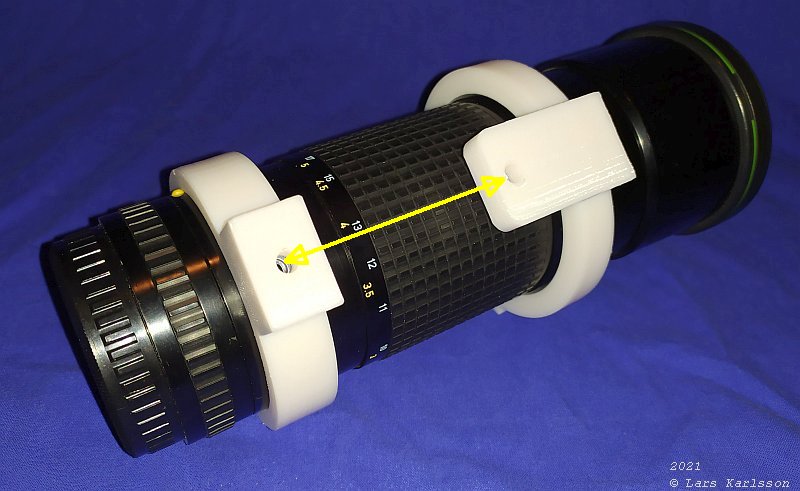
The distance between the holes are 70 mm, that is the distance between the holes at the dovetail. Now is only the 180 teeth pulley left to make. |
|
|