5: Master flat 3D analyze
Here i have taken an another flat image,
I reduced the aperture to f6.3 to reduce the vignetting and get a more even light.
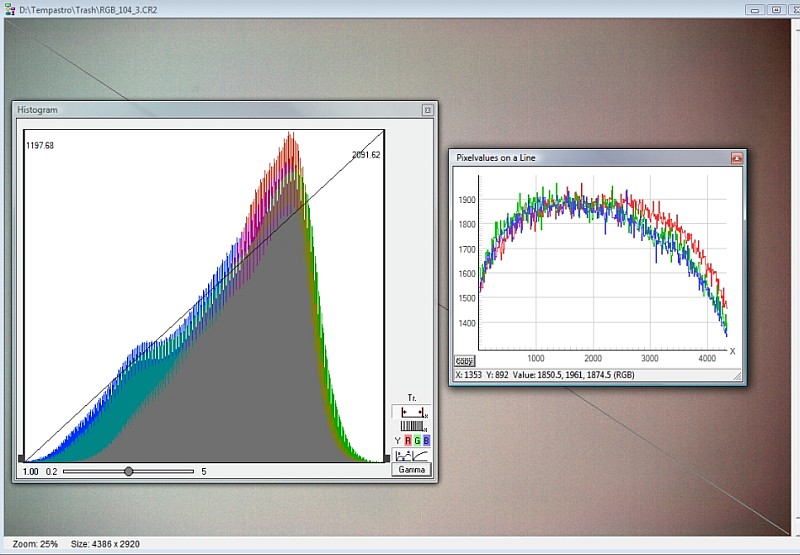
Compare with the earlier one in the beginning
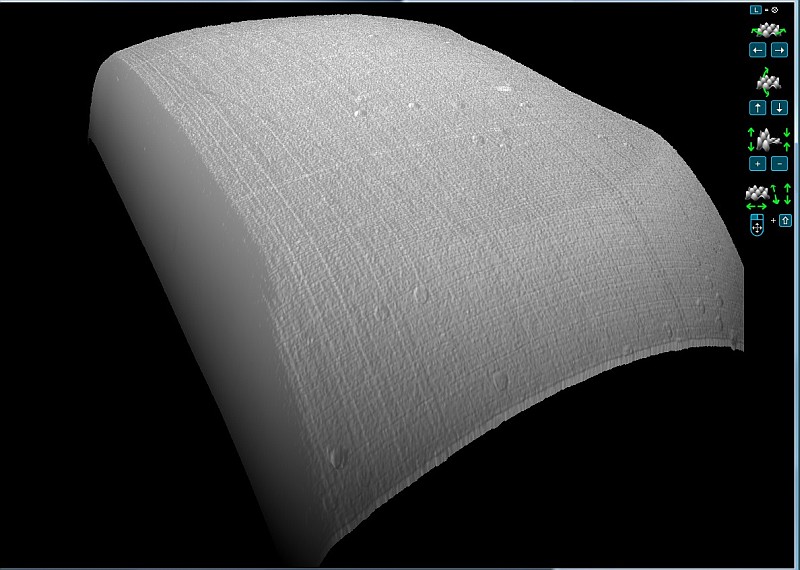
This is a 3D representation of a master-flat image, this and the other images done in Fitswork.
It is clearly visible stains and dust on the sensor and the abrupt cutting of the signal when the light cone approaching the edge of the sensor.
Mostly caused by the DSLR camera's narrow entrance to the sensor. The softer rounding come from flat field corrector limitations.
The deflection around the circular edge from M48 adapter which in this case is undersized.
How to get the sensor free from dust and dry patches seem to be a real science, I've never succeeded.
And when I manage to get it quite well,
it happens that during the flat image taken sometimes new dust falls down on the sensor that has been hidden in the camera body.
|