2: Pixel gain differences
When making a flat calibration is not just to eliminate vignetting.
Each pixel has a slightly different gain and it usually follow the columns.
Flat calibration normalizes also the gain on all the pixels, and the static patterns that can be seen in the light parts are reduced.
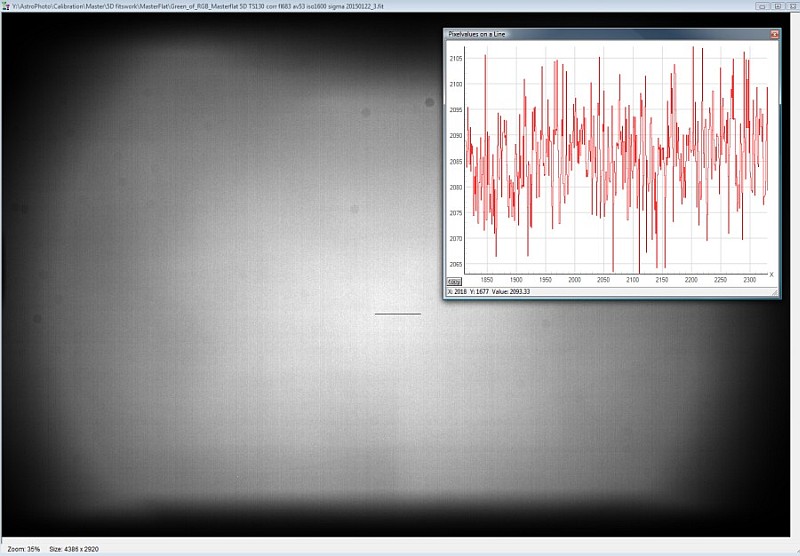
This is how a flat image in detail will look,
in addition to the large patches of vignetting there is a finer pattern pixel to pixel variation
as seen above and often follows the columns as you can clearly see here.
I made a horizontal line chart, a short composition, see horizontal line in the middle of.
Apparently, the signal fluctuates a lot pixel to pixel and that will be reduced a lot with flat image calibration.
In this case, the signal is 2085 +/- 20 ADU, about 1% may not sound like much,
but when process the image to bring out the little weak variations (nebula, galaxies) it also reinforce this pattern and it can get really ugly.
|